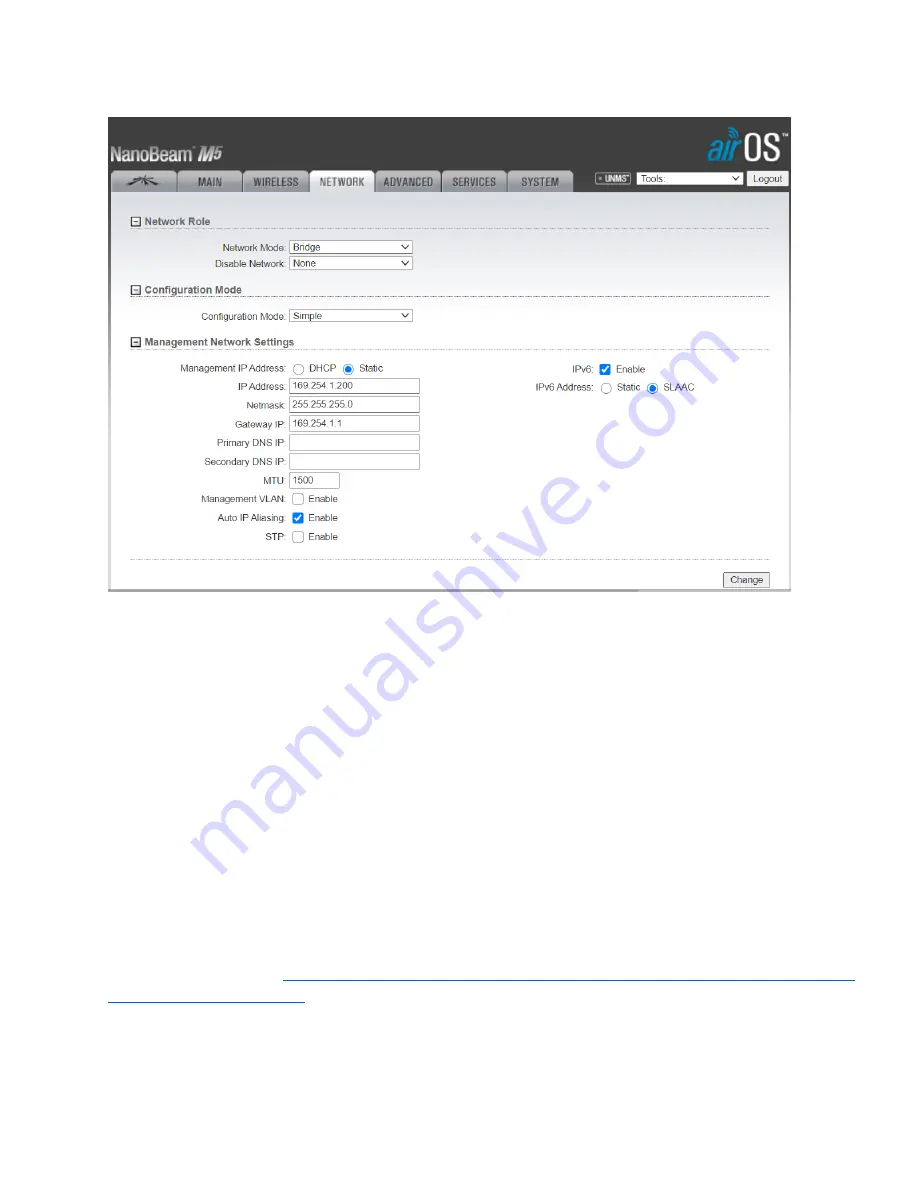
3
20.
Go to the
Network
tab and change IP address to
169.254.1.200
Change
Gateway IP
to
169.254.1.1
. Click on the
Change
button at the bottom of the screen and the
Apply
button at the top of the screen.
21.
Connect the scale house phone intercom to a POE switch. Connect the second bridge device to the POE injector
that came with it. Plug the LAN port of that POE injector into the POE Ethernet switch (can use a non-powered
port). Do NOT plug the bridge into the same POE as the phone since they are different voltages
. Point the two
bridge devices at each other so they can communicate.
22.
Log in to the second unit using the same address and password combination:
https://192.168.1.20. username
ubnt, password ubnt
23.
Click on the
Wireless Tab
and make sure
Wireless Mode
is set to
Station
.
24.
Also under the
Wireless
tab and
Wireless Security
, change
Security
to WPA-AES, WPA Authentication to PSK
,
and the
WPA Preshared Key
to
alphaadmin
. Click on Change button at the bottom of the screen and the
Apply
button at the top of the screen.
25.
Go to
Network
and change IP address to
169.254.1.201
. Change
Gateway IP
to 169.254.1.1
. Click on
Change
button at the bottom of the screen and the
Apply
button at the top of the screen.
26.
You will now need to reconfigure the Ethernet adapter on your computer with a static IP address on the
169.254.1.1
subnet, subnet mask:
255.255.255.0
if you want to log in to make any changes. The username is
ubnt and the password is alphaadmin. Changing the adapter will also allow you to connect to the intercom
equipment.
27.
The equipment should now be operational. For best performance, you should follow the antenna alignment
instructions located here:
https://help.ui.com/hc/en-us/articles/205222640-airMAX-How-to-Aim-a-NanoBeam-


