


UBI EasyCoder 201 IIE
UBI EasyPak 71 – Getting Started
10
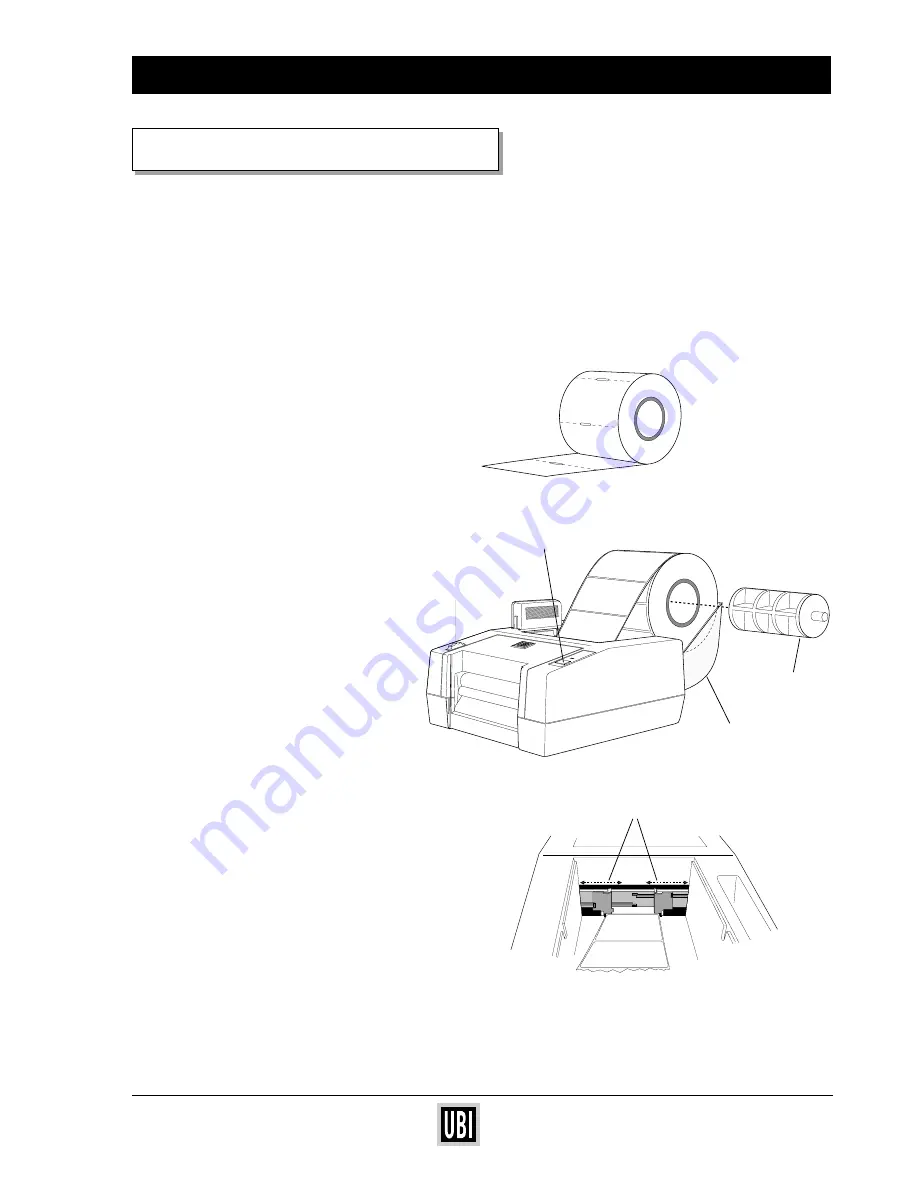
LABELS
Easy
Coder
71
Power
Feed
❏
Standard Model
1
Open the hinged cover.
2
Place the spindle into the core of the
paper roll.
3
Place the paper roll and spindle in the
hinged cover.
4
Pull the paper guides outwards as far
as they can go.
5
Place the front edge of the paper
between the paper guides and push it
forwards until you notice resistance.
6
Adjust the paper guides so they
become flush with the edges of the
paper without causing it to bend.
7
Press the "Feed" button to advance
the paper until its front edge is flush
with the front cover.
8
If the paper is off center, push the
print head release knob towards the
back of the printer and hold while
adjusting labels. Then release the
knob.
9
While keeping the paper straight,
rewind excess paper onto the roll and
place the roll in the cavity with the
spindle resting in the slots. Close the
hinged cover.
8
When the "Power" indicator lamp
lights green, your printer is ready to
print.
LOAD PAPER
The Standard Model printer lets you print and feed out
labels or tickets .
The Self-strip Model lets you also separate (dis-
pense) self adhesive labels from the backing paper.
Paper guides
TAGS
Release
knob
Feed button
Spindle
Cover
Note the difference!
❏
Tags should be
wound with thermal
layer facing inwards
and unroll from the
bottom of the roll.
❏
Labels should be
wound with labels
facing outwards and
unroll from the top of
the roll.