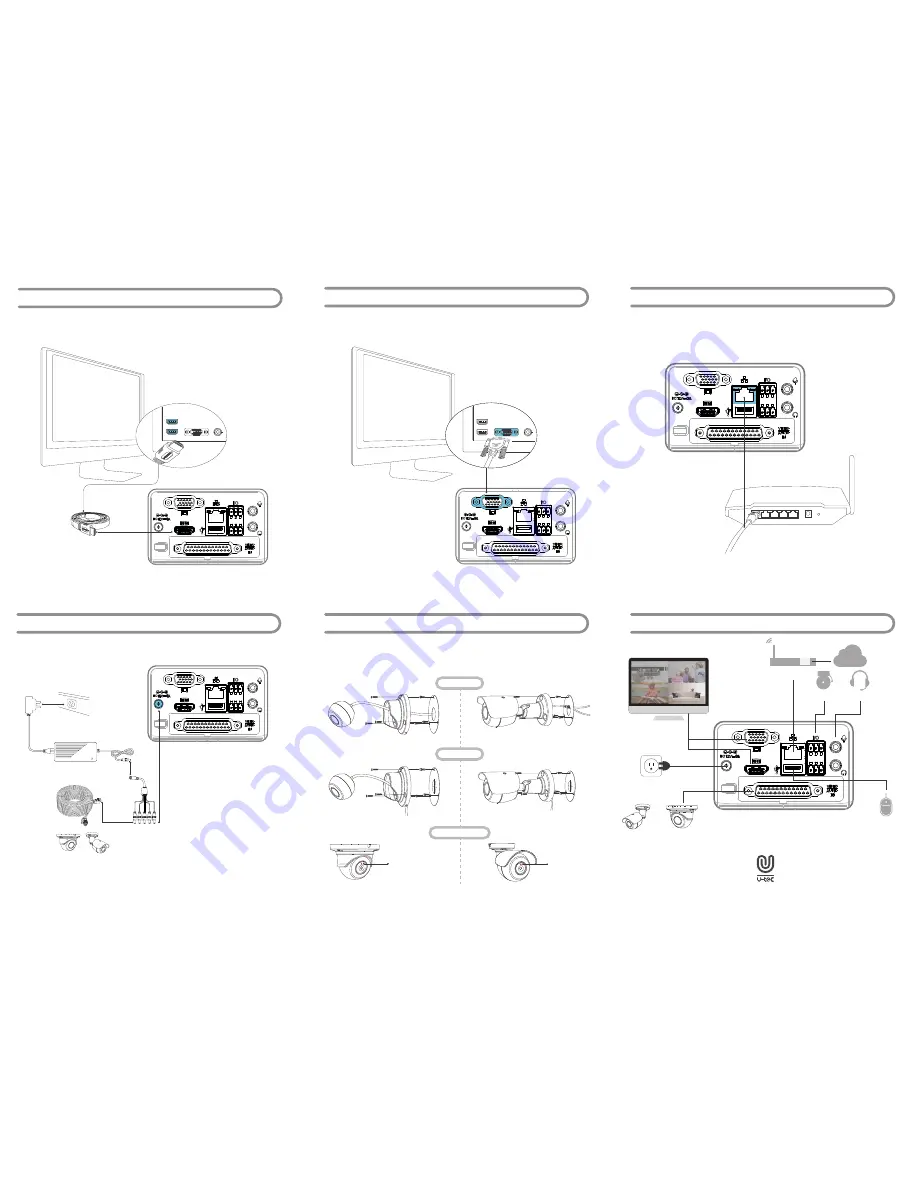
If you have a monitor with a VGA connection, connect a VGA cable(not supplied) to the VGA
output on the H2-D4, and connect the other end to the VGA input on the Monitor. You can skip
this step if you are using the supplied HDMI cable.
Connect the HDMI cable(supplied) to the HDMI input on the H2-D4, and connect the other end to
a spare HDMI input on the TV. Make sure your HDTV input matches the physical connection used
to connect your H2-D4.
T
ake 4*A1/B1+1*H2-D4 for example
*Not included
Power
Analog Cameras
VGA
HDMI
*Monitor
*Bell
*Audio device
*Router
WAN
X4
or
Mouse
Plug the power splitter to the power adapter and power cable. The other ends plug to the H2-D4
and cameras.
All connections have now been completed. You’re now ready to run through “The Setup Wizard” to
configure your H2-D4.
Connect the Ethernet cable(supplied) to the LAN connection on the H2-D4, and then connect the
other end to a spare port on your router or wireless access point. This steps help you to see the
videos on your phone. You can skip this step if mobile monitoring is not required.
There are two linear ways to install the cameras on the ceiling or wall.
C
onnect the H2-D4 to your HDTV
C
onnect the H2-D4 to your Monitor (Optional)
C
onnect to your home Network (Optional)
I
nstall the Cameras on the Ceiling or Wall
C
onnect the Power Adapters
8
9
12
11
10
7
U-tec and CamGuardian brands and products are trademarked and protected
under law in the United States. Unauthorized use is prohibited.
CamGuardian is sub-brand of U-tec Group Inc.
Internet
A1
B1
Wiring Inside
Wiring Outside
Adjust Camera Angle
Please put the red
triangle on the top for
an upright image.
Please put the red
triangle on the top for
an upright image.


