USER GUIDE & SERVICE MANUAL
Outdoor Collection
●
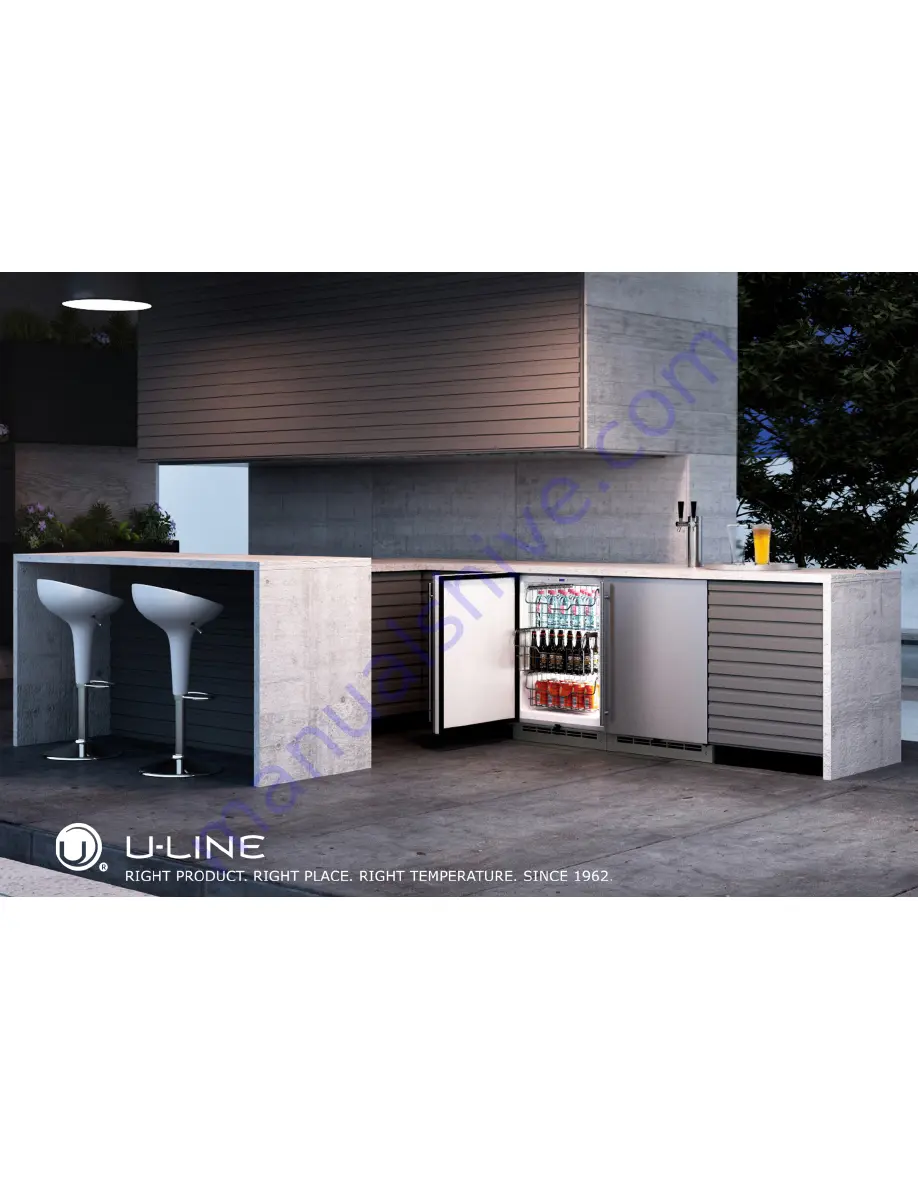
UORE124
24” Solid Door Refrigerator
Страница 1: ...USER GUIDE SERVICE MANUAL Outdoor Collection UORE124 24 Solid Door Refrigerator...
Страница 2: ...ation Environmental Requirements Electrical Cutout Product Dimensions Side by Side Installation Anti Tip Bracket General Installation Grille Installation Door Swing Door Adjust Free Standing Kit Opera...
Страница 3: ...over two decades and is proud to have the opportunity to ship to you PRODUCT INFORMATION Looking for additional information on your product User Guides Spec Sheets CAD Drawings Compliance Documentatio...
Страница 4: ...th CAUTION Caution means that failure to follow this safety statement may result in minor or moderate personal injury property or equipment damage DANGER This unit contains R600a Isobutane which is a...
Страница 5: ...n place so children may not easily climb inside If the unit is being removed from service for disposal check and obey all federal state and local regulations regarding the disposal and recycling of re...
Страница 6: ...or reduce ice production on applicable models For best performance keep the unit out of direct sunlight and away from heat generating equipment In climates where high humidity and dew points are prese...
Страница 7: ...he unit Always keep your working area dry NOTICE Electrical installation must observe all state and local codes This unit requires connection to a grounded three prong polarized receptacle that has be...
Страница 8: ...CAUTION Unit can NOT be installed behind a closed cabinet door CUTOUT DIMENSIONS 24 cutout width sufficient if door protrudes beyond adjacent cabinetry PRODUCT DIMENSIONS REAR 4 102 mm 7 178 mm 24 61...
Страница 9: ...ed according to each unit s electrical specifications requirements Side by Side Installation with Bracket 1 Slide both units out so screws on top of units are easily accessible 2 Remove screws as show...
Страница 10: ...over holes and attach to unit with two screws removed in step 2 using a T 25 Torx driver Tighten screws fully 4 Gently push unit into position Be careful not to entangle the electrical cord or water l...
Страница 11: ...s than the opening s rear height Shorten the unit height in the front by adjusting the front legs This allows the unit to be gently tipped into the opening Readjust the front legs to level the unit af...
Страница 12: ...ING DO NOT touch the condenser fins The condenser fins are SHARP and can be easily damaged Removing the grille 1 Disconnect power to the unit 2 Loosen the two screws 1 3 Remove grille 2 from unit Inst...
Страница 13: ...ng Units have a zero clearance for the door to open 90 when installed adjacent to cabinets Stainless Steel models require 2 1 8 54 mm door clearance to accommodate the handle if installed next to a wa...
Страница 14: ...door To align and adjust the door 1 Gently pry off hinge cover from top of unit 2 Loosen do not remove top and bottom hinge screws using a Torx T 25 screwdriver 3 Align door squarely with cabinet 4 Ma...
Страница 15: ...odel Replace nuts if used Prepare door for reinstallation 1 Remove gasket This will reveal mounting holes for the magnet assembly 2 Remove magnet assembly from door with T 10 TORX driver Be sure to on...
Страница 16: ...lt into a cabinet To install the kit 1 Remove grille see GRILLE INSTALLATION section 2 Place shell accessory over front and back of cabinet base aligning holes of shell accessory with the holes on the...
Страница 17: ...for more details NOTICE Temperature displayed reflects actual temperature inside unit If the temperature displayed is different than selected the unit is progressing towards the selected temperature...
Страница 18: ...layed is the actual temperature inside unit Toggle between o F o C Hold and for 5 seconds The display will change units Enable Sabbath Mode Press and hold for 5 seconds and release The o F o C symbol...
Страница 19: ...ies U Line uses the following sizes Combinations of red and white bottles are used in Wine Captain Models and Beverage Centers NOTICE Restricting airflow may result in poor product performance product...
Страница 20: ...e shelves as follows 1 To move to a different position in the unit insert shelf at an angle approximately 15 20 over the rib in the side of the unit where you want to place the shelf Place the shelf i...
Страница 21: ...ess steel to become blurred Rust not cleaned up promptly can penetrate the surface of the stainless steel and complete removal of the rust may not be possible Integrated Models To clean integrated pan...
Страница 22: ...sensitive flooring the unit must be removed from cabinetry To defrost 1 Disconnect power to the unit 2 Remove all products from the interior 3 Prop the door in an open position 2 in 50 mm minimum 4 A...
Страница 23: ...n environmental conditions more or less frequent cleaning may be necessary WARNING Disconnect electric power to the unit before cleaning the condenser NOTICE DO NOT use any type of cleaner on the cond...
Страница 24: ...n the evaporator allow ice to thaw naturally 4 Clean and dry the interior of the unit Ensure all water has been removed from the unit 5 The door must remain open to prevent formation of mold and milde...
Страница 25: ...will not be responsible for any consequential or incidental damages arising from the breach of these warranties or any other warranty whether express implied or statutory Some states do not allow the...