PAGE 2 OF 2
0414 IH-1019
π
CHICAGO • ATLANTA • DALLAS • LOS ANGELES • MINNEAPOLIS • NYC/PHILA • SEATTLE • MEXICO • CANADA
1-800-295-5510
uline.com
4. If using S-8118, S-8119, S-14824 or S-14825 refill
cartridges, move spray setting to "3000." (See Figure 4)
5. Press and hold the RESET button until "DAYS TO REFILL"
counts down to zero and "U3" is displayed. The screen
will now read "30 DAYS TO REFILL." (See Figure 4)
a. If changing spray setting to "9000," follow step 5
and "U9" will be displayed. The screen will now
read "90 DAYS TO REFILL."
6. If desired, turn beeping tone on or off by using the
TONE button. (See Figure 4)
7. The MODE button can be used to:
• Set spray frequency.
• Change current time.
• Choose between 12- or 24-hour operation.
• Set 12-hour operation start time.
• Set current day of the week.
• Select days of week for dispenser to power down (2
days maximum).
a. To set spray frequency, press MODE until LO, ME
or HI is displayed and then use ADJUST button
to select between LO, ME and HI. When desired
spray frequency is shown, press ENTER until the
home screen is displayed. (See Figure 4)
b. To set current time, press MODE until the time
screen is shown, and use ADJUST to set current
time. When finished, press ENTER until home
screen is displayed. (See Figure 4)
c. To select between 12- or 24-hour operation, press
MODE until 12 or 24 is displayed, and use ADJUST
to change between the two. Press ENTER until
home screen is displayed. (See Figure 4)
d. To select days on/off for dispenser, push MODE
until second day screen appears, and ON or
OFF will flash at bottom of the screen. Use ADJUST
to set shown day to ON or OFF, and press ENTER
to move to next day. After scrolling through days
of the week, the screen will return to the home
screen. (See Figure 4)
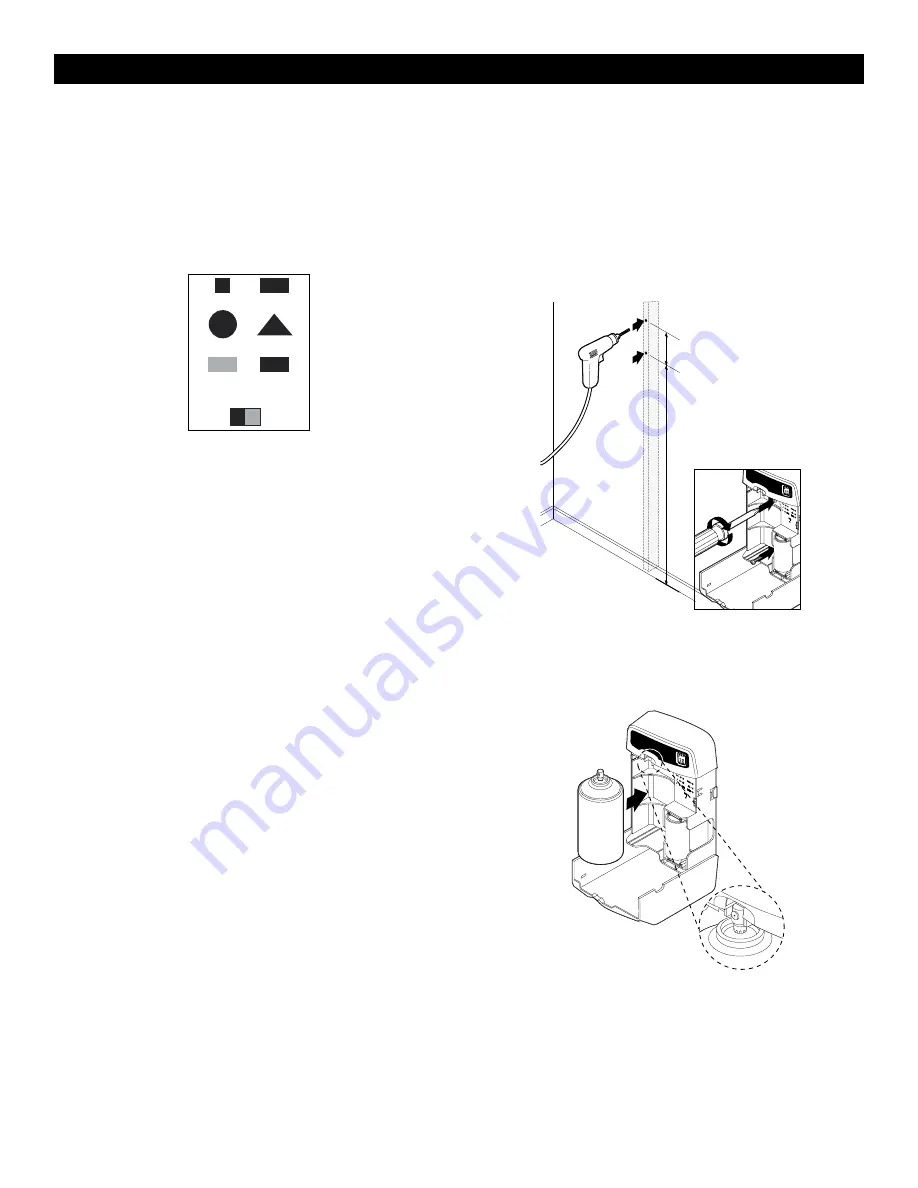
8. Recommended mounting height is 7' from the floor
to the bottom screw hole in dispenser. When desired
mounting height is set, top screw hole should be
exactly 4.5" from bottom screw hole. (See Figure 5)
9. To mount, drill holes into wall at marked locations.
Hold the dispenser to wall and insert top screw first,
followed by bottom screw. (See Figure 5)
10. Press ON/OFF button to turn dispenser off.
11. Insert refill can with spray nozzle facing out of
dispenser and away from wall. (See Figure 6)
12. Press ON/OFF button to turn dispenser on and press
RESET to begin dispensing cycle.
13. Close dispenser cover.
assembly continued
ENTER
3000
9000
RESET
MODE
TONE
ADJUS
T
ON/OF
F
G
A
B
C
D
E
F
ENTER
3000
9000
RESET
MODE
TONE
ADJUS
T
ON/OF
F
G
A
B
C
D
E
F
TONE
MODE
ON/OFF ADJUST
RESET ENTER
3000
9000
Figure 4
Figure 5
Figure 6
4.5"
7'0"


