background image

USER GUIDE

Free Standing Kit 1

u-line.com

SAFETY •

INSTALLATION & INTEGRATION

 • OPERATING INSTRUCTIONS • MAINTENANCE • SERVICE
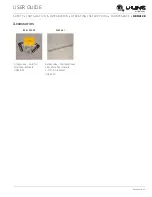
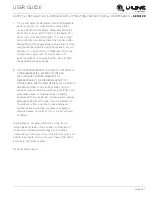
Free Standing Kit

The free standing kit is an optional accessory. It is only 
used when unit is not installed in surrounding cabinetry.

To install the kit:

1. Remove grille (see GRILLE-PLINTH INSTALLATION 

section).

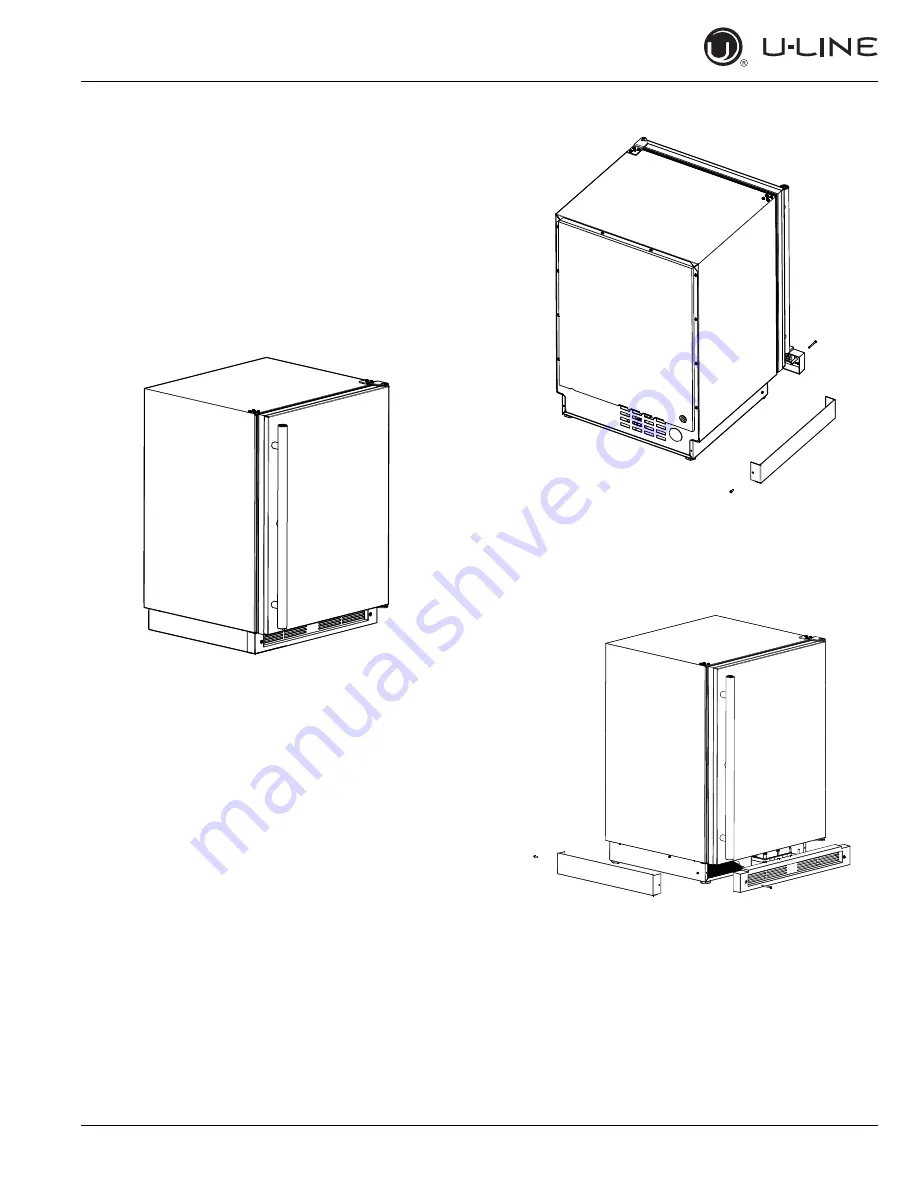
2. Place shell accessory over front and back of cabinet 

base, aligning holes of shell accessory with the holes 
on the base. Insert sheet metal screw in back of base. 

3. Align front hole with hole in shell accessory, hole in 

base, and hole in grille. Tighten screw.

Содержание 1000 SERIES

Страница 1: ...USER GUIDE SAFETY INSTALLATION INTEGRATION OPERATING INSTRUCTIONS MAINTENANCE SERVICE 1000 Series 1224RF 24 Refrigerator Freezer RIGHT PRODUCT RIGHT PLACE RIGHT TEMPERATURE SINCE 1962...

Страница 2: ...cal Cutout Dimensions Product Dimensions Side by Side Installation Anti Tip Bracket General Installation Grille Plinth Installation Door Swing Door Stop Door Adjust Free Standing Kit Operating Instruc...

Страница 3: ...ship to you PRODUCT INFORMATION Looking for additional information on your product User Guides Quick Reference Guides CAD Drawings Compliance Documentation and Product Warranty information are all ava...

Страница 4: ...sted throughout this guide SAFETY ALERT DEFINITIONS Throughout this guide are safety items labeled with a Danger Warning or Caution based on the risk type DANGER Danger means that failure to follow th...

Страница 5: ...freezer take off the doors and leave shelves in place so children may not easily climb inside If the unit is being removed from service for disposal check and obey all federal state and local regulati...

Страница 6: ...C or higher may reduce the unit s ability to reach low temperatures For best performance keep the unit out of direct sunlight and away from heat generating equipment In climates where high humidity a...

Страница 7: ...use an extension cord to connect power to the unit Always keep your working area dry NOTICE Electrical installation must observe all state and local codes This unit requires connection to a grounded...

Страница 8: ...he rear CAUTION Unit can NOT be installed behind a closed cabinet door Never remove the round grounding prong from the plug and never use a two prong grounding adapter Never use an extension cord to c...

Страница 9: ...duct Dimensions 1 u line com SAFETY INSTALLATION INTEGRATION OPERATING INSTRUCTIONS MAINTENANCE SERVICE Product Dimensions 34 1 8 to 35 1 8 867 mm to 892 mm 24 610 mm 3 9 16 91 mm Not Including Handle...

Страница 10: ...rly grounded electrical receptacles placed according to each unit s electrical specifications requirements Side by Side Installation with Bracket 1 Slide both units out so screws on top of units are e...

Страница 11: ...5 models only have three screws but same screws are used in both applications 3 Place bracket part 14154 over holes and attach to unit with two screws removed in step 2 using a T 25 Torx driver Tighte...

Страница 12: ...adjust the rear legs to achieve a total unit rear height of 1 8 3 mm less than the opening s rear height Shorten the unit height in the front by adjusting the front legs This allows the unit to be ge...

Страница 13: ...nect electric power to the unit before removing the grille WARNING DO NOT touch the condenser fins The condenser fins are SHARP and can be easily damaged Removing the grille 1 Disconnect power to the...

Страница 14: ...ed adjacent to cabinets Stainless Steel and black and white models require 2 1 8 54 mm door clearance to accommodate the handle if installed next to a wall Integrated models require 1 4 6 mm clearance...

Страница 15: ...ing conditions It is not designed for excessive force Do not use the door to move the unit in out of the cutout during installation If your unit is already undercounter it might need to be moved out f...

Страница 16: ...asket is not pinched on the hinge side of the door To align and adjust the door 1 Remove grille see GRILLE PLINTH INSTALLATION 2 Loosen do not remove top and bottom hinge screws 3 Align door squarely...

Страница 17: ...o holes where the hinge was removed Take care not to scratch cabinet 5 Remove it from the cabinet Repeat for cabinet base Prepare door for reinstallation 1 Rotate door 180 to reverse 2 Align the flat...

Страница 18: ...ly used when unit is not installed in surrounding cabinetry To install the kit 1 Remove grille see GRILLE PLINTH INSTALLATION section 2 Place shell accessory over front and back of cabinet base aligni...

Страница 19: ...at the factory Initial startup requires no adjustments NOTICE U Line recommends allowing the unit to run overnight before loading with product When plugged in the unit will begin operating under the f...

Страница 20: ...turn ON or OFF Toggle lights Press and release to leave interior light on for 3 hours Glass door wine and beverage centers only Adjust refrigerator set point Press and release When the F or C in the...

Страница 21: ...ntain internal temperatures and set points View a full list of Star K certified U Line units at www star k org To enable Sabbath Mode 1 Press 4 and hold for ten seconds and release the F C symbol will...

Страница 22: ...o perform at its highest efficiency Do not block the front grille or the unit will not perform as expected Do not install the unit behind a door When loading your unit leave space between the evaporat...

Страница 23: ...t by pulling out 3 Insert the shelves as follows 1 To move to a different position in the unit insert shelf at an angle approximately 15 20 over the rib in the side of the unit where you want to place...

Страница 24: ...ainless surfaces this includes glass tile and counter cleaners If any surface discoloring or rusting appears clean it quickly with Bon Ami or Barkeepers Friend Cleanser and a nonabrasive cloth Always...

Страница 25: ...sonal injury and damage to the inner lining NOTICE The drain pan was not designed to capture the water created when manually defrosting To prevent water from overflowing the drain pan place towels or...

Страница 26: ...ntal conditions more or less frequent cleaning may be necessary WARNING Disconnect electric power to the unit before cleaning the condenser WARNING DO NOT touch the condenser fins The condenser fins a...

Страница 27: ...ent from the unit 2 Disconnect the power cord from its outlet and leave it disconnected until the unit is returned to service 3 If ice is on the evaporator allow ice to thaw naturally CAUTION DO NOT u...

Страница 28: ...m SAFETY INSTALLATION INTEGRATION OPERATING INSTRUCTIONS MAINTENANCE SERVICE Accessories 80 51004 00 Accessories Anti Tip Mounting Brackets US 18 99 23054 01 Accessories Stainless Steel PRO Style Door...

Страница 29: ...ll the components listed Compressor The compressor makes a hum or pulsing sound that may be heard when it operates Evaporator Refrigerant flowing through an evaporator may sound like boiling liquid Co...

Страница 30: ...me the door is open The time the internal light is illuminated This mainly affects product on the top rack or shelf Obstruction of front grille or condenser Digital Display Shows 1 16 or 99 A factory...

Страница 31: ...ervice com 3 The warranty listed above does not apply to floor display models The warranty for these models shall be 30 days from the date of retail purchase and only if U Line s Product Registration...

Страница 32: ...IS IN LIEU OF ANY AND ALL OTHER WARRANTIES EXPRESS OR IMPLIED INCLUDING ANY IMPLIED WARRANTY OF MERCHANTABILITY OR IMPLIED WARRANTY OF FITNESS FOR A PARTICULAR PURPOSE ALL OF WHICH ARE DISCLAIMED U Li...

Отзывы: