XPLR-M9 - User guide
2 Getting started
2.1 XPLR-M9 evaluation with u-start (default)
You can explore u-blox M9 performance with u-start evaluation tool in four simple steps:
1.
Connect the XPLR-M9 kit to a PC with a USB cable. The USB driver will be automatically
installed when connecting the kit to the PC for the first time (requires internet connection).
A removable flash device called XPLR-M9 will be visible in the PC after automatic driver
installation.
2.
Run u-start installer located in the XPLR-M9 device folder (administration rights for the PC
are needed to install the u-start).
3.
Connect to active GNSS antenna or connect to simulator.
4.
Start u-start evaluation tool.
When u-start is launched, the XPLR-M9 performs a cold start if was already in use with
another evaluation tool, i.e., u-center to make sure that the receiver is in a known state and
all the changes that have been made to it previously are discarded.
2.1.1 u-start supported features
After a successful installation, u-start is available in the Start menu. Select u-start evaluation tool
to open the user interface.
u-start v.19.08.02 supports the features below:
•
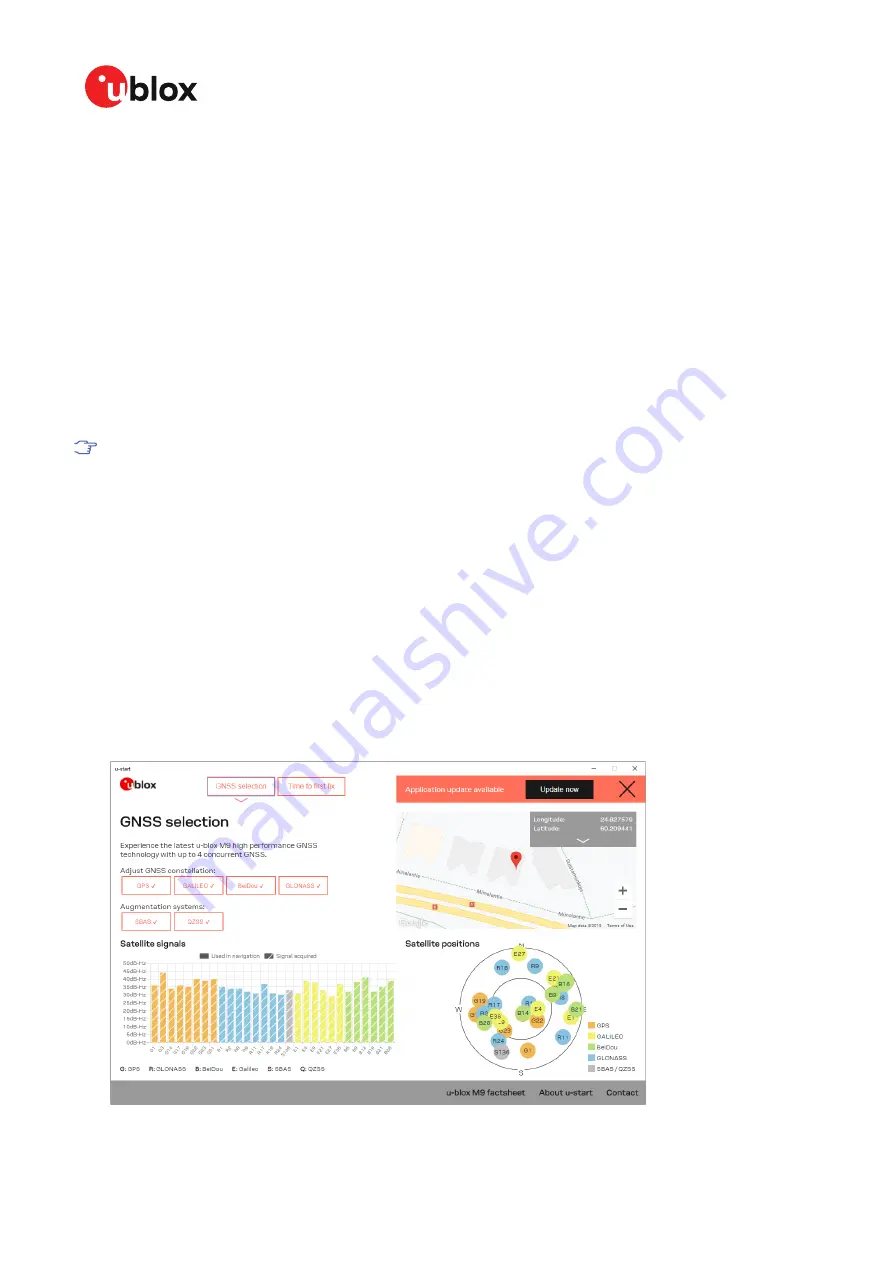
GNSS selection tab
• You can choose between 4 concurrent GNSS constellations and see the amount of satellites
visible in sky view.
• SBAS and QZSS Augmentation systems enabled, you can select either or use both of them.
• You can see your own position on Google map view.
• Satellite signal view is enabled.
• Prompts the user for the software update if newer version of the application is found.
Figure 2: GNSS selection view
UBX-19041842 - R03
2 Getting started
Page 5 of 14
C1-Public


