Tyco American Dynamics VideoEdge IP Box Camera Скачать руководство пользователя страница 85

Installation and Operation Guide


85 

APPENDIX 3. –Register as a DDNS member 

The DDNS

dynamic domain name system

 is a function which is provided by an American 

company. Please refer to www.dyndns.com. This chapter provides the user with the basic 

instructions on how to register a free DDNS service.  


Registering for a DDNS 

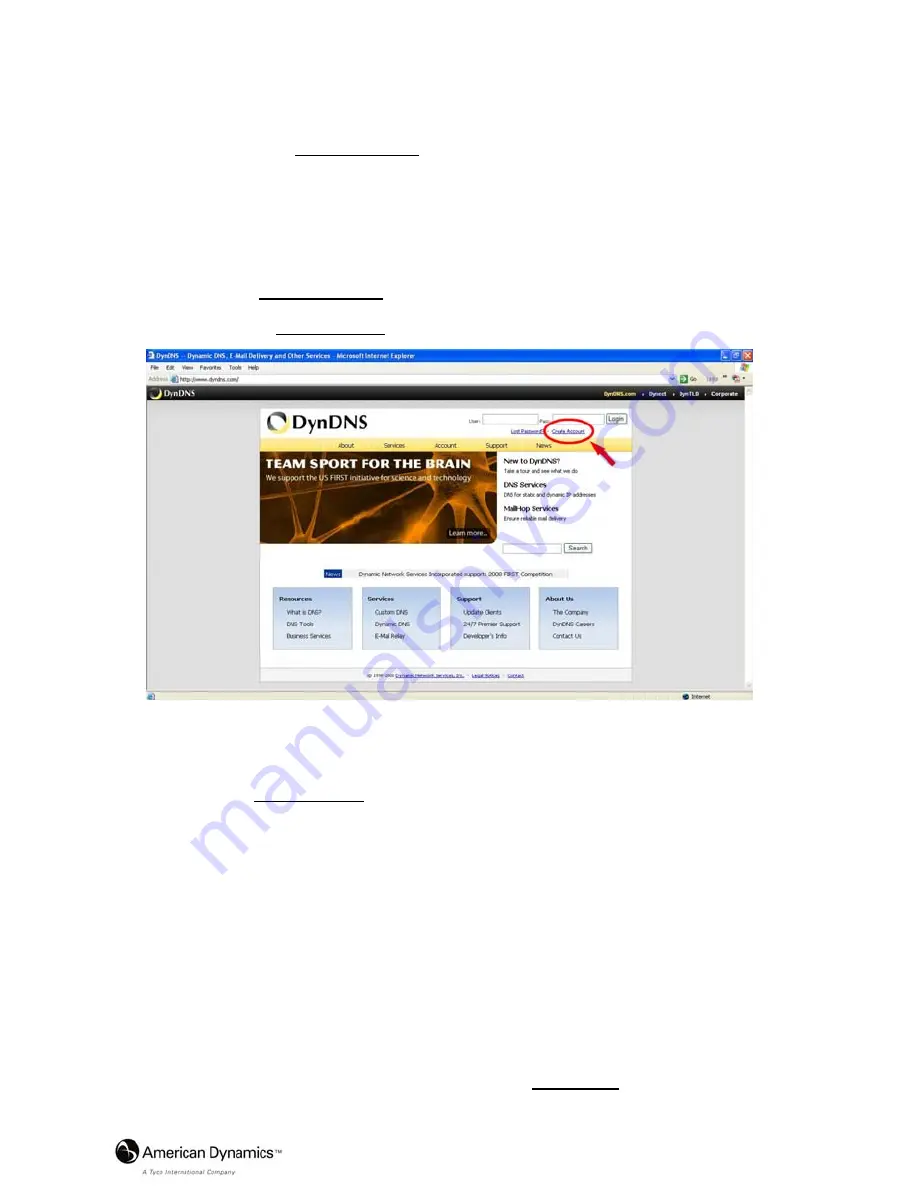
Enter the URL www.dyndns.com. In the upper right-hand corner of the main page, where 

there is an item, ”Create Account”, as shown in Figure 1. 


Figure 1 

Create an account 

After clicking ”Create Account”, you will enter the Create Account page. Please complete 

the form at the bottom of the page to create your account. You will receive an e-mail 

containing instructions to activate your account. If you do not follow the directions within 48 

hours, you will need to recreate your account. 


Set up the DDNS 

After creating the account successfully, please enter your user name and password in the 

upper right-hand corner of the main page to login, as shown in Figure 2. 

After you login successfully, a text will appear saying “My Services”, as shown in Figure 3. 

Содержание American Dynamics VideoEdge IP Box Camera

Страница 1: ...Part Number 8200 2646 00 B0 VideoEdge IP Box Camera Installation Operation Guide Version1 5...

Страница 2: ......

Страница 3: ...reproduced translated or reduced to any electronic medium or machine readable form in whole or in part without prior written consent of Tyco International Ltd Copyright 2009 and its Respective Compan...

Страница 4: ...KET MOUNT INSTALLATION 15 3 INSTALLATION 16 3 1 CONNECTING WITH AN NVR 16 3 2 CONNECTING WITH A DVR 16 3 3 CONNECTING WITH A MULTIPLEXER 17 3 4 UPDATING SYSTEM SOFTWARE 17 3 5 IP CAMERA SD CARD TROUBL...

Страница 5: ...36 5 1 4 Change the System Setting 47 5 1 5 Change the Application Setting 55 5 1 6 Change the SD card Setting 63 5 1 7 Change the Pan Tilt setting 64 5 1 8 PPPoE DDNS 65 5 1 9 The Bandwidth Calculato...

Страница 6: ...r fall into it Do not attempt to service this unit yourself as opening or removing covers may expose you to dangerous voltage or other hazards Please refer all servicing to your distributor retailer D...

Страница 7: ...from one to the other as you wish The MPEG4 file format is a very small size file so it can save more images over a longer time and can be set extremely fast The device also has a built in website ser...

Страница 8: ...ght function 1 3 Technical Specifications General Built in Web Server and network interface You don t need a PC to operate Installation Fast and simple installation connect to your network and assign...

Страница 9: ...e 9 KByte 720 576 Frame 58 KByte 43 KByte 32 KByte 27 KByte 23 KByte 720 288 40 KByte 30 KByte 20 KByte 17 KByte 14 KByte 720 576 Field 58 KByte 48 KByte 32 KByte 24 KByte 20 KByte 176 112 8 KByte 7 K...

Страница 10: ...n Guide Dimensions Weight Dimensions and weight are as follows Height 55 mm Width 95 mm Length 62 mm Weight 306 g Not including power supply and mini tripod Accessories Included CD R x 1 Power supply...

Страница 11: ...This is a standard RJ 45 connector for 10 100 Mbps Ethernet networks 4 AUDIO OUT Connector The connector provides the unit s audio signal to a speaker 5 VIDEO OUT Connector The connector provides the...

Страница 12: ...from the DHCP server This option is needed to configure the network communication settings In the default factory configuration this DIP Switch is in the Down position 3 ALARM I O This is a 6 PIN conn...

Страница 13: ...6 ALC VR Iris control VR When an auto iris DC Drive lens is used this VR is used to adjust the iris for different lighting environments Adjust the VR clock wise to open the iris and counter clockwise...

Страница 14: ...other words if the user connects the IP camera with an SD card and the PC via the USB connector the IP camera can be used as a normal card reader 2 Remove an SD card As a configuring tool Before using...

Страница 15: ...as a screw hole for attaching the bracket to the camera Please follow the steps below to install the camera on the bracket Step 1 Rotate the screw in the bracket to fix the bracket to the camera Step...

Страница 16: ...if there is a connection between the IP camera and another device If there is no such connection the IP camera factory default Static IP address will not appear on the monitor screen 3 1 CONNECTING WI...

Страница 17: ...ectory named LANCAM in the SD card if it does not exist 3 Copy the file of UPDATE BIN to the LANCAM directory NOTE If the IP camera is running please power it off first 4 Insert the SD CARD into the I...

Страница 18: ...in step 3 or the IP camera will not work normally after being updated 4 If the power of the IP camera is suddenly lost in step 6 please remove the SD card first and turn on the IP camera next to test...

Страница 19: ...nical support and ignore the following steps 4 Ensure the SD CARD ENABLE function is activated in the ALARM and SCHEDULE pages if there is no check mark appears beside the SD icon on the screen 5 Read...

Страница 20: ...45 cable configuration for connections Physical specifications of the RJ 45 cable for Ethernet Wire Type Cat 5 Connector Type RJ 45 Max Cable Length 100 m Hub Wiring Configuration Straight Through PC...

Страница 21: ...Installation and Operation Guide 21 4 1 2 Connect to a LAN Hub INTRANET The RJ 45 PIN configuration for connecting with a LAN Hub is shown below RJ 45 LAN CAMERA TO PC NETWORK CARD uplink...

Страница 22: ...address for the unit if the LAN unit isn t connected to a DHCP server Otherwise please follow the instructions given below Set the IP MASK and GATEWAY The following is a sample setting IP 192 168 1 X...

Страница 23: ...s for example 192 168 1 1 Therefore if the connected network is identified as Class C for example the first three sets of numbers of the IP camera IP address must be the same as the network address If...

Страница 24: ...elow to install the TCP IP communication program in your computer 1 Open the Start menu from your computer and select the Settings Control Panel option 2 Double click the Network icon to enter the win...

Страница 25: ...ion 4 5 If it is not included please follow section 4 4 to install the TCP IP 4 4 TCP IP Installation During the installation you will be requested to insert the Windows CD ROM After installation the...

Страница 26: ...ect Obtain an IP address automatically Any assigned IP address for the connected IP cameras must be in the same class type as the server If there is no DHCP server please select specify an IP address...

Страница 27: ...llow the instructions below to ensure whether you have established the connection successfully 1 Click Start Programs MS DOS Prompt 2 Enter ping 192 168 1 168 then enter See the sample screen below Th...

Страница 28: ...ablished Please re check all the hardware and software installations by repeating sections 4 4 and 4 5 If you still can t establish the connection after rechecking please contact your dealer If you re...

Страница 29: ...col The details are listed as follows RJ 45 PIN configuration for Ethernet PIN NO PIN Assignment 1 TX 2 TX 3 RX 4 Not Connected 5 Not Connected 6 RX 7 Not Connected 8 Not Connected Physical specificat...

Страница 30: ...he appropriate spaces 6 Click on the OK button to set your entries and automatically exit the page NOTE The default User Name and Password are admin and 9999 respectively NOTE The page headlined Enter...

Страница 31: ...Card window if the SD card is inserted Click on the Pan Tilt button to change the Pan Tilt Zoom settings Click on the button to change the time date display mode Click on the button to switch high lo...

Страница 32: ...e Resolution Quality Frame rate MPEG4 mode only Format Viewer Type MJPEG mode only and MJPEG Deinterlace MJPEG mode only as necessary 3 Click on the Submit button to submit the new image setting 4 Cli...

Страница 33: ...list to choose the Day Night mode of Auto Day mode Night mode and Schedule ii Set the values of Focus Adjust and Sensitivity iii Click on the Submit button to submit the new Day Night setting NOTE The...

Страница 34: ...ged by the above steps any re entry onto the home page will find images in their earlier or original setting Exchange the image format 1 Select one of the formats then press the Submit button 2 The IP...

Страница 35: ...ble BLC Mode Scroll to choose from Disable Weighted or Fixed Gain Backlight Select in the backlight level in the blank 0 to 255 Brightness Select your desired quality of image brightness from a spectr...

Страница 36: ...ess 1 Click on the Network button in the home page to enter the Network page 2 The accessible networks here are the FTP for PAL only SMTP for PAL only SNTP DDNS PPPoE UPnP and the Traffic 3 Enter the...

Страница 37: ...y numbers between 0 and 255 It is used to identify the subnet where the IP camera is sited Default Gateway Enter the 4 byte Gateway in the relevant blank spaces each unit value must be between 0 and 2...

Страница 38: ...image files when necessary 3 Click on the Submit button to submit the new FTP setting of the recording 4 Click on the Home button to return to the home page Description of function keys FTP IP Addres...

Страница 39: ...ivate the function 3 Enter the Sender name DOMAIN NAME of the SMTP server and set the recipient s e mail address as necessary 4 Click on the Submit button to submit the new SMTP setting 5 Click on the...

Страница 40: ...k Automatically Adjust for Daylight Saving Time Changes to checkmark the box and activate the function 4 Click on the Submit button to submit the new SNTP setting 5 Click on the Home button to return...

Страница 41: ...Click DDNS Type to open the list of two DDNS modes to choose from DynDNS and hn Click on the Apply button and connect their website automatically and visit it Enter your dynamic IP Address and Email...

Страница 42: ...on the Apply button and connect this website automatically and enter it Enter your dynamic IP Address and Email Address If they are accepted by the website you will get an Email containing your DDNS A...

Страница 43: ...e PPPoE Setting page 2 Click on the PPPoE Mode to activate the function 3 Enter the PPPoE Account and the PPPoE Password 4 Click on the Submit button to submit the new setting 5 Click on the Home butt...

Страница 44: ...unction 3 Enter the UPnP Max Expired Age the SSDP Port and the UPnP Port 4 Click Enable UPnP Memory Card Access to checkmark the box and activate the function 5 Click on the Submit button to submit th...

Страница 45: ...Set the Allow Deny IP Filter policy and enter its IP address After setting the policies they will be shown on the Policy List The user can use the Up or Down to select a policy and use the Delete butt...

Страница 46: ...on the upper left menu to enter the Network Traffic page 2 Enter the Maximum Upload Bandwidth and the Maximum Download Bandwidth 3 Click on the Submit button to submit the new setting 4 Click on the...

Страница 47: ...ter Time and Synchronize With SNTP Server 3 Click on the Submit button to submit the new Date and Time settings 4 Click on the Home button to return to the home page Description of function keys The L...

Страница 48: ...ave chosen 6 Enter the Timestamp Format you have chosen 7 Click on the Submit button to submit the new user s setting 8 Click on the Home button to return to the home page Description of function keys...

Страница 49: ...on to submit the new user s settings 4 Click on the Home button to return to the home page Description of function keys User List The list shows the registered user s and the corresponding authority D...

Страница 50: ...page to enter the Digital I O Setting page 2 Mark the Digital Input ON or OFF and the Digital Output ON or OFF Click your choices to enable 3 Click on the Submit button to submit the new user s setti...

Страница 51: ...age to enter the Audio Setting page 2 Mark the Audio ON or OFF 3 Click on the Submit button to submit the new user s settings 4 Click on the Home button to return to the home page NOTE This setting is...

Страница 52: ...ge Description of function keys Baud rate Eight different speeds can be used 2400 baud per second 4800 baud 9600 baud 19200 baud 28800 baud 38400 baud 57600 baud and 115200 baud Type Choose one of the...

Страница 53: ...the UPDATE BIN file is appropriate to the model of the unit Updating with the wrong UPDATE BIN file may cause physical damage to the device NOTE The Temporary Internet Files or cache folder contains W...

Страница 54: ...nts button on the upper left above to enter the Event Log page 2 Choose one of the three buttons shown on the page to view an event when necessary The three buttons are titled First Page Previous 20 a...

Страница 55: ...ome page to enter the FTP Application Setting page default 2 Enter the required number of images you wish to set in Pre Alarm Memory Buffer and Alarm Memory Buffer respectively in their corresponding...

Страница 56: ...s MJPEG format 4 Enter its recording rate and duration in seconds and click Submit for their setting if AVI is your choice Description of function keys MJPEG Format One image per file Max MJPEG Numbe...

Страница 57: ...r PAL version only 1 Click on the SMTP button on the left side to enter the SMTP Application Setting page 2 Enter the attached file number as and when necessary The maximum number which can be used is...

Страница 58: ...llow the steps below to change the Language setting via the network as necessary 1 Click on the Language button on the left side to enter the Language Setting page You have an option as to which langu...

Страница 59: ...ge of MPEG4 mode 2 Click Enable Record UPLOAD Via FTP to checkmark the box and activate the function FTP function is for PAL version only 3 Click Enable Record Save Into SD card to checkmark the box a...

Страница 60: ...lick on the Submit button to submit the new schedule setting 4 Click on the Remove All Schedules button to clear out all the data of the schedule setting Description of function keys Schedule Check un...

Страница 61: ...and activate the function 5 Click Enable Alarm Upload Via SMTP to checkmark the box and activate the function SMTP function is for PAL version only 6 Enter the Alarm Duration you have chosen 7 Click o...

Страница 62: ...one targeted zone depending on your requirement 3 Enables disables the motion detection function 4 Set up the signal level 5 Click on the Submit button to submit the new setting of the recording 6 Cl...

Страница 63: ...to the SD card Application Setting Page 2 Click on the desired file to display the images 3 Each file can be deleted by clicking the Delete hyperlink NOTE Right click the hyperlink of the file in the...

Страница 64: ...ten buttons designated Go to can be clicked to view the particular corresponding angle of the position to which it is set 4 Select the connecting port The RS 485 communication ports function as conne...

Страница 65: ...rties Enter the IP address in a four part format for example 192 168 1 101 the first three parts must be identical to the above numbers only the last part can be changed to your own number which must...

Страница 66: ...assword 9999 Click OK 2 Choose the DDNS Click Enable DDNS Enter the DDNS host name for example abc123 homeip net Enter DDNS Account for example abc123 Enter the DNS Password for example 7777 Submit Th...

Страница 67: ...er button to enter the calculating page The is the URL address of the IP camera accordingly Please select the video format and set the desired resolution quality and the percentage of the motion scene...

Страница 68: ...otion detection button on the left side of the page to enter the Alarm Motion Detection page 3 Click and drag the cursor across a targeted zone to draw a red rectangle on the image You can also draw t...

Страница 69: ...filename which you want to view 3 It will ask you to enter the username and password 4 If you didn t set the other player before the AVI file will be played by the Windows Media Player Question 4 How...

Страница 70: ...ities of using the IP camera Entering the setting page 1 Click the System button in the home page 2 Click the Users button on the left side of the page to enter the System Users page Add a new user 1...

Страница 71: ...in illumination B W 0 03 lux F1 2 Compression MJPEG MPEG4 Resolution 352 x 240 720 x 480 Frame 720 x 240 720 x 480 Field Full D1 VGA Half VGA 2CIF CIF QVGA Frame rate 30 25 24 15 10 5 FPS Picture size...

Страница 72: ...RoHS Others Accessories Power adapter x 1 USB wire x 1 User manual x 1 Specifications are subject to change without notice FTP and SMTP functions are for PAL version only This device s requires AC 24...

Страница 73: ...as shown in Figure1 below Figure 1 UPnP Setup Flow Chart 1 Check the IP class of your PC In most cases Microsoft Windows XP will assign an IP address 169 254 automatically with a subnet mask 255 255...

Страница 74: ...nnections icon The Network Connections dialog box appears See Figure 3 Figure 3 Step 3 Click the Protocols tab in the Network Connections dialog box See Figure 4 Figure 4 Step 4 When the Local Area Co...

Страница 75: ...operties dialog box choose Use the following IP Address to indicate that you do not wish to use DHCP and assign IP Address 192 168 1 200 with Subnet mask 255 255 255 0 Click OK when you finish it See...

Страница 76: ...e it The following steps will help you to install them Step1 From the Start menu point to Set Program Access and Default and then click it See Figure 8 Figure 8 Step 2 When the Add or Remove Programs...

Страница 77: ...on and Operation Guide 77 Figure 10 Step 4 Check UPnP User Interface and choose OK See Figure 11 Figure 11 Step 5 When the original Network Component Wizard dialog box returns click Next See Figure12...

Страница 78: ...ervices After installation you must turn on the relative services to start the UPnP protocol The following procedures demonstrate this Step 1 From the Start menu point to Settings and then click Contr...

Страница 79: ...ation Guide 79 Figure15 Step 3 Click on the Services icon in the Administrative Tools dialog box See Figure16 Figure16 Step 4 When the Services dialog box shows up double click the SSDP Discovery Serv...

Страница 80: ...n Guide Figure17 Step 5 Choose Automatic in the Startup type and click OK to start it See Figure18 Figure18 Step 6 When the Services dialog box appears again double click the Universal Plug and Play D...

Страница 81: ...Installation and Operation Guide 81 Figure19 Step 7 Choose Automatic in the Startup type press the Start button and click OK to start it See Figure20 Figure20 Step 8 Restart your system...

Страница 82: ...starting services the UPnP protocol will take effect You can scan all LANCams in My Network Place like Figure21 and Figure22 below Figure21 Figure22 Just double click the UPnP MPEG4 IP camera the vide...

Страница 83: ...P and ping command Use any of the following ways to set the IP address within thirty seconds after booting the LANCam re cycle the power Setting IP using the method below can only be done on the Ether...

Страница 84: ...Ethernet address or arp s IP address MAC address ping IP address Example arp s 192 168 1 100 00 0C 0C 00 00 01 ping 192 168 1 100 The device responds to the ping in the examples above if the new addre...

Страница 85: ...ount as shown in Figure 1 Figure 1 Create an account After clicking Create Account you will enter the Create Account page Please complete the form at the bottom of the page to create your account You...

Страница 86: ...em which is below the My Hosts item as shown in Figure 4 Click Add Host Service and its service items will appear The Add Dynamic DNS Host item helps to add a new DDNS Each member may have only one fr...

Страница 87: ...can choose a Sub Hostname as s he likes from the right hand side of the Hostname s drop down list NOTE You don t have to set the IP Address in the same format as the camera s IP Address It will renew...

Страница 88: ...88 Installation and Operation Guide Figure 6...

Страница 89: ...5 0 63 0 5 0 38 0 25 QVGA 0 66 0 56 0 44 0 38 0 22 ZOOM 2 3 2 5 2 1 5 1 ZOOM 3 3 2 5 2 1 5 1 ZOOM 4 3 2 5 2 1 5 1 2 When frame rate is lower or equal to 15 frames second Highest High Medium Low Lowest...

Страница 90: ...ve set the function of Motion Detection but it doesn t seem to work A Check if Motion range and Sensitivity have been set before activating the function 4 My AVI files recorded in the SD card cannot...

Отзывы: