background image

36

S1662-AT-001 http://www.tyan.com

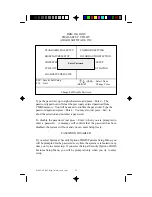
ROM ISA BIOS

CMOS SETUP UTILITY

AWARD SOFTWARE, INC.

STANDARD CMOS SETUP

PASSWORD SETTING

BIOS FEATURES SETUP

IDE HDD AUTO DETECTION

CHIPSET FEATURES SETUP

DAVE & EXIT SETUP

PCI SLOT CONFIGURATION

EXIT WITH OUT SAVING

LOAD SETUP DEFAULTS

 ESC : Save & Exit Setup
 F10  : Quit

(Shift)F2

:Change Color

:Select Item

Change/Set/Disable Password

Type the password, up to eight characters, and press <Enter>.  The
password typed now will clear the previously entered password from
CMOS memory.  You will be asked to confirm the password.  Type the
password again and press <Enter>.  You may also just press <Esc> to
abort the selection and not enter a password.

To disable the password, just press <Enter> when you are prompted to
enter a password.  A message will confirm that the password has been
disabled, the system will boot and you can enter Setup freely.

PASSWORD DISABLED

If you select System at Security Option of BIOS Features Setup Menu, you
will be prompted for the password every time the system is rebooted or any
time you try to enter setup.  If you select Setup at Security Option of BIOS
Features Setup Menu, you will be prompted only when you try to enter
setup.

Enter Password

Содержание Dual S1662D

Страница 1: ...Single S1662S Dual S1662D Pentium Pro 440FX PCI ISA System Board User s Manual Revision 1 2 ...

Страница 2: ...assword Reset 12 3 10 DRAM Installation 13 3 11 CPU Installation 15 3 12 VRM Installation 16 3 13 Peripheral Device Installation 16 3 14 Connecting The Power Supply 17 4 BIOS Configuration 19 4 1 Entering Setup 19 4 2 Control Keys 20 4 3 Getting Help 21 4 4 The Main Menu 21 4 5 Standard CMOS Setup Menu 23 4 6 BIOS Features Setup 26 4 7 Chipset Features Setup 29 4 7 1 Power Management Setup 30 4 8 ...

Страница 3: ...and is based on a Baby AT form factor Some of the features included are on board dual channel PCI IDE on board floppy controller on board high speed I O Universal Serial Bus and on board PS 2 mouse connector Flexibility and expandibility have been designed into the S1662 With I O and drive controller support built on board the five PCI and three ISA One ISA and one PCI as a shared slot slots are f...

Страница 4: ...DRAMs Supports 8MB to 1024MB of DRAMs wL2 Cache 256 512KB 2nd level cache in CPU wEIDE Controller Primary and secondary PCI EIDE channels on board for support of up to four EIDE Mode 0 through Mode 4 drives Supports DMA Bus Master mode 1 and 2 Bus Master driver on web at www tyan com wEnhanced I O Multi mode bi directional parallel port that supports standard EPP and ECP modes Supports 16550 compa...

Страница 5: ...ative Humidity 0 to 85 operating Altitude 0 to 10 000 feet operating Vibration 0 to 1 000 Hz Voltage 4 9 to 5 2 V Information presented in this publication has been carefully checked for reliability however noresponsibilityisassumedforinaccuracies The informationcontainedinthisdocumentissubjecttochangewithout notice Trademarks Award BIOS Flash are trademarks of Award Software International Inc AMI...

Страница 6: ...a of the system chassis imedietly before handling the mainboard or any compo nent Doing so discharges the static charge your body may have built After opening the mainboard carton extract the system board holding it by its edges and place it only on a grounded anti static surface component side up Inspect the board for damage Press down on all of the socket IC s to make sure that they are properly...

Страница 7: ...n Parallel Port 1 1 Secondary IDE 1 1 Com2 Com1 1 1 PCI Slot 1 PCI Slot 2 PCI Slot 3 PCI Slot 5 RTC BIOS AMI AWARD VRM 0 VRM 1 J31 J30 J29 J33 J43 J46 J48 J47 pin 1 pin 1 pin 1 pin 1 PCI Slot 4 J20 J21 J22 J23 J24 J27 J25 J28 pin 1 J32 J34 Con6 J18 J19 pin 1 pin 1 J44 J45 J14 J15 J49 J50 J17 CPU 1 CPU 0 82441FX 82371SB 82442FX Primary IDE J5 J 9 pin 1 pin 1 J1 USB1 Socket 8 U9 Socket 8 U10 pin 1 U...

Страница 8: ...ier J27 J24 J28 J25 X2 on on on on X2 5 off on on on X3 on off on on X3 5 off off on on X4 on on off on CMOS Resest Password Reset J5 Default off If you forget your CMOS password or need to reset the CMOS registers just power off the system and close jumper J5for five seconds Then open jumper J5 and power on the system This will set the CMOS and password back to the system default DRAM Voltage J20...

Страница 9: ...t Assignments 1 Speaker out 2 Ground 3 Ground 4 5V Keylock Connector J31 Pinout Assignments Pins 1 to 3 for power LED 1 Led Output 2 No Connect 3 Ground Pins 4 and 5 for Keylock 4 Keylock 5 Ground Turbo Switch J30 Non Turbo Mode Not Supported HDD LED J43 Pinout Assignments 1 Cathode 2 Anode 3 Cathode 4 Anode Pins 1 and 2 are for primary IDE channel Pins 3 and 4 are for secondary IDE channel ...

Страница 10: ...9 Default 5V This jumper should be left at the factory default Voltage J9 5V 1 2 default 12V 2 3 InfraRed Interface Con6 and Con7 Pinout Assignment 1 Signal In 2 Gound 3 Signal Out 4 VCC Super I O Type J34 Type J34 665IR 1 2 669IR 2 3 This setting depends on what type of SMC I O chip is installed on the board This jumper is set at the factory and should not be changed ...

Страница 11: ...provides a 4 Pin header J33 to connect the speaker The polarity can go either way 3 5 Turbo Switch The front panel on your case may have a turbo switch to control system speed when slower program execution is required for software developed in the old XT days The Intel 440FX chipset doesn t support a de turbo mode but the S1662 has a connector J30 for the cable that may come with the case 3 6 Turb...

Страница 12: ...perly you may want to forego updating your BIOS in the event the new one causes problems with your existing hardware and software J9 determines which type of EEPROM is used This jumper has been set to match the on board BIOS chip The factory default for the S1662 is on pins 1 2 Refer to chapter 5 for Flash EEPROM upgrade procedures 3 9 Hardware CMOS Password Reset The following steps are valid pro...

Страница 13: ...me of the available memory configurations Voltage ID for Older Pentium Pro CPU s J7 and J10 Most Pentium Pro CPU s will program the VRM to output the correct voltage it requires so these jumper are not important and should be left open Some early versions of the Pentium Pro cannot program the VRM so you have to set these jumper manually J7 and J10 each have eight pins and are numbered as follows 5...

Страница 14: ...MB x2 16MB x2 128MB 32MB x2 32MB x2 none none 128MB 32MB x2 32MB x2 32MB x2 none 192MB 32MB x2 32MB x2 32MB x2 32MB x2 256MB 64MB x2 64MB x2 none none 256MB 128MB x2 none none none 256MB 64MB x2 64MB x2 64MB x2 none 384MB 64MB x2 64MB x2 64MB x2 64MB x2 512MB 128MB x2 128MB x2 none none 512MB 128MB x2 64MB x2 64MB x2 64MB x2 640MB 128MB x2 128MB x2 128MB x2 none 768MB 128MB x2 128MB x2 64MB x2 64M...

Страница 15: ... normal and will not damage the CPU When the CPU is installed the lever should snap into place at the side of the socket in the down position 3 11 CPU Installation Many types of Pentium Pro 150 thru 200 MHz CPUs can be used on the S1662 Please refer to the previous pages for the correct CPU jumper settings for your board w The CPU is a sensitive electronic component and it can be easily damaged by...

Страница 16: ...l work in the S1662 Make sure you purchased a qualified VRM w VRM socket 0 is for CPU socket 0 w VRM socket 1 is for CPU socket 1 3 13 Peripheral Device Installation After all the jumpers on the mainboard have been set then it can be mounted into the case Then proceed to install the display card and any other peripheral devices If a PCI Bus interface card is to be installed in the system any one o...

Страница 17: ... 5V VCC VCC VCC 5 volt power connector pinout Pin 1 To connect the leads from either voltage power supply you should first make sure the power supply is unplugged Most power supplies have two leads Each lead has six wires two of which are black Orient the connectors so the black wires are in the middle of the 5V power supply Caution Some power supplies also include 3V connectors The connection wir...

Страница 18: ...bles to their receptacles on the mainboard You may need to hold the lead at an angle to line it up Once you have the guide pins aligned press the lead connector so that the plastic clips on the lead snap into place and secure the lead to the connec tor Connecting 5V power supply ...

Страница 19: ...e post Power On Self Test press Del key or simultaneously press Ctrl Alt and Esc keys TO ENTER SETUP BEFORE BOOT PRESS CTRL ALT ESC OR DEL KEY If the message disappears before you respond and you wish to enter Setup restart the system by turning it OFF then ON or by pressing Reset on the system case You may also restart by simultaneously pressing Ctrl Alt and Del keys If you do not press the keys ...

Страница 20: ...1 key General help only for Status Page Setup menu and Option Page Setup Menu F2 key Change color from a total of 16 colors F3 key Calendar only for Status Page Setup Menu F4 key Reserved F5 key Restore the previous CMOS value only for Option Page Setup Menu F6 key Load defaults F8 key Reserved F9 key Reserved F10 key Save all CMOS changes only for Main Menu ...

Страница 21: ...up Utility the Main Menu Figure 4 4 will appear on the screen The Main Menu allows you to select from the eight setup functions and 2 exit choices Use the arrow keys to select among the items and press Enter to accept or enter the sub menu Figure 4 4 Main Menu ROM ISA BIOS 2A59CT51 CMOS SETUP UTILITY AWARD SOFTWARE INC ESC Save Exit Setup F10 Quit Shift F2 Change Color Select Item Time Date Hard D...

Страница 22: ...uration This setup page allows you to modify the configuration of PCI slot parameters w w Load setup defaults BIOS defaults indicate the most appropriate values of each system param eter for your system w w Supervisor User Password Change set or disable password It allows you to limit access to the system and Setup w w Integrated Peripherals This option lets the you enable or disable on board FDD ...

Страница 23: ...e 0mb 0 0 0 0 0 Primary Slave none 0mb 0 0 0 0 0 Secondary Master none 0mb 0 0 0 0 0 Secondary Slave none 0mb 0 0 0 0 0 Drive A 1 44 M 3 5 in Drive B 1 2 M 5 25 in Video EGA VGA Halt On All errors 4 5 Standard CMOS Setup Menu The items in Standard CMOS Setup Menu Figure 4 5 are divided into 9 categories Each category includes one or more setup items Use the arrows to highlight the item and use the...

Страница 24: ...the hard disk vendor or the system manufacturer CYLS number of cylinders HEADS number of heads PRECOMP written precom LANDZONE landing zone SECTORS number of sectors Mode Normal Access mode for IDE drives under 528MB Mode LBA Access mode for EIDE drives over 528MB Mode Large Access mode for IDE drives over 528MB that don t support LBA If a SCSI hard disk has been installed or you have a CD ROM Tap...

Страница 25: ...fatal error the system will be stopped and you will be promted No errors The system boot will not be stopped for any errors that are detected All but Keyboard The system boot will not stop for a keyboard error it will stop for all other errors All but Diskette The system boot will not stop for disk errors it will stop for all other errors All but Disk Key The system boot will not stop for a keyboa...

Страница 26: ... free for application programs as possible 4 6 BIOS FEATURES SETUP ROMISABIOS BIOSFEATURESSETUP AWARDSOFTWARE INC Video BIOS Shadow Enabled C8000 CBFFF Shadow Disabled CC000 CFFFF Shadow Disabled D0000 D3FFF Shadow Disabled D4000 D7FFF Shadow Disabled D8000 DBFFF Shadow Disabled DC000 DFFFF Shadow Disabled Virus Warning Enabled CPU Internal Cache Enabled External Cache Enabled Boot Sequence A C Sw...

Страница 27: ...le No warning message to appear when anything attemps to access the boot sector or hard disk partition table w w CPU Internal Cache External Cache These two categories speed up the memory access However it de pends on the CPU Chipset design Default value is Enabled Enabled Enables the cache Disabled Disables the cache w w Boot Sequence This category determines which drive the computer searches fir...

Страница 28: ...p NumLock Status Default value is On On Keypad is number keys Off Keypad is arrow keys w w Memory Parity Check The default value is disabled w w Gate A20 Option Gate A20 controls the ability to access memory addresses above 1 MB by enabling Fast or disabling Normal access to the processor Default value is Fast w w Typematic Rate Setting Typematic Rate char sec and Typematic Delay Typematic Rate Se...

Страница 29: ... changed unless you are familiar with the chipset The Chipset Features Screen ESC Quit Select Item F1 Help PU PD Modify F5 Old Values Shift F2 Color F6 Load BIOS Defaults F7 Load Setup Defaults w w Security Option This category allows you to limit access to the system setup or just setup Default value is Setup System The system will not boot and access to Setup will be denied if the correct passwo...

Страница 30: ...IRQ4 Wake Up Event Off IRQ13 Coprocessor Off IRQ8 Wake Up Event Off IRQ14 Hard Disk Off IRQ12 Wake Up Event Off IRQ15 Reserved Off w wPower Management Options are disabled user defined Min saving and Max saving w wPM Control by APM Advanced Power Management Options are Yes and No When set for No system BIOS will ignore APM when power managing the system If set on Yes the system BIOS will wait for ...

Страница 31: ...e continous idle time before the system enters Doze mode w wStandby Mode Defines the continous idle time before the system enters Standby mode w wPower Down Activities Defines the the activities that can cause the PM timers to reload Break ing out of PM Mode ...

Страница 32: ...MA6 assigned to PCI PnP DMA7 assigned to PCI PnP PCI IRQ Activated By Level PCI IDE IRQ Map To Auto Primary IDE INT A Secondary IDE INT B ESC Quit Select Item F1 Help PU PD Modify F5 Old Values Shift F2 Color F6 Load BIOS Defaults F7 Load Setup Defaults w PCI Slot 1 Slot 2 Slot 3 Slot 4 Slot 5 INT w For Default Setting Connect to PCI System INT PCI Slot1 INTA INTA PCI Slot1 INTB INTB PCI Slot1 INT...

Страница 33: ...g types depending on the type of device using the interrupt Legacy ISA Devices compliant with the original PC AT bus specification PCI ISA PnP Devices compliant with the Plug and Play standard whether designed for the PCI or ISA bus architecture w wPCI IRQ Activated By Select the PCI IRQ Active scheme either LEVEL or EDGE Default value is LEVEL w wPCI IDE IRQ Map To Select the IDE IRQ Map to ISA I...

Страница 34: ...IO Auto On Chip Primary PCI IDE Enable On Chip Secondary PCI IDE Enable PCI Slot IDE 2nd Channel Enable On Board FDC Controller Enable On Board Serial Port 1 Com1 3F8 On Board Serial Port 2 Com2 2F8 On Board Parallel Port 378 IRQ7 Parallel Port Mode Normal The Settings in the Integrated Peripherals lets the user enable or disable on board device You can also configure the I O and IRQ settings of t...

Страница 35: ...FTWARE INC ESC Save Exit Setup F10 Quit Shift F2 Change Color Select Item Load SETUP Defaults except standard CMOS SETUP w w Load SETUP defaults To load SETUP default values to CMOS SRAM enter Y If not enter N w w If any problem has occurred loading the SETUP DEFAULTSis recommended 4 10 PASSWORD SETTING When you select this function the following message will appear at the center of the screen to ...

Страница 36: ... memory You will be asked to confirm the password Type the password again and press Enter You may also just press Esc to abort the selection and not enter a password To disable the password just press Enter when you are prompted to enter a password A message will confirm that the password has been disabled the system will boot and you can enter Setup freely PASSWORD DISABLED If you select System a...

Страница 37: ...keep the old H D D parameter info 4 12 SAVE EXIT SETUP STANDARD CMOS SETUP PASSWORD SETTING BIOSFEATURESSETUP IDEHDDAUTODETECTION CHIPSET FEATURES SETUP DAVE EXIT SETUP PCI SLOT CONFIGURATION EXIT WITH OUT SAVING LOAD SETUP DEFAULTS ESC Save Exit Setup F10 Quit Shift F2 Change Color Select Item ROM ISA BIOS CMOS SETUP UTILITY AWARD SOFTWARE INC Save to CMOS and EXIT Y N N Type Y and you will quit ...

Страница 38: ...d and reprogrammed by the FMW The following three files make up the FMW AWDFLASH EXE The Flash Memory Writer utility for Award to Award upgrade AMIFLASH COM The Flash Memory Writer utility for AMI to AMI upgrade README Atextfileofinstructions S62AWXX BIN XX A 2 digit version number Flash memory writer records or programs a new BIOS onto the flash memory chip You cannot upgrade an Award BIOS to a A...

Страница 39: ... do this isto a Boot your system from a bootable floppy disk with no CONFIG SYS or AUTOEXEC BAT files and then run Flash Memory Writer from a backup copy of your support disk You can make your back up floppy bootable when you format it and use one disk for both purposes b If you are using MS DOS 6 x you can use the feature that allows you to bypass the CONFIG SYS and AUTOEXEC BAT file You do this ...

Страница 40: ... Erase and then Program the flash memory on the mainboard with the new BIOS file You should choose yes to save the original system BIOS to a floppy diskette before you program the new BIOS This leaves you with a backup of your original BIOS in case you need to re install it This option is highly recommended If you can not sucessfully program the BIOS file for whatever reason re install you origina...

Страница 41: ... adapter DMA Channel 3 Available DMA Channel 4 Cascade for DMA controller 1 DMA Channel 5 Available DMA Channel 6 Available DMA Channel 7 Available 6 2 INTERRUPT MAP NMI Parity check error IRQ H W 0 System TIMER interrupt from TIMER 0 1 KEYBOARD output buffer full 2 Cascade for IRQ 9 15 3 SERIAL port 2 4 SERIAL port 1 5 PARALLEL port 2 6 FLOPPY DISK adapter 7 PARALLEL port 1 8 RTC clock 9 Availabl...

Отзывы: