background image

P . 1

Bard

P. 3 - 11

Check all parts. If  you find any defective or missing parts contact your  local dealer. Please DRY FIT
and check for defects for all parts that  will  require CA or Epoxy  for final  assembly.  Any parts  you
find to be defective after the gluing process may be difficult to remove for warranty replacement. The


manufacturer will replace any defective parts. but will not extend to the parts that are good before 


gluing to defective parts during assembly.

I N D E X

BEFORE YOU BEGIN

PARTS LIST

ASSEMBLY

SAFETY   PRECAUTIONS

P. 1

P. 2

P. 11

BEFORE  YOU  BEGIN

Read through the manual before you begin,  so you will  have an overall idea of what to do.

Symbols used throughout this instruction manual  comprise of the following : -

1

2

3

3mm

Do not overlook this symbol!

Cut off shaded portion.

Peel off shaded portion
covering film.

Pay close attention here!

Pierce the shaded portion
covering film.

Must be purchased separately!

Drill holes with the specified
diameter (here:  3mm).

Ensure smooth non-binding
movement while assembling.

Apply instant glue
(C.A.glue,  super glue.)

Assemble left and right
sides the same way.

Apply epoxy glue. 

Apply


thread


locker

Warning

!

Содержание Bard

Страница 1: ...miliar with this kind of engine powered precision model Operating this model without prior preparation may cause injuries Remember safety is the most important thing Always keep this instruction manua...

Страница 2: ...FORE YOU BEGIN PARTS LIST ASSEMBLY SAFETY PRECAUTIONS P 1 P 2 P 11 BEFORE YOU BEGIN Read through the manual before you begin so you will have an overall idea of what to do Symbols used throughout this...

Страница 3: ...For Radio 2pcs PLYWOOD 3X48X70mm For Radio 1pc WOODEN 8X13X16mm For Aileron Servo 2pcs WOODEN 7X13X16mm For Aileron Servo 2pcs Parts List P 2 10 PLASTIC PARTS CLEVIS 4pcs STRAPER 2pcs HORN 4pcs RUBBER...

Страница 4: ...Aileron 1 PWA2x8mm Screw PM2x16mm Screw 8 4 Wooden 8x13x16mm 1mm PWA2x8mm Straper Fuel Tube PM2x16mm Clevis Fuel Tube 6x5mm Metal Rod 1 8x55mm Horn Aileron Servo 2 2 5mm P 3 Wooden 7x13x16mm...

Страница 5: ...Stabilizer Elevator 3 d3xD12mm Washer 1 1 PM3x20mm Screw Completed Top View Bottom View PM3x20mm d3xD12mm Top View P 4...

Страница 6: ...Rudder 4 Elevator Linkage 5 PM2x12mm Screw 2 Clamp the copper tube PM2x12mm Clevis Fuel Tube 6x5mm Tube Wire Horn Short P 5...

Страница 7: ...t 2mm Washer 2 2 2 2 Elevator Pushwire 2mm 2mm 3mm Included with the Radio Set Elevator Servo Please refer to attached sheet for linkage connector installation Servos 8 Balsa 5x5x48mm Plywood 3x48x70m...

Страница 8: ...Main Wing 9 Lead to Aileron Servo Wing Tube Dx353mm Rudder Band P 7...

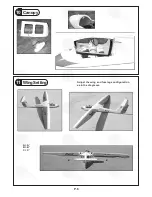
Страница 9: ...Canopy 10 Wing Setting 11 Adjust the wing and fuselage configuration as in the diagrams A A B B C C A A B B C C P 8...

Страница 10: ...y Precautions First time flyer should never fly by himself herself Assistance from experienced flyer is absolutely necessary Pre flight adjustment must be done before flying it is very dangerous to fl...

Страница 11: ...rotate freely Product Registration Form US Customers We would like to share with you any relevant information regarding your model including product news and free upgrade parts when applicable Please...

Отзывы: