


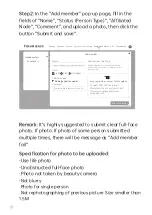

Avatars Name Attributes Status Register time Comment Affiliated node Userld Action
Camilla Female staff - Headquarters-Face Access -
2020/03/28
11:02:08
Edit
|
Delete
Simone Female staff - Headquarters-Face Access -
2020/03/28
10:00:02
Edit
|
Delete
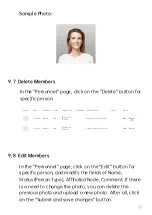
Sample Photo:
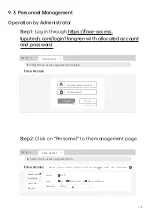
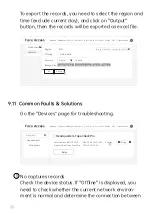
In the “Personnel” page, click on the “Delete” button for
specific person.
9.7 Delete Members
In the “Personnel” page, click on the “Edit” button for
specific person, and modify the fields of Name,
Status(Person Type), Affiliated Node, Comment. If there
is a need to change the photo, you can delete the
previous photo and upload a new photo. After all, click
on the “Submit and save changes” button.
9.8 Edit Members
22
Содержание TupuCheck Pro
Страница 2: ......


