background image

1 6

English


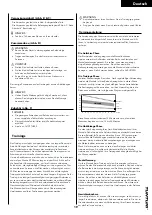
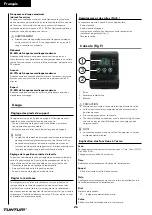
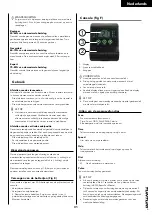
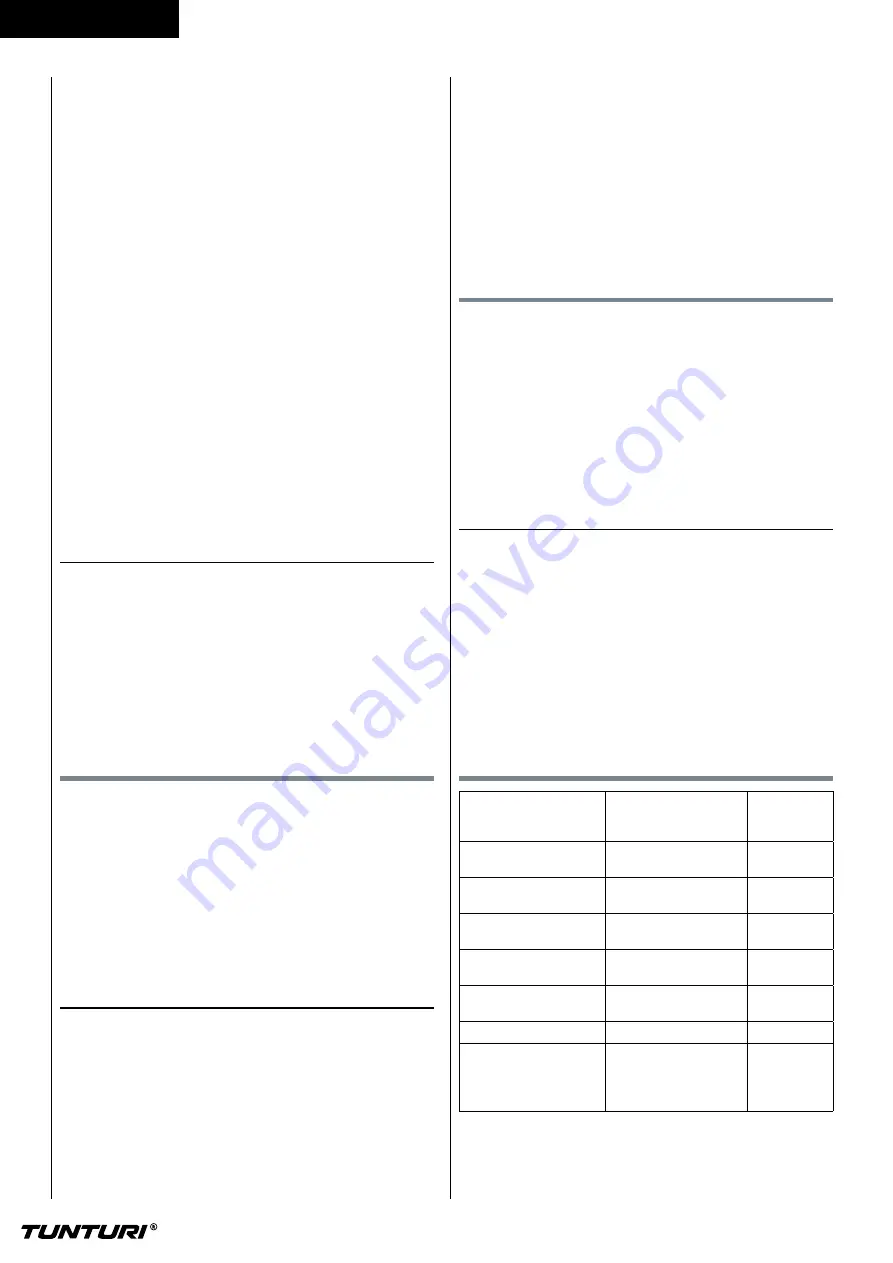
- Press MODE to select goal you like to set.  (the selected goal will 

blink when able to set value.)


-

Press SET Button to higher the goal input, hold SET button to 
higher the value fast.  


- Press RESET button shortly to reset the changed selected goal. 


- Press MODE Button to active next optional goal to be set.  

TIME  + 1 min 


( 1 ~  99) 


SPEED  


( max. 99,9 Km/h)


DIST  + 0,5KM  ( 0,5KM ~  99,50Km )


ODO    

( max. 999,9 Km)


CAL  + 1  


( 1 ~  999 )


PULSE  + 1  


( 40 ~ 240 )

 ‼   NOTE

• 

When you set a goals the set goal value will Count down in 

active mode.

• 

When goal is reached the console will notify by 4 dual acoustic 
beep signals. The reached value will now Count up starting from 

“0”.

• 

You can set more than one goal, all goals will notify when goal 

is reached. 

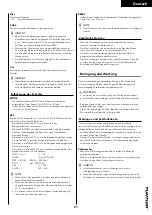
RESET


-

Push and hold for 4 seconds to reset: Time, Dist., Cal., & Pulse 

 ‼   NOTE

• 

Total Count can only be reset by a batteries exchange.

Extra notes


-

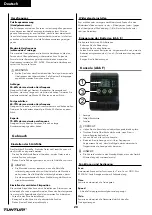
If the display is faint or shows no figures, please replace the 

batteries.


-

The monitor will automatically shut off if there is no signal received 
after 4 minutes .


- The monitor will be auto-powered on when starting to exercise 

push button w/signal in.


- The monitor will automatically start calculating when you start to 

exercise and will stop calculating when you stop exercising for 4 

seconds .

Cleaning and maintenance

The equipment does not require special maintenance. The 
equipment does not require recalibration when it is assembled, used 

and serviced according to the instructions.

 ⚠ WARNING 

• 

Do not use solvents to clean the equipment.

• 

Clean the equipment with a soft, absorbent cloth after each use.

•  Regularly check that all screws and nuts  

are tight.

• 

If necessary, lubricate the joints.

Defects and malfunctions

Despite continuous quality control, defects and malfunctions caused 
by individual parts can occur in the equipment. In most cases, it will 
be sufficient to replace the defective part.


-

If the equipment does not function properly, immediately contact 

the dealer.


-

Provide the model number and the serial number of the equipment 
to the dealer. State the nature of the problem, conditions of use 

and purchase date.

Trouble shooting: 


-

When the display of LCD is dim, it means the batteries need to be 

changed.


-

If there is no signal when you pedal, please check if the cable is 

well connected.

 ‼   NOTE

• 

When stop training for 4 minutes, the main screen will be off.

• 

If the computer displays abnormally, please re-install the 

batteries and try again.

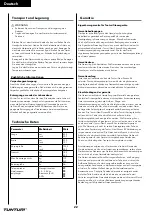
Transport and storage

 ⚠ WARNING

• 

Carry and move the equipment with at least two persons.

• 

Move the equipment and carefully put the equipment down. 
Place the equipment on a protective base to prevent damage to 
the floor surface.

• 

Move the equipment carefully over uneven surfaces. Do not 
move the equipment upstairs using the wheels, but carry the 
equipment by the handlebars.

• 

Store the equipment in a dry place with as little temperature 

variation as possible.

Additional information

Packaging disposal

Government guidelines ask that we reduce the amount of waste 
material disposed of in land fill sites. We therefore ask that you 
dispose of all packaging waste responsibly at public recycling centres.

End of life disposal

We at Tunturi hope you enjoy many years of  enjoyable use from 
your fitness trainer. However, a Time will come when your fitness 
trainer will come to the end of its useful life. Under ‘European WEEE 
Legislation you are responsible for the appropriate disposal of your 
fitness trainer  to a recognised public collection facility.

Technical data

Parameter

Unit of 
measurement

Value

Length

cm 
inch

84.0 
30.7

Width

cm 
inch

50.0 
19.7

Height

cm 
inch

123,0


48.4

Weight

kg 
lbs

18.3 
40.3

Max. user weight

kg 
lbs

110 
240

Battery size

2x

AA

HR. receiver

handgrip contact 

5.3~ 5.4 Khz.
Bluetooth (BLE)


ANT+

 


Содержание 8717842028261

Страница 1: ...produit Leest u deze handleiding voordat u dit apparaat installeert Leggere questo manuale prima di assemblare questo prodotto Lea este manual antes de montar este producto L s bruksanvisningen innan...

Страница 2: ......

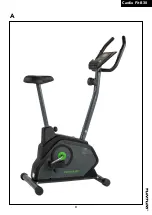
Страница 3: ...3 Cardio Fit B30 A...

Страница 4: ...10 i 8x 20MM 8pcs M8x60MM 4pcs M8x35MM 2pcs 6MM 1pcs M8x16MM 4pcs M8 4pcs 4 Cardio Fit B30 B...

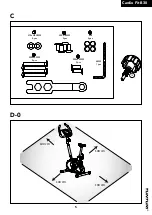
Страница 5: ...10 8x 20MM 8pcs M8x60MM 4pcs M8x35MM 2pcs 6MM 1pcs M8x16MM 4pcs M8 4pcs 100 cm 100 cm 100 cm 100 cm 5 Cardio Fit B30 C D 0...

Страница 6: ...10 8x 20MM 8pcs M8x60MM 4pcs M8x35MM 2pcs 6MM 1pcs M8x16MM 4pcs M8 4pcs 6 Cardio Fit B30 D 1...

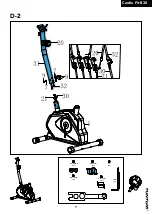
Страница 7: ...10 8x 20MM 8pcs M8x60MM 4pcs M8x35MM 2pcs 6MM 1pcs M8x16MM 4pcs M8 4pcs 7 Cardio Fit B30 D 2...

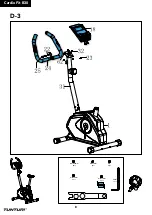
Страница 8: ...10 8x 20MM 8pcs M8x60MM 4pcs M8x35MM 2pcs 6MM 1pcs M8x16MM 4pcs M8 4pcs 8 Cardio Fit B30 D 3...

Страница 9: ...10 8x 20MM 8pcs M8x60MM 4pcs M8x35MM 2pcs 6MM 1pcs M8x16MM 4pcs M8 4pcs 9 Cardio Fit B30 D 4 Preassembled Vormontiert Pr assembl Voorgemonteerd Pre assemblato Pre ensamblado F rmonterad Esikoottu...

Страница 10: ...10 8x 20MM 8pcs M8x60MM 4pcs M8x35MM 2pcs 6MM 1pcs M8x16MM 4pcs M8 4pcs 1 0 Cardio Fit B30 D 5...

Страница 11: ...ome standard with this product 10 8x 20MM 8pcs M8x60MM 4pcs M8x35MM 2pcs 6MM 1pcs M8x16MM 4pcs M8 4pcs 1 1 Cardio Fit B30 D 6 Preassembled Vormontiert Pr assembl Voorgemonteerd Pre assemblato Pre ensa...

Страница 12: ..._ _ AA A A _ _ AA A A 1 2 Cardio Fit B30 E F...

Страница 13: ...diately stop your workout and consult a physician To avoid muscular pain and strain start each workout by warming up and finish each workout by cooling down Remember to stretch at the end of the worko...

Страница 14: ...50 55 60 65 70 75 85 70 AGE MAXIMUM COOL DOWN HEART RATE TARGET ZONE This stage should last for a minimum of 12 minutes though most people start at about 15 20 minutes The cool down phase This stage i...

Страница 15: ...f the console when it is covered with drops of sweat Do not lean on the console Only touch the display with the tip of your finger Make sure that your nails or sharp objects do not touch the display N...

Страница 16: ...ccur in the equipment In most cases it will be sufficient to replace the defective part If the equipment does not function properly immediately contact the dealer Provide the model number and the seri...

Страница 17: ...er The warranty does not extend to fitness equipment or components that have been modified without the consent of Tunturi New Fitness BV Defects resulting from normal wear misuse abuse corrosion or da...

Страница 18: ...Ger t von Kindern oder Personen mit k rperlicher sensorischer geistiger oder motorischer Behinderung verwendet wird oder wenn nicht gen gend Erfahrung und Kenntnisse vorhanden sind kann dies zu Gefah...

Страница 19: ...Ihnen viele Vorteile bieten Er verbessert Ihre k rperliche Fitness formt die Muskeln und hilft Ihnen in Verbindung mit einer kalorienreduzierten Di t Gewicht zu verlieren Die Aufw rm Phase Der Blutkr...

Страница 20: ...stabilsten wenn alle St tzf e vollst ndig eingeschraubt sind Nivellieren Sie die Maschine daher indem Sie alle St tzf e vollst ndig Eindrehen bevor Sie die entsprechenden F e zur Stabilisierung der Ma...

Страница 21: ...doppelte akustische Piepsignale Der erreichte Wert wird dann ab 0 heraufgez hlt Sie k nnen mehr als ein Ziel einstellen und das jeweilige Ziel informiert sie wenn es erreicht ist RESET Halten Sie die...

Страница 22: ...annt Garantiedauer Die Garantie gilt ab Kaufdatum Die Garantiedauer kann sich je nach Land unterscheiden Bitte wenden Sie sich an Ihren zust ndigen H ndler um die Garantiedauer zu erfahren Garantieumf...

Страница 23: ...pricht EN 957 HC 89 336 EWG Das Produkt tr gt daher das CE Kennzeichen 04 2020 Tunturi New Fitness BV Purmerweg 1 1311 XE Almere The Netherlands Haftungsausschluss 2020 Tunturi New Fitness BV Alle Rec...

Страница 24: ...l mental ou moteur voire dont l exp rience ou les connaissances s av rent insuffisantes est une source de risques Les personnes charg es de leur s curit doivent leur fournir des instructions explicite...

Страница 25: ...essous Chaque tirement doit tre maintenu pendant environ 30 secondes Ne forcez pas ou n tirez pas excessivement un muscle Si vous sentez qu une position vous fait mal ARR TEZ Phase d exercice C est l...

Страница 26: ...La position verticale de la selle est r glable en amenant le tube de selle la position requise Avec la jambe pratiquement droite la vo te plantaire doit toucher la p dale en son point le plus bas Des...

Страница 27: ...tous les objectifs seront signal s lorsqu ils sont atteints RESET Maintenez la touche enfonc e pendant 4 secondes pour r initialiser Time Dist Cal Pulse NOTE Total Count peut tre r initialis uniqueme...

Страница 28: ...e nature que ce soit li s l utilisation de ou l inaptitude utiliser cet quipement Restrictions de garantie La garantie couvre les d fauts de fabrication et de mat riaux dans un quipement d origine sor...

Страница 29: ...roorzaken De personen die verantwoordelijk zijn voor hun veiligheid moeten uitdrukkelijke instructies geven of toezicht houden op het gebruik van het toestel Laat uw gezondheid door een arts controler...

Страница 30: ...en zoals hieronder beschreven Houd elke stretch oefening ongeveer 30 seconden vol Forceer uw spieren niet bij het stretchen STOP als het pijn doet De training fase Dit is de fase waarin u de meeste in...

Страница 31: ...andsknop aan de stuurbuis met de klok mee richting om de weerstand te verhogen en tegen de klok in richting om de weerstand te verlagen De schaalverdeling boven de knop 1 8 helpt u bij het vinden en o...

Страница 32: ...ng en onderhoud Het toestel vereist geen speciaal onderhoud Het toestel behoeft geen kalibratie wanneer het wordt geassembleerd gebruikt en onderhouden overeenkomstig de instructies WAARSCHUWING Verwi...

Страница 33: ...die het gevolg zijn van materiaalfouten of onjuist uitgevoerd werk mits het toestel zijn originele samenstelling heeft De garantie betreft alleen defecten die blijken tijdens normaal gebruik overeenk...

Страница 34: ...professionale L apparecchio non idoneo per scopi commerciali L utilizzo massimo limitato fino a 2 ore al giorno L uso di questo apparecchio da parte di bambini o persone con handicap fisici sensoriali...

Страница 35: ...e durante l esercizio La velocit del vostro lavoro dovrebbe essere sufficiente per aumentare il vostro battito cardiaco nella zona target mostrata sul grafico qui sotto 200 180 160 140 120 100 80 20 2...

Страница 36: ...e del tubo di supporto del manubrio Senso orario direzione per aumentare la resistenza Senso antiorario direzione per diminuire la resistenza La scala sopra la manopola 1 8 vi aiuta a trovare e azzera...

Страница 37: ...ll inizio dell allenamento oppure premendo un tasto Il monitor avvia automaticamente il calcolo all inizio dell allenamento e si arresta quando questo viene interrotto per 4 secondi Pulizia e manutenz...

Страница 38: ...attrezzo mancato guadagno o altri danni di natura economica Limiti di garanzia La garanzia copre i difetti di materiale e fabbrica dell attrezzo che si manifestano subito dopo l acquisto La garanzia...

Страница 39: ...deben dar instrucciones expl citas o supervisar el uso de la m quina Antes de empezar a hacer ejercicio consulte con un m dico para comprobar su estado de salud Si experimenta nauseas mareos u otros s...

Страница 40: ...da esta fase El ejercicio debe ser lo suficientemente fuerte como para incrementar el ritmo card aco hasta el objetivo que se muestra en el siguiente cuadro 200 180 160 140 120 100 80 20 25 30 35 40 4...

Страница 41: ...el manillar en el sentido de las agujas del reloj direcci n para aumentarla y en el sentido contrario direcci n para disminuirla La escala que aparece encima de la perilla 1 8 le permite buscar y reaj...

Страница 42: ...tenimiento La m quina no requiere un mantenimiento especial No es necesario recalibrar la m quina cuando sta se ha montado utilizado y mantenido seg n las instrucciones ADVERTENCIA Antes de la limpiez...

Страница 43: ...ipo a condici n de que se hayan observado las instrucciones de montaje mantenimiento y utilizaci n proporcionadas por Tunturi Tunturi New Fitness BV y los distribuidores Tunturi no pueden responder de...

Страница 44: ...uktioner eller vervaka anv ndningen av utrustningen Innan du p b rjar din tr ning upps k en l kare som kan kontrollera din h lsa Om du upplever illam ende yrsel eller andra onormala symptom avsluta ge...

Страница 45: ...LA NER HJ RTFREKVENS M LZON Denna fas b r p g i minst 12 minuter ven om de flesta b rjar med ungef r 15 20 minuter Nedvarvningsfasen Under denna fas f r ditt kardiovaskul ra system och dina muskler va...

Страница 46: ...v svettdroppar Luta dig inte mot panelen Vidr r endast displayen med din fingertopp Var noga med att inte dina naglar eller vassa f rem l vidr r displayen ANM RKNING Panelen verg r till vilol ge n r u...

Страница 47: ...iga delen Om utrustningen inte fungerar korrekt kontakta omedelbart terf rs ljaren L mna utrustningens modellnummer och serienummer till terf rs ljaren Ange problemets art f rh llanden vid anv ndning...

Страница 48: ...are och r g llande endast i de l nder d r det ifnns en godk nd Tunturi New Fitness BV terf rs ljare Garantin g ller ej f r redskap eller delar som har ndrats utan Tunturi New Fitness BV s godk nnande...

Страница 49: ...isuudestaan vastuussa olevien henkil iden on annettava selke t ja tarkat ohjeet laitteen k yt st ja valvottava laitteen k ytt Ennen harjoituksen aloittamista ota yhteys l k riin terveystarkastusta var...

Страница 50: ...40 45 50 55 60 65 70 75 85 70 IK MAKSIMI VIILENTY SYKE KOHDEALUE T m n vaiheen tulisi kest v hint n 12 minuuttia mutta useimmilla aloittelijoilla se on noin 15 20 minuuttia J hdyttelyvaihe T m n vaih...

Страница 51: ...ista kansi Poista vanhat paristot Laita uudet paristot paikalleen Varmista paristojen olevan asennettu ja napaisuusmerkint jen mukaisesti Asenna kansi paikalleen Ohjauspaneeli kuva F 1 3 2 1 N ytt 2 T...

Страница 52: ...vaadi uudelleenkalibrointia kokoonpanon k yt n ja ohjeiden mukaan suoritetun huollon j lkeen VAROITUS Irrota adapteri ennen puhdistusta ja huoltoa l k yt liuottimia laitteen puhdistukseen Puhdista lai...

Страница 53: ...oudatettu Tunturi New Fitness BV n ja Tunturin j lleenmyyj t eiv t vastaa virheist jotka aiheutuvat heid n vaikutusmahdollisuuksiensa ulkopuolella olevista seikoista Takuu on voimassa vain niiss maiss...

Страница 54: ...18 17 15 13 16 14 20 23 62 31 22 24 25 7 9 9 7 32 19 30 10 21 12 1 8 7 8 7 4 6 6 2 4 11 33 8 7 5 3 6 6 5 8 7 5 4 Cardio Fit B30...

Страница 55: ...56 57 55 26 34 48 54 53 30 40 49 21 27 28 61 50 52 59 60 36 38 36 37 35 36 43 47 45 44 46 45 14 16 29 28 27 40 40 40 40 40 40 40 41 41 58 39L 43 42 41 41 39R 58 5 5 Cardio Fit B30...

Страница 56: ...8 20 1 27 France nut 2 28 Locknut M10 3 29 Bowl shaped spacer 1 30 Sensor wire 1 31 Front post 1 32 Middle sensor wire 1 33 Crank 1 34 Seat post bushing 1 35 Axle for flywheel 1 36 Bearing 6000 3 37 F...

Страница 57: ......

Страница 58: ......

Страница 59: ...it er Montage dieses Produkts beginnen Veuillez lire ce manuel avant de commencer le montage de ce produit Leest u deze handleiding voordat u dit apparaat installeert Leggere questo manuale prima di a...

Страница 60: ...www tunturi com Tunturi New Fitness BV Purmerweg 1 NL 1311 XE Almere P O Box 60001 NL 1320 AA Almere The Netherlands www tunturi com...

Отзывы: