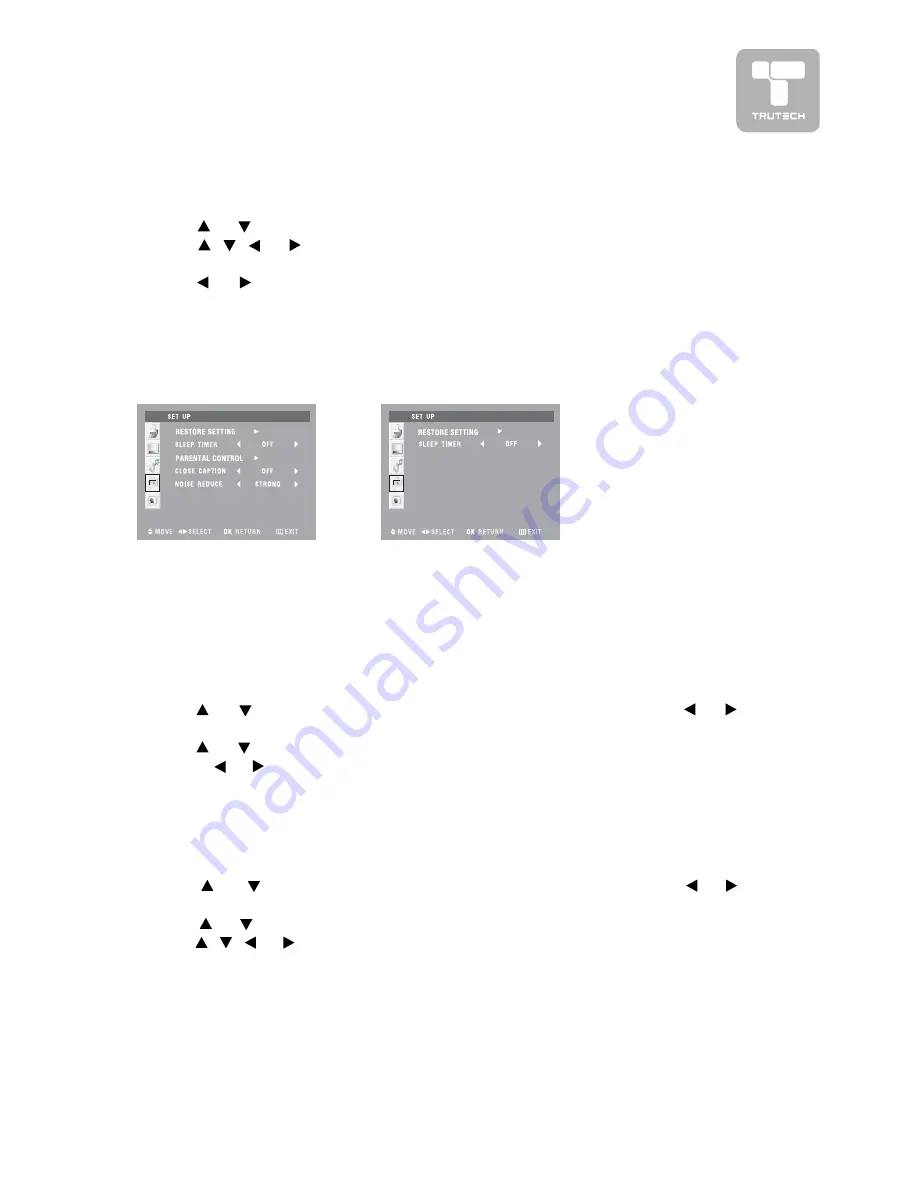
TruTech PLV16320VM Скачать руководство пользователя страница 19

19

MENU SETUP

SETUP MENU

SETUP MENU

SETUP MENU

SETUP MENU

SETUP MENU

1. Press the MENU

MENU

MENU

MENU

MENU button.

2. Use

 or

 button to select the Set up 

Set up 

Set up 

Set up 

Set up menu.

3. Use

,

,

 or

 button to select the options (Restore setting, Sleep

(Restore setting, Sleep

(Restore setting, Sleep

(Restore setting, Sleep

(Restore setting, Sleep

timer

timer

timer

timer

timer, Par

, Par

, Par

, Par

, Parental contr

ental contr

ental contr

ental contr

ental control, Close caption, Noise r

ol, Close caption, Noise r

ol, Close caption, Noise r

ol, Close caption, Noise r

ol, Close caption, Noise reduce)

educe)

educe)

educe)

educe) and adjust them using

the   or 

 buttons. (The screen will change to your desired setting).

4. Repeat step 3 to adjust other options.
5. Press the OK button to return to normal screen, press the MENU

MENU

MENU

MENU

MENU button

to exit menu.

AV1/AV2 mode

YUV1/YUV2/

PC IN  mode

TIMERS SETTING

TIMERS SETTING

TIMERS SETTING

TIMERS SETTING

TIMERS SETTING

To select the sleep timer to turn off the unit automatically.
1. Press the MENU

MENU

MENU

MENU

MENU button.

2. Use 

 or 

 button to select the Set up

Set up

Set up

Set up

Set up menu, and then press 

 or

button to enter.

3. Use 

 or

 button to select Sleep timer

Sleep timer

Sleep timer

Sleep timer

Sleep timer.

4. Use

,

,

 or

 button to select the number of minutes (Off --> 5Min -->

(Off --> 5Min -->

(Off --> 5Min -->

(Off --> 5Min -->

(Off --> 5Min -->

10Min --> 15Min --> 30Min --> 45Min --> 60Min).

10Min --> 15Min --> 30Min --> 45Min --> 60Min).

10Min --> 15Min --> 30Min --> 45Min --> 60Min).

10Min --> 15Min --> 30Min --> 45Min --> 60Min).

10Min --> 15Min --> 30Min --> 45Min --> 60Min).

5. Press the OK button to return to normal screen, press the MENU

MENU

MENU

MENU

MENU button

to exit menu.

Note :

Note :

Note :

Note :

Note : You can also select simply by pressing the SLEEP

SLEEP

SLEEP

SLEEP

SLEEP button.

RESTORE SETTING

RESTORE SETTING

RESTORE SETTING

RESTORE SETTING

RESTORE SETTING

If you reset the AV to the factory settings, all your present settings on picture &
sound  will be erased and replaced by the factory’s default settings.  However,
picture setting in PC mode and parental setting will not be erased.
1. Press the MENU

MENU

MENU

MENU

MENU button.

2. Use

 or

 button to select the Set up 

Set up 

Set up 

Set up 

Set up menu, and then press

 or

button to enter.

3. Use

 or

 button to select the option of RESTORE SETTING and then

press   or

 button to set ‘ON’ for high detail in black portions.

Содержание PLV16320VM

Страница 1: ...08 09 1371 32 THIN LCD MONITOR WIDESCREEN...

Страница 2: ...t is warm and damp water droplets or condensation may form inside the unit When there is condensation inside the unit the unit may not function normally Let the unit stand for 1 2 hours before turning...

Страница 3: ...time 14 Refer all servicing to qualified service personnel Servicingisrequiredwhen the apparatus has been damaged in any way such as power supply cord or plug is damaged liquid has been spilled or obj...

Страница 4: ...component video output DVD only 480i 480p 720p 1080i are supported 11 Connecting an audio amplifier 12 Connecting a PC 12 Connecting the power cord 13 INSTALLATION 14 Removing the base stand 14 Mount...

Страница 5: ...rts pleasecallcustomerserviceat1 888 252 6252 or visit http www 1800customersupport com Remote control with battery x 1 Need More Help DO NOT RETURN THIS TO THE STORE Please call Customer Service at 1...

Страница 6: ...STANDBY ON button STANDBY ON button STANDBY ON button STANDBY ON button STANDBY ON button Turns the unit ON and puts the unit into STANDBY mode 11 11 11 11 11 YUV2 button YUV2 button YUV2 button YUV2...

Страница 7: ...ton Turns the unit on and off 7 7 7 7 7 MENU button MENU button MENU button MENU button MENU button Enter the Setup menu 8 8 8 8 8 INPUT INPUT INPUT INPUT INPUT button button button button button Sele...

Страница 8: ...put Jacks AV IN2 Audio Input Jacks AV IN2 Audio Input Jacks Left Right Left Right Left Right Left Right Left Right 17 17 17 17 17 AV IN2 Video Input jack AV IN2 Video Input jack AV IN2 Video Input jac...

Страница 9: ...s unit S VIDEO cable not included Make sure you connect both audio and video from the same VCR to the same input AV1 AV2 Note Note Note Note Note Please refer to the VCR s user manual for more informa...

Страница 10: ...Note Note Note Please refer to the VCR s user manual for more information CONNECTIONS CONNECTIONS CONNECTIONS CONNECTIONS CONNECTIONS Connecting a camcorder Connecting a camcorder Connecting a camcor...

Страница 11: ...cable not included Connect the right red and left white audio output from the source to the right red and left white input on this unit Audio cable not included Make sure you connect both audio and v...

Страница 12: ...NG AN AUDIO AMPLIFIER CONNECTING AN AUDIO AMPLIFIER CONNECTING AN AUDIO AMPLIFIER This connection allows you to use an audio amplifier and external speakers Connect the right red and left white audio...

Страница 13: ...mponents are connected correctly To prevent electrical shock match wide blade of plug to wide slot on outlet To prevent electrical shock match wide blade of plug to wide slot on outlet To prevent elec...

Страница 14: ...G THE BASE ST REMOVING THE BASE STAND AND AND AND AND WARNING The LCD Display is very fragile and must be protected at all times when removing the base stand Be sure that no hard or sharp objects or a...

Страница 15: ...l When headphones are connected no sound will come from the front speakers Note Note Note Note Note Avoid listening to sound at high levels for prolonged periods of time This may be harmful to you and...

Страница 16: ...Contrast Adjust to sharpen the picture quality The black portions of the picture become richer in darkness and the white become brighter Brightness Brightness Brightness Brightness Brightness Adjust t...

Страница 17: ...est corresponds to your viewing requirements Full Normal Zoom 1 Zoom 2 Note Note Note Note Note You can also select simply by pressing the FORMA FORMA FORMA FORMA FORMAT T T T T button In PC IN mode I...

Страница 18: ...SOUND MENU SOUND MENU SOUND MENU SOUND MENU SOUND MENU 1 Press the MENU MENU MENU MENU MENU button 2 Use or button to select the Sound Sound Sound Sound Sound menu 3 Use or button to select the optio...

Страница 19: ...button 2 Use or button to select the Set up Set up Set up Set up Set up menu and then press or button to enter 3 Use or button to select Sleep timer Sleep timer Sleep timer Sleep timer Sleep timer 4...

Страница 20: ...Only press OK button to set the password other button is not available 7 Press the MENU button to return to normal screen Note Note Note Note Note In AV1 AV2 mode only this option is available TV Rati...

Страница 21: ...ion mode for CH1 data TEXT1 Text mode for CH1 data CC2 Caption mode for CH2 data TEXT2 Text mode for CH2 data CC3 Caption mode for CH3 data TEXT3 Text mode for CH3 data CC4 Caption mode for CH4 data T...

Страница 22: ...LA ON SCREEN DISPLA ON SCREEN DISPLA ON SCREEN DISPLAY SETTING Y SETTING Y SETTING Y SETTING Y SETTING 1 Press the MENU MENU MENU MENU MENU button 2 Use or button to select the OSD OSD OSD OSD OSD men...

Страница 23: ...cables are connected firmly Make sure there are no unshielded electrical devices nearby that are causing interference Turn the unit off for 30 minutes then try it again No sound Black and white pictur...

Страница 24: ...Printed in China 811 173291 011...

Отзывы: