


Memory Management
(IX)
Select the Memory Management symbol in the Main
Menu and press “ ” to access the options.
/
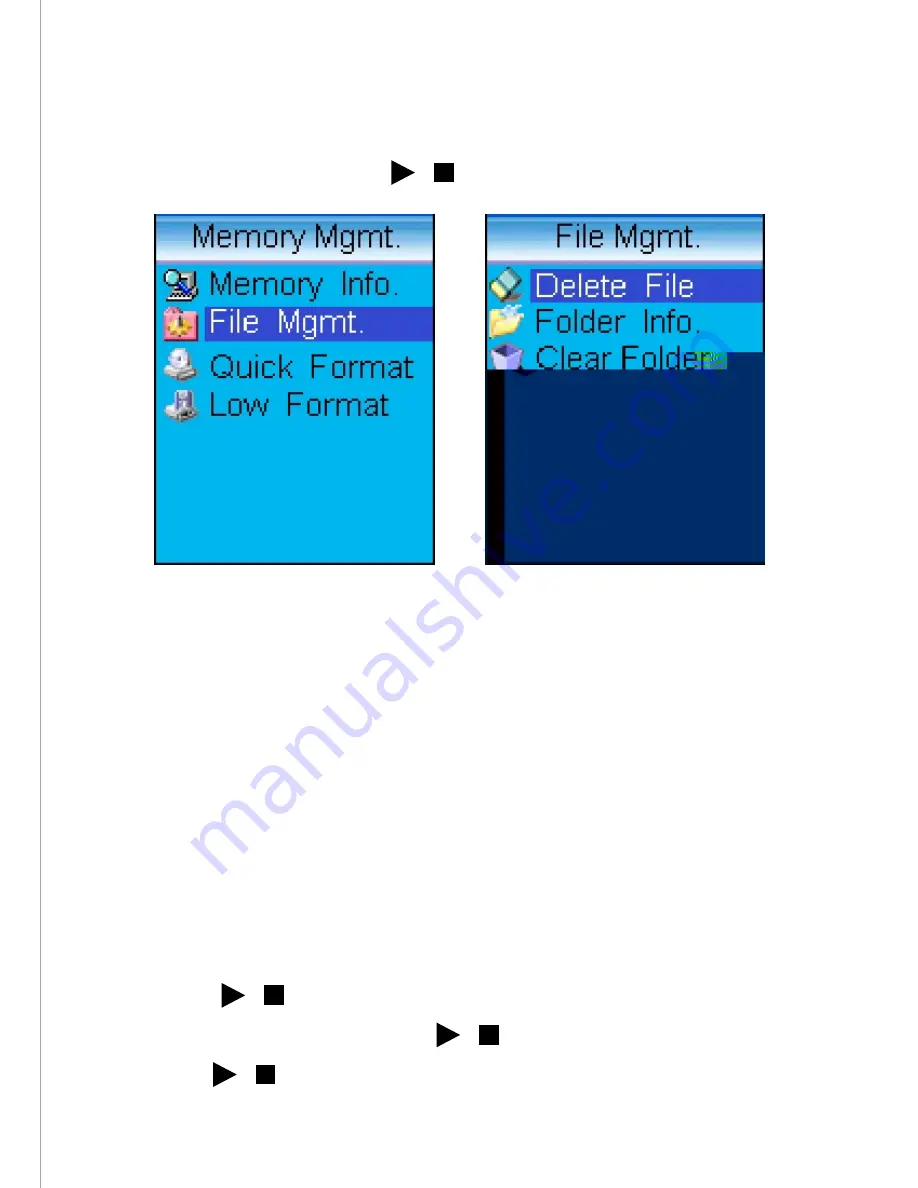
Fig. 37
Fig. 38
1. Memory Information:
Displays total unit memory and available memory.
2. File Management:
Select this option to delete files. (Fig. 38) Select
the “Delete File” option to delete a single file.
Press “Up/Down” to select a directory, and press
“ ” to access file list. Select the file to be
deleted and press “ ” Choose “OK” and press
“ ” again to confirm deletion.
/
/
/
46
Содержание Pic 'N Roll
Страница 1: ...User s Manual http www truly net Pic N Roll Digital Photo Audio Player...
Страница 11: ......
Страница 21: ...Fig 5 Fig 6 Fig 7 21...
Страница 36: ...Fig 21 Fig 22 Fig 23 36...
Страница 51: ...Fig 40 Tool Introduction 51...
Страница 52: ...52...
Страница 57: ...Fig 47 Click the Add button to add a new station Fig 48 2 Fig 48 57...
Страница 64: ...Fig 60 Using the Toolbar 64...
Страница 69: ...Some LRC files are available for download from some websites Fig 64 Fig 65 69...


