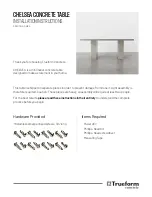
That should do it! We hope you enjoy your Chelsea Table. If you have any questions or need assistance,
feel free to reach us at 888-474-7977 or at [email protected].
1. The underside (subdeck) of the top has been
predrilled to accept mounting screws. Two
locations under the top will be marked with
colored circles that correspond to similar
marks on legs’ mounting brackets. This is done
to ensure the top is orientated properly and the
holes align with the brackets. Identify these
marks on both the top and base.
2
.
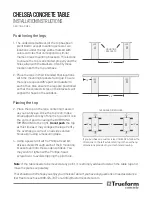
Place the legs in their intended final locations
with the mounting brackets facing up. Ensure
the legs are spaced 26” apart and parallel to
each other. Also ensure the legs are positioned
so that the colored circles on the brackets will
align with those on the subdeck.
Positioning the legs
Placing the top
26”
MOUNTING
BRACKETS
OVERHANG DIMENSIONS
26”
15”
CHELSEA CONCRETE TABLE
INSTALLATION INSTRUCTIONS
SKU: TBL-CHEL
2. Place the top on the legs, centering it as well
as you can by eye. Once the top is on, make
small adjustments by lifting the top until it is in
the correct position using the OVERHANG
DIMENSIONS to the right.
Do not push
the top
at this time as it may collapse the legs. Verify
the overhang is correct on all sides and all
holes align using a measuring tape.
4. Using a power drill with a Phillips-Head bit,
drives screws through each of the 8 mounting
brackets and into the wooden subdeck. You
may wish to tighten with a Phillips-head
screwdriver to avoid stripping the pilot hole.
Note
: If the table needs to be moved at any point, it is strongly advised to detach the table top and
move the pieces separately.
26”
15”
10”
10”
10”
10”
15”
A
A
LEG
LEG
B
A
LEG
LEG
B
B
If you purchased a custom-sized CHELSEA, follow the
directions to the left while referring to the overhang
dimensions provided in your technical drawing.


