EN
9
pressure switch TDP DS
Setting the switch-on pressure
Warning
Setting the switch-on pressure may only be carried out
by specialist companies for water installation.
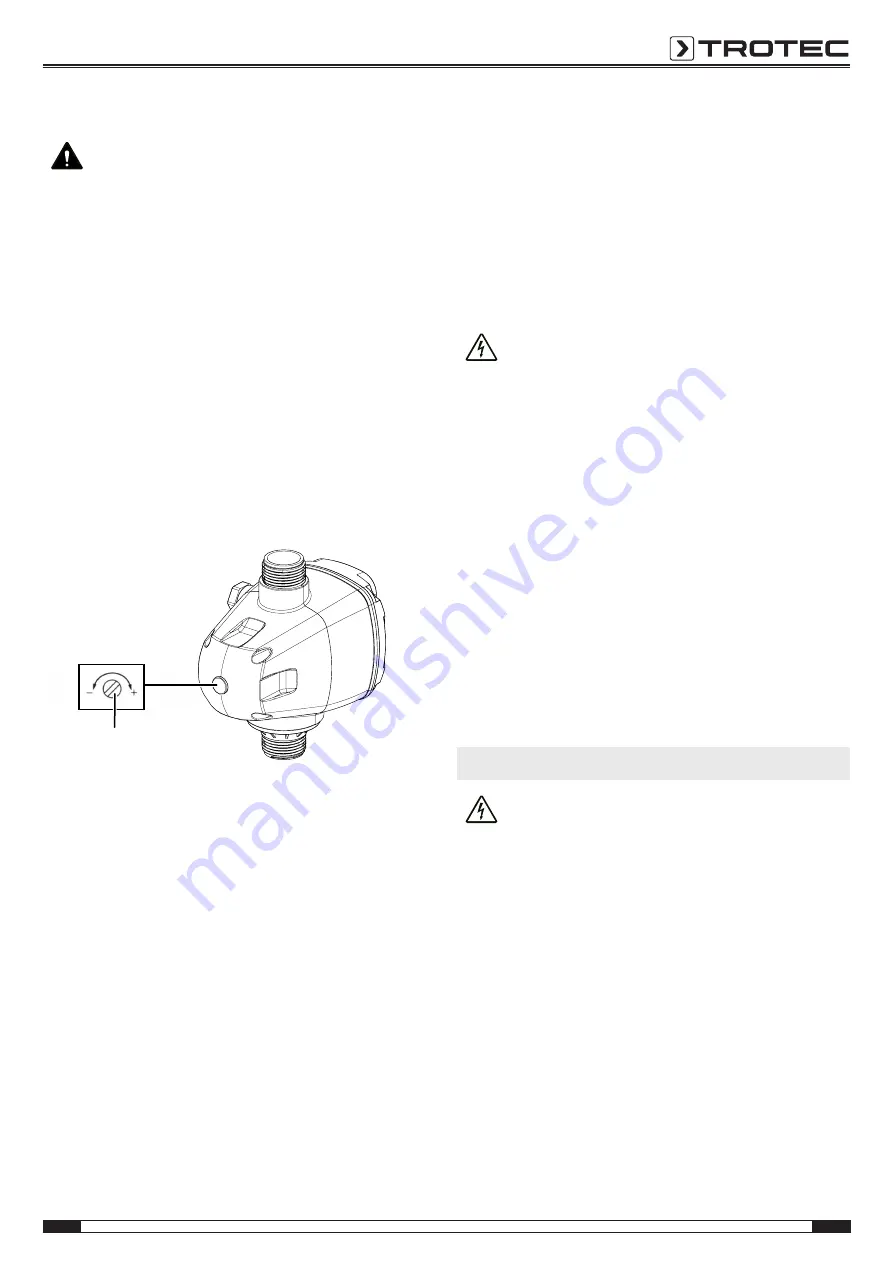
The device is equipped with a pressure setting screw (4). The
setting screw is used to set the pressure value at which the
device switches on the connected pump. For more detailed
information about the required pump pressure please refer to
the start-up chapter.
Please proceed as follows to set the switch-on pressure:
1. Turn the pressure setting screw (4) towards the minus sign
to reduce the switch-on pressure. The minimum switch-on
pressure (screw all the way to the minus sign) is 1.5 bar.
ð
Every 360° turn decreases the pressure for approx.
0.2 bar.
2. Turn the pressure setting screw (4) towards the plus sign
to increase the switch-on pressure. The maximum switch-
on pressure (screw all the way to the plus sign) is 2.5 bar.
ð
Every 360° turn increases the pressure for approx.
0.2 bar.
4
Note for setting the switch-on pressure:
•
The switch-on pressure is set too low:
– When the tap is opened, the pump does not start
operating.
– The LED
Power On
(9) is illuminated in green.
– Turn pressure setting screw towards the plus sign.
•
The switch-on pressure is set too high:
– The dry-run protection is activated and the pump does
not start operating.
– The LEDs
Power On
(9) and
Pump On
(8) are illuminated
(green / yellow).
– Turn pressure setting screw towards the minus sign.
•
Switch-on pressure is set close to the maximum pressure
of the pump:
– The pump operates continuously or frequently switches
on or off.
– The LEDs
Power On
(9),
Pump On
(8) and
Alarm
(7) are
illuminated (green / yellow / red).
– Turn pressure setting screw 2.5 times towards the
minus sign.
– The pressure is reduced by approx. 0.5 bar.
Shutdown
Warning of electrical voltage
Do not touch the mains plug with wet or damp hands.
If you like to disconnect the pressure switch from the water
network, (e.g. for cleaning, maintenance or storing during
winter), proceed as follows:
1. Disconnect the pressure switch from the power supply by
plugging the mains plug out of the mains socket.
2. Afterwards, disconnect the power supply of the pump from
the pressure switch.
3. Open a tap that is connected to the pressure switch to
release any remaining water pressure.
4. Disconnect the connection on the water outlet of the
pressure switch. Afterwards, disconnect the connection on
the water inlet of the pressure switch.
5. Empty the pressure switch (and your pump as well).
Carefully dry pressure switch and power cable.
Note
During winter, store pressure switch (and your pump)
in a dry room and protected against frost.
Errors and faults
Warning of electrical voltage
Do not touch the mains plug with wet or damp hands.
•
Switch off the device.
•
Hold onto the mains plug while pulling the power cable out
of the mains socket.
The device has been checked for proper functioning several
times during production. If malfunctions occur nonetheless,
check the device according to the following list.
The connected pump does not start operating:
•
Check the power connection.
•
Check the power cable and mains plug for damage.
•
Check the on-site fusing.
•
Check the necessary initial pressure of the pump.
•
Check whether enough water is available and make sure
the water can be sucked by the pump without any
problems.


