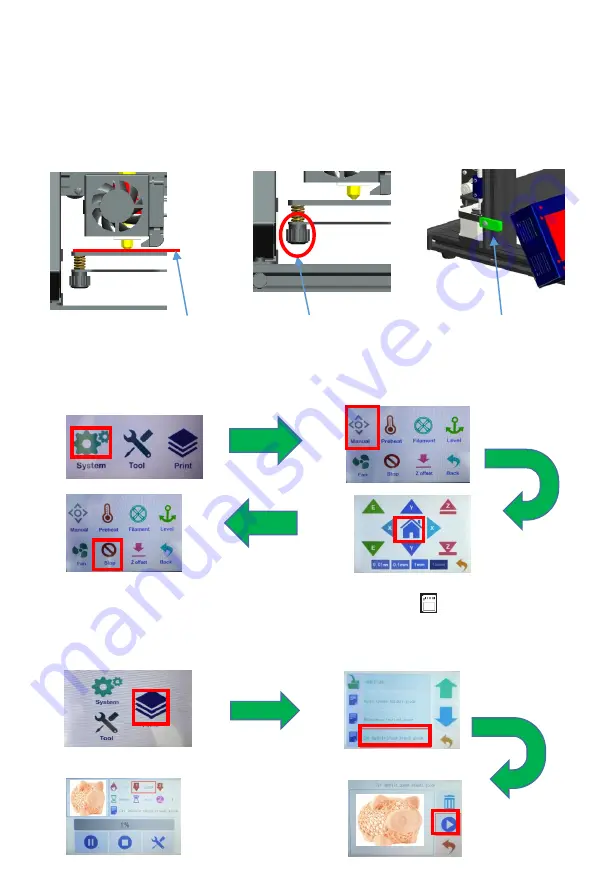
3. Verify platform flatness and print test
Step 2: click "tool"→ "manual" →"return to zero”, then the three axis will automatically
return to the origin, and then click" emergency stop "to close the motor.
Step 1: move the printing head to the nearest boundary point of the platform by hand, as
shown in FIG. (1). Then place an A4 paper between the nozzle and the platform (2).Then
move the printing head to another boundary point of the platform, and repeat the above
operation to adjust the leveling, until the four points around the platform and the middle
of the platform have been leveling completed (if leveling nut adjustment fails to meet
leveling, it can be adjusted via upper and lower adjustment of z-axis adjusting block, and
then fine-tuning with leveling nut until the platform leveling).
(
1
)
A4 paper
(
2
)
Leveling nuts
(
3
)
Z axis-
adjustment parts
Finally, plug in the SD card and click “print”.
(
attention direction
)
The model has
been sliced and attached to the card. Choose one of them to print, such as "Cat (mobile
phone stand)“, After waiting for the temperature to reach the target temperature, it will
automatically start printing.


