background image

Section 4  BASIC OPERATION

4-6

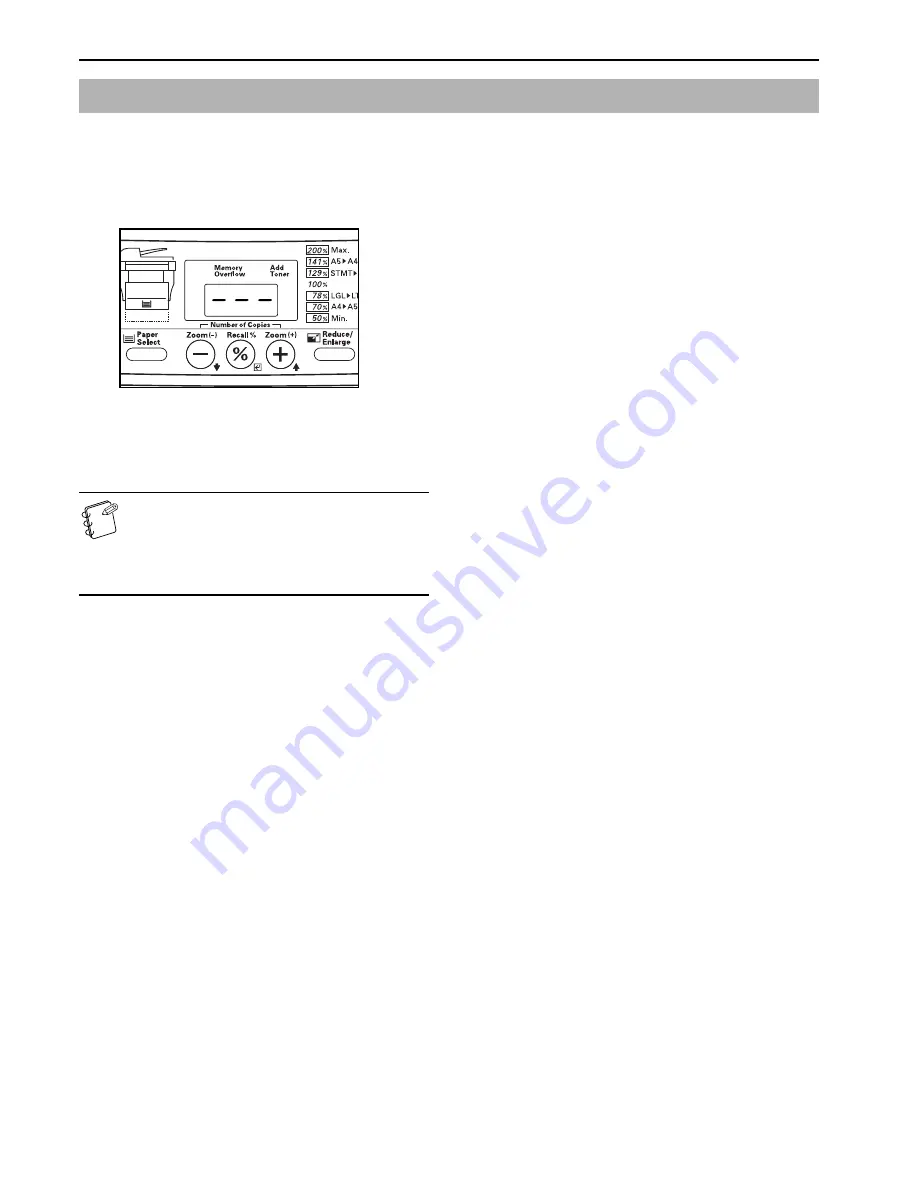
The Low Power mode automatically puts the copier into a state of 
sleep if no operation has been performed on the copier for a pre-set 
period of time (between 1 minute and 240 minutes). “---” will be 
shown on the copy quantity/magnification display, but everything 
else on the operation panel will go out.
The factory default setting is for 15 minutes.

To enable copying again, press any one of the keys on the operation 
panel. If the optional Document Processor is installed on your 
copier, copying will be automatically enabled as soon as you set an 
original in the Document Processor.

NOTES

• It is possible to set the amount of time before the Low 

Power mode engages. (See “

Low Power Mode Time

” 

on page 6-4.)

• Even while the Low Power mode is engaged, the 

optical lamp will be dimly lit.

Low Power mode

Содержание DC 2315

Страница 1: ...Instruction Handbook DC 2315 Digital Multifunctional System ...

Страница 2: ...ing recording or by any information storage and retrieval system without permission in writing from the Publisher Legal Restriction On Copying It may be prohibited to copy copyrighted material without permission of the copyright owner It is prohibited under any circumstances to copy domestic or foreign currencies Copying other items may be prohibited ...

Страница 3: ...section contains explanations on using the various convenient functions of this copier Section 6 COPY DEFAULT SETTINGS This section contains explanations on changing the various default settings available for adjusting the copier to fit your copy needs Section 7 OPTIONAL EQUIPMENT This section contains explanations on the optional equipment that are available for use with this copier Section 8 TRO...

Страница 4: ...orderline 5 6 Selecting the order of 4 in 1 layout 5 7 Sort mode 5 9 Program function 5 10 Registering the program 5 10 Using programmed settings to make copies 5 10 Section 6 COPY DEFAULT SETTINGS 6 1 Available default items 6 1 Accessing and changing the default settings 6 6 Checking the total copy count and printing out a report 6 12 Section 7 OPTIONAL EQUIPMENT 7 1 Document Processor 7 1 Paper...

Страница 5: ...oductions of photographs Image quality selection See page 4 1 4 Saving on toner use Eco Copy mode See page 4 1 5 Making one copy from either two or four originals Layout modes See page 5 1 6 Sorting automatically Sort mode See page 5 9 7 Memorizing frequently used settings Program function See page 5 10 8 A full range of optional equipment is available Document Processor See page 7 1 Paper Feeder ...

Страница 6: ... consumption is automatically reduced after a certain amount of time elapses since they were last used and they must also support a Sleep Mode where power consumption is reduced to a minimum when there is no activity within a set amount of time This product is equipped with the following features as a result of its compliance with International Energy Star Program standards Low Power Mode The devi...

Страница 7: ...tion includes information on actions which must be performed Specifics of the required action are indicated inside the symbol Please contact your service representative to order a replacement if the safety warnings in this Operation Guide are illegible or if the guide itself is missing fee required DANGER Indicates that serious injury or even death will very possibly result from insufficient atten...

Страница 8: ...vi ...

Страница 9: ...BE SUFFICIENTLY CAREFUL to avoid fire or electric shock when removing a paper jam or when replacing toner Label 1 High temperature inside Do not touch parts in this area because there is a danger of getting burned NOTE DO NOT remove these labels Label 2 High temperature inside Do not touch parts in this area because there is a danger of getting burned ...

Страница 10: ...ntilated locations During copying some ozone is released but the amount does not cause any ill effect to one s health If however the copier is used over a long period of time in a poorly ventilated room or when making an extremely large number of copies the smell may become unpleasant To maintain the appropriate environment for copy work it is suggested that the room be properly ventilated Power s...

Страница 11: ...plug from the outlet to avoid the danger of fire or electrical shock Then contact your service representative DO NOT remove or connect the power plug with wet hands as there is a danger of electrical shock ALWAYS contact your service representative for maintenance or repair of internal parts CAUTION DO NOT pull the power cord when removing it from the outlet If the power cord is pulled the wires m...

Страница 12: ...iner out of the reach of children If toner happens to spill from the toner container avoid inhalation and ingestion as well as contact with your eyes and skin If you do happen to inhale toner move to a place with fresh air and gargle thoroughly with a large amount of water If coughing develops contact a physician If you do happen to ingest toner rinse your mouth out with water and drink 1 or 2 cup...

Страница 13: ...tion of the product by user no radiation can leak from the machine This machine is classified as Class 1 laser product under IEC 60825 CAUTION Performance of procedures other than those specified in this manual may result in hazardous radiation exposure This label is attached to the laser scanner unit inside the machine and is not in a user access area The labels shown below are attached on the re...

Страница 14: ...e only functional switches and are not suitable for isolating the equipment from the power source VORSICHT Der Netzstecker ist die Hauptisoliervorrichtung Die anderen Schalter auf dem Gerät sind nur Funktionsschalter und können nicht verwendet werden um den Stromfluß im Gerät zu unterbrechen ...

Страница 15: ...its and methods of measurement for radio interference characteristics of information technology equipment EN55022 Class B Limits for harmonic currents emissions for equipment input current 16A per phase EN61000 3 2 Limitation of voltage fluctuations and flicker in low voltage supply systems for equipment with rated current 16A EN61000 3 3 Safety of information technology equipment including electr...

Страница 16: ...1 8 ...

Страница 17: ... this cover when you need to replace the toner container or if a paper jam occurs inside the copier 6 Front cover Open this cover when you need to replace the toner container or if a paper jam occurs inside the copier 7 Process Unit Take this unit out when you need to replace the toner container or if a paper jam occurs inside the copier 8 Toner container 9 Lock lever Operate this lever when you n...

Страница 18: ...ck Use this lock when loading Folio or Oficio II size paper in the drawer 16 Copy storage table Finished copies can be ejected and stored on this table The copy storage table has a storage capacity of 150 sheets of standard copy paper 80 g m 17 Multi bypass tray Set paper on this tray when copying onto small size or special paper 18 Multi bypass extension Pull out this extension when using the mul...

Страница 19: ...cument Processor 24 Right cover anchor pin This pin must be removed and the right cover opened in order to access the slot for installing additional memory If you need to add additional memory contact your service representative or an authorized service center 20 21 22 23 24 IMPORTANT Be sure to hold both the front and rear sides of the copier when carrying it as shown in the illustration Be sure ...

Страница 20: ...ise the number of copies to be made as well as to increase the currently selected copy magnification ratio Press this key as well during default settings in order to select the desired default item or setting 8 Number of Copies Zoom key Press this key when you want to lower the number of copies to be made as well as to decrease the currently selected copy magnification ratio Press this key as well...

Страница 21: ...er enters at the end of warm up or when the Reset Power key is pressed The upper drawer is selected as the source for paper feed the number of copies to be made is set to 1 and Text Photo is selected as the image quality mode If the optional Paper Feeder is installed on your copier it is possible for you to change which drawer will be automatically selected in the initial mode See Default Drawer o...

Страница 22: ...Section 2 NAMES OF PARTS 2 6 ...

Страница 23: ...t out before loading the paper into a drawer or setting it on the multi bypass tray Failure to do so may result in a paper jam Loading paper into a drawer Standard copy paper 60 g m 90 g m thick paper 90 g m 105 g m recycled paper or color paper can be loaded into each drawer Up to 250 sheets of standard copy paper 80 g m can be loaded into each drawer at one time The sizes of paper that can be lo...

Страница 24: ...idth of the paper being loaded in the drawer NOTES The paper sizes are marked on the bottom of the drawer The factory default setting is for A4 Letter size paper 4 Set the paper in the drawer so that the leading edge is aligned against the paper stopper but making sure that none of the paper gets caught on the overhanging tabs IMPORTANT ALWAYS adjust the paper stopper and paper width guides BEFORE...

Страница 25: ...ture Adjusting the paper stopper for Folio or Oficio II size paper Perform the following procedure to adjust the paper stopper when you want to load Folio or Oficio II size paper into the drawer 1 Remove the stopper extension lock from the paper stopper 2 Slide the paper stopper towards the rear of the drawer until the grooves 1 that are cut into the paper stopper are aligned with the rear edge of...

Страница 26: ... use the operation panel and select the size of paper that is loaded in the drawer 1 Press down on the Paper Select key for at least 3 seconds The first default item for paper size selection will be shown 2 Press the Number of Copies Zoom or Number of Copies Zoom key until F12 Default item Upper Drawer Paper Size is shown NOTE To select the size of paper loaded into the optional Paper Feeder make ...

Страница 27: ...ric Specification A4 A6R and Folio The types of paper and the number of sheets that can be set on the multi bypass tray at one time are as follows Standard paper 80 g m 50 sheets Thick paper 120 g m 25 sheets Thick paper 160 g m 10 sheets OHP transparencies 1 sheet IMPORTANT After setting paper on the multi bypass tray be sure to use the operation panel to select the size of that paper See page 3 ...

Страница 28: ...ti bypass tray when you are planning to use that tray to feed paper DO NOT leave paper on the multi bypass for long periods of time When you are setting paper on the multi bypass make sure that the side to be copied onto is facing upward When using 8 1 2 14 Legal 8 1 2 13 Oficio II or Folio size paper it is recommended that you load that paper into the drawer s and have paper fed from there If you...

Страница 29: ... Tray Paper Size is shown 3 Press the Recall Enter key 4 Press the Number of Copies Zoom or Number of Copies Zoom key to select the appropriate paper size The displayed code numbers refer to the available paper sizes as explained in the following table IMPORTANT If you want to copy onto non standard size paper be sure to use the F15 Non Standard Size Paper Width default item to register the paper ...

Страница 30: ...andard size paper be sure to use the F15 Non Standard Size Paper Width default item to register the paper size BEFORE attempting to select that size See page 6 3 3 Press the Recall Enter key The copier will return to a copy ready state Code number Size A4 A4 A5 A5 A6 A6 Fo Folio Lg Legal 8 1 2 14 Lt Letter 8 1 2 11 St Statement 5 1 2 8 1 2 o2 Oficio II 8 1 2 13 XXX Non standard size paper The XXX ...

Страница 31: ...en this mode is selected copying will be carried out at a higher fixing temperature and the copy speed will be lowered in order to ensure efficient fixing of the toner to the copy paper 1 Press the Thick Paper key The Thick Paper indicator will light 2 Perform the standard copying procedure NOTE The copy speed will be somewhat lowered in the Thick Paper mode ...

Страница 32: ...1 sheet of special paper should be stored there at one time 1 Open the face up tray located at the rear of the copier 2 Perform the standard copying procedure Finished copies will be ejected onto the face up tray NOTES Finished copies will be ejected face up Copies will be stored in reverse order on the face up tray IMPORTANT ALWAYS be sure to close the face up tray after use NEVER leave the face ...

Страница 33: ...ity modes Auto Exposure Adjustment mode Make sure the Auto Exp indicator is lit Text Photo mode Originals with both text and photos Make sure the Text Photo indicator is lit Photo mode Originals with mainly photos Make sure the Photo indicator is lit Text mode Originals with mainly text Make sure the Text indicator is lit Selecting the Eco Copy indicator and thereby the Eco Copy mode will cause th...

Страница 34: ...om 1 up to 99 in one step or the Number of Copies Zoom key to shift the number of copies to be made from 99 to 1 Make sure the desired number of copies to be made is shown on the copy quantity magnification display The setting can be made to any number up to 99 NOTE It is possible for you to limit the number of copies or copy sets that can be made at one time See Copy Limit on page 6 3 7 Setting a...

Страница 35: ...e has a storage capacity of 150 sheets of standard copy paper 80 g m CAUTION If the copier will not be used for a short period of time overnight etc turn the power switch OFF If it will not be used for an extended period of time vacations etc remove the power plug from the outlet for safety purposes during the time the copier is not in use ...

Страница 36: ... magnification display and the symbol will light 2 Press the Number of Copies Zoom or the Number of Copies Zoom key as appropriate to change the displayed magnification ratio to the desired ratio 3 Press the Recall Enter key The new magnification ratio will be registered and the copy quantity magnification display will return to showing the number of copies to be made Making enlarged and reduced c...

Страница 37: ...own in order each time you press the Reduce Enlarge key NOTE The available magnification ratios will be shown in the following order 100 78 70 50 200 141 and then 129 3 Press the Recall Enter key The new magnification ratio will be registered and the copy quantity magnification display will return to showing the number of copies to be made Available magnification ratios in the order they can be sc...

Страница 38: ...on panel will go out The factory default setting is for 15 minutes To enable copying again press any one of the keys on the operation panel If the optional Document Processor is installed on your copier copying will be automatically enabled as soon as you set an original in the Document Processor NOTES It is possible to set the amount of time before the Low Power mode engages See Low Power Mode Ti...

Страница 39: ...ion panel is turned off To enable copying again press any one of the keys on the operation panel More about the Off mode The Off mode is a power saving feature which automatically turns most of the power to the copier off when a certain time elapses without any operation being performed Copiers are generally in a standby mode more than they are in actual operation so power consumption during this ...

Страница 40: ...Section 4 BASIC OPERATION 4 8 ...

Страница 41: ...e default setting for the borderline See Borderline on page 6 3 Inch specification Only Letter 8 1 2 11 and Statement 5 1 2 8 1 2 size originals can be used in this mode Only Letter 8 1 2 11 size copy paper can be used in this mode Metric specification Only A4 and A5 size originals can be used in this mode Only A4 size copy paper can be used in this mode 2 in 1 Use this mode when you want to copy ...

Страница 42: ...tting the originals The following illustrations indicate how the orientation of the original will affect the resulting copies When setting the originals on the platen NOTE Make sure the originals are set so that the first page is scanned first ...

Страница 43: ...Section 5 COPY FUNCTIONS 5 3 When setting the originals in the Document Processor NOTE Make sure the originals are set so that the first page is scanned first ...

Страница 44: ...tional Document Processor is installed on your copier all of the originals set there will be scanned and the copy operation will start 4 Once scanning of the first original is completed 1 the number of originals already scanned will be shown Set the next original and press the Start key Carry out this step as well for the rest of the originals that you want to copy 5 Once you have finished scannin...

Страница 45: ...en setting the originals in the Document Processor NOTES Make sure the originals are set so that the first page is scanned first It is possible to select the order in which the images will appear within the copy page See Selecting the order of 4 in 1 layout on page 5 7 1 Press the 2in1 4in1 key until the 4in1 indicator lights NOTE It is possible for you to change the type of borderline See Selecti...

Страница 46: ...n Set the next original and press the Start key Carry out this step as well for the rest of the originals that you want to copy 5 Once you have finished scanning all of the originals press the Recall Enter key or the 2in1 4in1 key Copying will start Selecting the borderline Perform the following procedure when you want to change the type of borderline 1 Press down on the 2in1 4in1 key for at least...

Страница 47: ...ll return to a copy ready state Selecting the order of 4 in 1 layout Perform the following procedure if you want to select the order in which the images will appear within the copy page in the 4 in 1 mode 1 Press down on the 2in1 4in1 key for at least 3 seconds 2 Press the Number of Copies Zoom or the Number of Copies Zoom key until F17 Default item 4 in 1 Layout Order is shown 3 Press the Recall ...

Страница 48: ...mber that corresponds to desired layout order 1 4 is shown The displayed code numbers refer to the available layout orders as explained in the following table 5 Press the Recall Enter key The displayed numbers will flash and the copier will return to a copy ready state 1 1 2 3 4 3 1 2 3 4 2 1 3 2 4 4 1 3 2 4 ...

Страница 49: ...ll be selected automatically once originals are set there If the optional Document Processor is installed on your copier all of the originals set there will be scanned and the copy operation will start 4 Once scanning of the first original is completed 1 the number of originals already scanned will be shown Set the next original and press the Start key Carry out this step as well for the rest of t...

Страница 50: ... want to register as the program 2 Press down on the Program key for at least 3 seconds 3 The Program indicator will flash twice and registration of the program is complete NOTES Copying is now possible at any time using the settings that were registered as the program If you want to clear the settings that are currently registered as the program simply press the Reset Power key while the Program ...

Страница 51: ...ist of the currently selected default settings 6 6 F02 Image Quality Mode Sets the image quality mode that will be selected at the time the copier is turned on 1 Auto exposure adjustment mode 2 Text Photo mode 3 Photo mode 4 Text mode 5 Eco copy mode 6 6 6 9 F03 Exposure Steps Changes the number of exposure steps during manual adjustment of the copy exposure in all image quality modes except for t...

Страница 52: ...ffusion 2 Dithering 6 6 6 9 F10 Default Drawer Sets the location for feeding paper that will be automatically selected at the end of warm up or when the Reset Power key is pressed If the optional Paper Feeder is not installed on your copier this default setting will not appear 1 Upper drawer 2 Paper Feeder 6 6 6 9 F11 Auto Drawer Switching ON OFF Sets whether the Auto Drawer Switching function see...

Страница 53: ...8 F17 4 in 1 Layout Order Sets the default order in which the images will appear within the copy page in the 4 in 1 Layout mode see page 5 1 Select from between code numbers 1 and 2 when making copies length wise and from between code numbers 3 and 4 when making copies width wise Default 1 6 6 6 9 F18 Borderline Sets the default borderline that will be used in the Layout modes see page 5 1 1 None ...

Страница 54: ...see page 4 7 automatically engages It is also possible to disable the Off mode When the Off mode is turned OFF this default setting will not appear See Off Mode ON OFF If the Off mode is turned off under the Off Mode ON OFF setting this default setting will not appear It is recommended that you try to set a longer time interval before the Off mode engages if you use the copier frequently and to a ...

Страница 55: ...for off center printing 1 0 3 0 mm Adjustment is complete at the time of purchase 6 6 6 8 F30 Document Processor Skewed Feed Adjustment option Adjusts for skewed feeding of originals in the Document Processor If the optional Document Processor is not installed on your copier this default setting will not appear 6 6 6 6 mm Adjustment is complete at the time of purchase 6 6 6 10 F31 Folio Width Adju...

Страница 56: ...e Recall Enter key If you selected default items F01 or F32 The corresponding list report will be printed out Proceed to step 4 If you selected default items F11 F20 F21 or F25 Proceed to step 5 If you selected default item F15 Proceed to step 7 If you selected default item F16 Proceed to step 9 If you selected default items F27 F28 or F29 Proceed to step 11 If you selected default item F31 Procee...

Страница 57: ...o select either ON or OFF F11 F20 F21 and F25 6 Press the Recall Enter key The operation panel will return to the display in step 2 Once you are finished accessing default items proceed to step 19 7 Press the Number of Copies Zoom or the Number of Copies Zoom key to set the width of the paper It is possible to enter any number between 4 13 8 50 105 mm 216 mm F15 ...

Страница 58: ...nished accessing default items proceed to step 19 11 Press the Start key A pattern like that shown in the following illustration will be printed out F27 F28 and F29 NOTE Be sure that there is 8 1 2 11 Letter or A4 size paper in the location a drawer or the multi bypass tray to be adjusted 12 Fold the printed sheet up the middle and compare the true center with the printed center line 13 If the res...

Страница 59: ...tion panel will return to the display in step 2 Once you are finished accessing default items proceed to step 19 17 The selected setting will change each time you press the Number of Copies Zoom or the Number of Copies Zoom key Refer to the tables under Available default items on page 6 1 to select the number that corresponds to the desired default setting F02 F10 F12 F14 F17 F19 F22 F24 18 Press ...

Страница 60: ...nd make a copy 22 Refer to steps 1 and 2 and access the actual F30 default item 23 Press the Recall Enter key 24 Fold the printed sheet that you made in step 21 up the middle and compare the true center with the printed center line 25 If the result is as shown in example 1 increase the setting If the result is as shown in example 2 decrease the setting NOTE For each tenth 0 1 that you increase the...

Страница 61: ... and make a copy 30 Refer to steps 1 and 2 and access the actual F26 default item 31 Press the Recall Enter key 32 Arrange the original and copy one on top of the other to verify the direction and amount of the shift If the result is as shown in example 1 increase the setting If the result is as shown in example 2 decrease the setting NOTE It is possible to change the setting to any number step be...

Страница 62: ...shown in three portions in the following order In this example the total number of copies made is 1 234 NOTE If you press the Start key while the total copy count is being shown the Total Count Report will be printed out If you are going to print out the Total Count Report make sure that there is 8 1 2 11 Letter or A4 paper either loaded in a drawer or set on the multi bypass tray Sample Total Cou...

Страница 63: ...ound with clips or staples If you must use such originals be sure to remove the clips or staples and straighten any curls wrinkles or creases before setting them in the Document Processor Failure to do so may result in the originals being misfed Originals with cut out sections or that have a slippery surface on either side Originals on which any correction fluid is still wet Originals with strong ...

Страница 64: ...he sheets before setting them in the Document Processor 2 Arrange the originals in order and set them face up on the original table Slide the leading edge of the originals securely into the Document Processor as far as they will go IMPORTANT Be sure to set only a number of originals that is LESS than the level indicator on inside of the rear insert guide Setting more than the acceptable number of ...

Страница 65: ... eject table If there are any originals left on either table they may fall off the copier when the Document Processor is opened 2 Set the original to be copied face down Be sure to align the original flush up against the left rear corner of the platen 3 Close the Document Processor IMPORTANT DO NOT put undue pressure on the Document Processor when you close it Doing so might break the platen glass...

Страница 66: ...YS detach it before attempting to pick up or transport the copier Additional Memory It is possible to increase the memory in your copier Adding additional memory will increase the number of originals that can be scanned at one time An additional 64 MB or 128 MB is effective when copying from originals with photos due to their normally low compression ratio Available memory 16 MB 32 MB 64 MB and 12...

Страница 67: ...or report there was no 8 1 2 11 or A4 size paper available Press the Paper Select key to select the source of paper feed and then press the Start key Print out will be performed onto paper from the selected location E31 appears on the copy quantity magnification display The amount of waste toner in the copier has reach the acceptable limit Contact your service representative or an authorized servi...

Страница 68: ...magnification display The left cover to the Document Processor is open Close the cover securely J and a number appear on the copy quantity magnification display A paper jam has occurred Refer to If paper jams on page 8 3 and remove the jammed paper 8 3 The Add Toner indicator lights The toner supply has run low Copying will still be available for awhile but will then become impossible Replace the ...

Страница 69: ... jam has occurred in the Paper Feeder Cautions Do not reuse jammed paper If paper is torn during removal be sure to remove any loose scraps of paper from inside the copier Failure to do so could cause another paper jam later Once all jammed paper has been removed warm up will begin The error indications will disappear as well and the copier will return to the same settings as prior to the paper ja...

Страница 70: ...per is visible pull it out towards you If the paper is not visible at all perform the Paper jam in a drawer procedure If the paper has been fed to the rear of the copier but the leading edge is not visible perform the Paper jam in the paper eject section procedure 5 Set the Process Unit into the copier by aligning the pins on both sides of the Process Unit with the guides inside the copier and the...

Страница 71: ...rently being used 2 Remove the jammed paper NOTE If a paper jam occurs in the optional Paper Feeder the procedure to remove jammed paper is the same as with the included drawer 3 Push the drawer back in firmly 4 Open and then close the upper front cover The error indications will go out ...

Страница 72: ... face up tray 2 Remove the jammed paper 3 Close the face up tray 4 Open and then close the upper front cover The error indications will go out CAUTION The copier s fixing unit is extremely hot Take sufficient care when working in this area as there is a danger of getting burned ...

Страница 73: ... indications will go out 3 Reset the paper on the multi bypass tray Original jam in the optional Document Processor 1 Remove all of the originals remaining on the original table 2 Open the left cover to the Document Processor 3 Remove the jammed original If the original is caught in the rollers or difficult to remove at all proceed to the next step 4 Open the Document Processor ...

Страница 74: ...Section 8 TROUBLESHOOTING 8 8 5 Remove the jammed original 6 Close the Document Processor 7 Reset the originals ...

Страница 75: ... the overall exposure level perform the Auto Exposure Adjustment procedure 6 1 Is the copier in either the Photo Text Photo or Text mode Adjust the exposure to the correct level using the copy exposure adjustment keys 4 2 To adjust the overall exposure perform the corresponding exposure adjustment procedure 6 1 Is the copier in the Eco Copy mode Select an image quality mode other than the Eco Copy...

Страница 76: ...ting originals in the optional Document Processor align the original insert guides securely before setting the originals 7 2 Paper jams occur often Is the copy paper loaded properly in the drawer Load the paper properly 3 1 Is the copy paper curled folded or wrinkled Replace the copy paper with new paper Is there any jammed paper or loose scraps of paper remaining inside the copier Carry out the a...

Страница 77: ...ion as shown in the illustration with a soft cloth dampened with alcohol or mild detergent IMPORTANT Never use thinner or other organic solvents to clean the Document Processor If copies appear soiled while using the optional Document Processor such as black lines appearing on the copy image the slit glass a is dirty Clean the slit glass with a dry soft cloth or one dampened with alcohol Never use...

Страница 78: ... replace the toner container 1 Open the upper front cover 2 Open the front cover 3 Lift the Process Unit together with the toner container out of the copier IMPORTANT Place the Process Unit on a clean level surface The drum in the Process Unit is sensitive to light Never expose the drum even to normal office lighting 500 lux for more than five minutes Never stand the Process Unit on end Replacing ...

Страница 79: ...remove the old toner container Put it in the supplied plastic bag and dispose of it 6 Shake the new toner container horizontally 5 or 6 times to ensure that the toner is evenly distributed inside 7 Remove the orange protective seal 8 Set the new toner container into the Process Unit CAUTION DO NOT attempt to incinerate the toner container Dangerous sparks may cause burns CAUTION DO NOT attempt to ...

Страница 80: ... CLEANER HOME POSITION IMPORTANT After cleaning make sure you restore the charger cleaner to its home position If the charger cleaner is not restored to the CLEANER HOME POSITION a black band will appear on subsequent copies 12 Use the cleaning cloth that is supplied with the new toner kit to wipe off any paper dust and dirt that has accumulated on the metal registration roller A inside the copier...

Страница 81: ... MAINTENANCE AND OPERATION INFORMATION 9 5 14 Close the front cover 15 Close the upper front cover After use ALWAYS dispose of the toner container in accordance with Federal State and Local rules and regulations ...

Страница 82: ... MB Resolution Reading 600 dpi 600 dpi Writing 600 dpi equivalent 600 dpi Paper feed system Automatic feeding from drawer 250 sheet capacity drawer 80 g m or from the multi bypass tray 50 sheet capacity 80 g m Acceptable copy paper Paper weights Drawer 60 g m 90 g m In the Thick Paper mode 90 g m 105 g m Multi bypass tray 60 g m 90 g m In the Thick Paper mode 90 g m 163 g m Paper types Drawer Stan...

Страница 83: ...r feed system Automatic feeding from drawer 250 sheet capacity drawer 80 g m Paper sizes 8 1 2 14 Legal 8 1 2 11 Letter 8 1 2 13 Oficio II A4 vertical A5 vertical and Folio Acceptable copy paper Paper weights 60 g m 90 g m In the Thick Paper mode 90 g m 105 g m Paper types Standard copy paper recycled paper and color paper Power source Via electrical connection to the copier Dimensions W D H 14 7 ...

Страница 84: ...onds Transition time to the Low Power mode at time of purchase 15 minutes Transition time to the Off and Sleep modes at time of purchase 30 minutes Duplex 2 sided copying Not available Paper feed Recycled paper made from 100 recycled pulp may be used with this product Environmental Specifications ...

Страница 85: ...t originals one by one Up to 50 originals can be set at one time Paper Feeder An extra drawer can be added below the drawer that is included with this copier The type sizes and amount of paper that can be loaded in the Paper Feeder is the same as with the included drawer Additional Memory By adding additional memory will it is possible to increase the number of originals that can be scanned at one...

Страница 86: ...ted Function selected second 1 2 3 4 5 6 7 8 9 10 11 12 Function selected first 1 Image quality Text mode U1 2 Image quality Photo mode U1 3 Image quality Text Photo mode U1 4 Image quality Eco copy mode U1 5 Copy exposure Manual adjustment U1 6 Copy exposure Auto Exposure Adjustment mode U1 7 Zoom mode U1 U2 8 Preset Zoom mode U1 U2 9 Program function 10 Thick Paper mode U1 11 Sort mode U1 12 Lay...

Страница 87: ...ecifications 9 8 Exposure Steps default setting 6 1 F Folio Width Adjustment default setting 6 5 Functions and settings combination chart 9 10 I If one of the following indications is displayed 8 1 If other trouble occurs 8 9 If paper jams 8 3 Image Quality Mode default setting 6 1 Initial mode 2 5 Installation precautions 1 2 L Layout modes 5 1 Loading paper 3 1 Low Power mode 4 6 Low Power Mode ...

Страница 88: ...tart copying 4 2 T Text Photo mode image quality mode 4 1 Text Photo Mode Exposure Adjustment default setting 6 1 Text mode image quality mode 4 1 Text Mode Exposure Adjustment default setting 6 2 Thick Paper mode 3 9 Toner container 9 2 Toner Coverage Report default setting 6 5 Total copy count 6 12 U Upper drawer 3 1 Upper Drawer Paper Size default setting 3 4 6 2 Upper Drawer Skewed Feed Adjust...

Страница 89: ...MEMO ...

Страница 90: ...E1 ...

Страница 91: ...UTAX GmbH Ohechaussee 235 22848 Norderstedt Germany ...

Отзывы: