


[3]
[ENGLISH] [fraNçaIS] [ESPaÑOL] [dEutScH]
[ItaLIaNO] [SVENSK] [daNSK] [POrtuGuÊS]
.com
TRITTONUSA
[4]
[ItaLIaNO] [SVENSK] [daNSK] [POrtuGuÊS]
Congratulations on your purchase of the SEE2 XPRESS DOCK XD300. The USB 2.0 Interface allows the SEE2 XPRESS
DOCK XD300 to work with most Windows and Macintosh computers. This easy-to-use solution will provide increased
productivity, expandability, and connectivity to both home and office users.
The SEE2 XPRESS DOCK XD300 provides a high-speed VGA port that can support an additional display with resolutions
up to 1600 x 1200. It also features 4 powered USB 2.0 ports, an Ethernet connection, and an audio input and output.
PACKAGE CONTENTS
• XD300 – USB Xpress Docking Station
• Driver CD
• AC Adapter
• USB A to Mini B Cable
• User Guide
Features
Compatible with any Notebook
with USB 2.0
Single USB Cable to connect all
your peripherals
1680 x 1050 Max Widescreen Resolution
4 High-Speed Powered USB Ports
Audio and Microphone Ports
10/100 Ethernet Port
Minimum PC System Requirements:
Windows 2000, XP 32/64 bit, Vista 32/64 bit, Windows 7 32/64 bit
Minimum System Requirements:
• Available USB 2.0 port
• Pentium 4/Celeron family or AMD K6/Athlon/Duron family with 1.5GHz
• 512MB RAM
* Aero mode requires Windows 7; Driver may not work with some tablet PCs
Minimum Mac System Requirements:
• Mac OS X 10.4.11 or later
• Available USB 2.0 Port
• Intel CPU
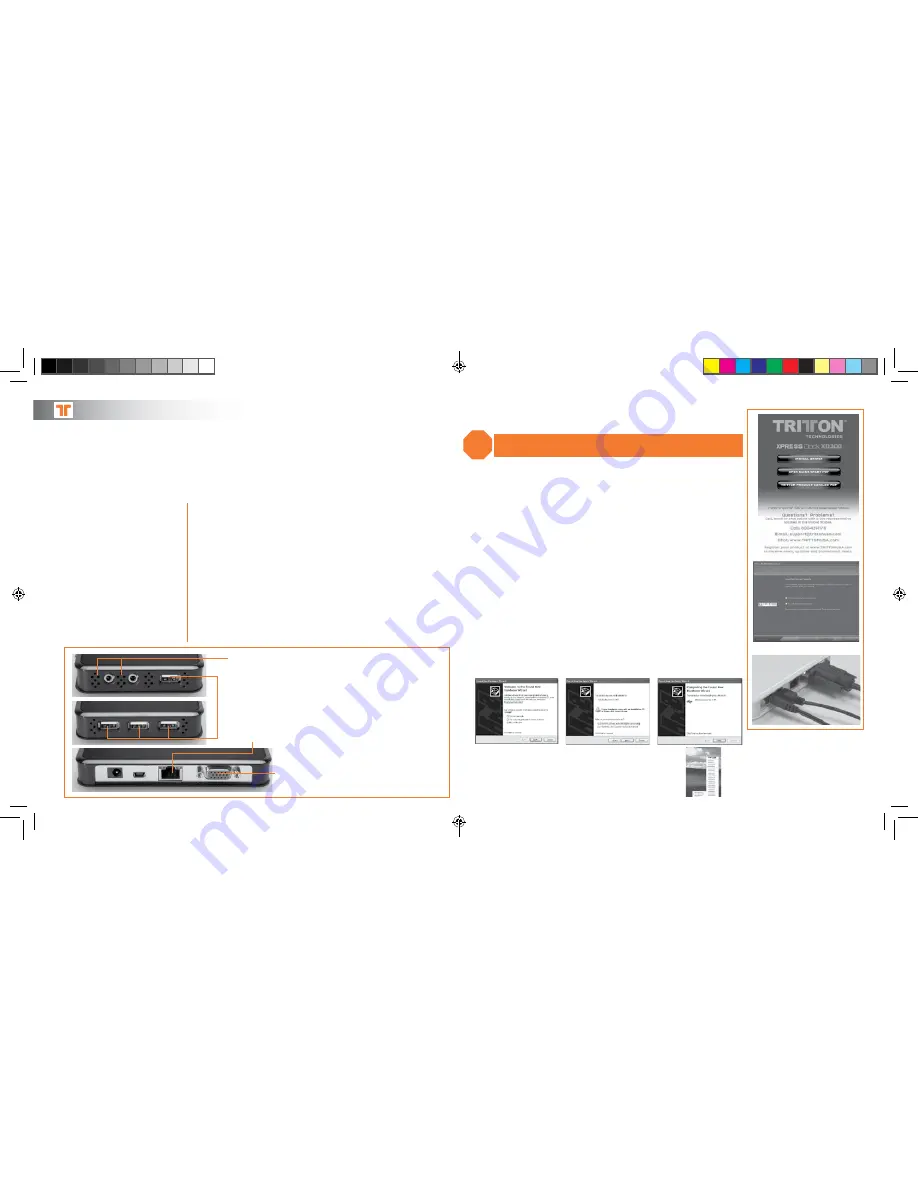
4 High-Speed
Powered USB
Ports
10/100 Ethernet Port
VGA
Port
Audio and
Microphone Ports
QUICK INSTALL GUIDE
–
[ENGLISH]
Windows Software installation
Note: Do not plug the SEE2 XD300 Xpress Dock into the computer before
the driver is installed
Step 1:
Insert the CD into the drive, click “Install Driver” and follow the on-screen
installer directions.
Step 2:
The Microsoft Software Installation Certificate warning dialog box may
be displayed under Windows XP up to 6 times. Please select “Continue
Anyway” to continue with the device driver installation. This will not
affect the device driver installation or usage.
Step 3:
When the installer is completed, click finish and reboot the computer.
Windows Hardware Installation
Step 4:
Connect the AC adapter, VGA cable, and USB cable to the XD300. Then
plug in the AC Adapter and connect the USB cable to an available USB
port on the computer.
Step 5:
Select “No , not at this time” if asked to search Windows update.
Step 6:
Select “Install the Software Automatically (Recommended)”
when prompted.
Step 7:
Click Finish when prompted. You can now connect your USB peripherals,
audio devices, and Ethernet connection. You are now ready to use your
Xpress Dock XD300!
STOP
5
6
7
1
4
3
For Windows 2000, XP, or Vista, use the System Tray icon to adjust
resolution, orientation, and mode.
For Windows 7, use the “Adjust Screen Resolution”setting in the
“Control Panel” to adjust resolution, orientation, and mode.
SEE2_XPRESS_XD300_UG.indd 3-4
1/7/11 11:43 AM


