7
4. Installation
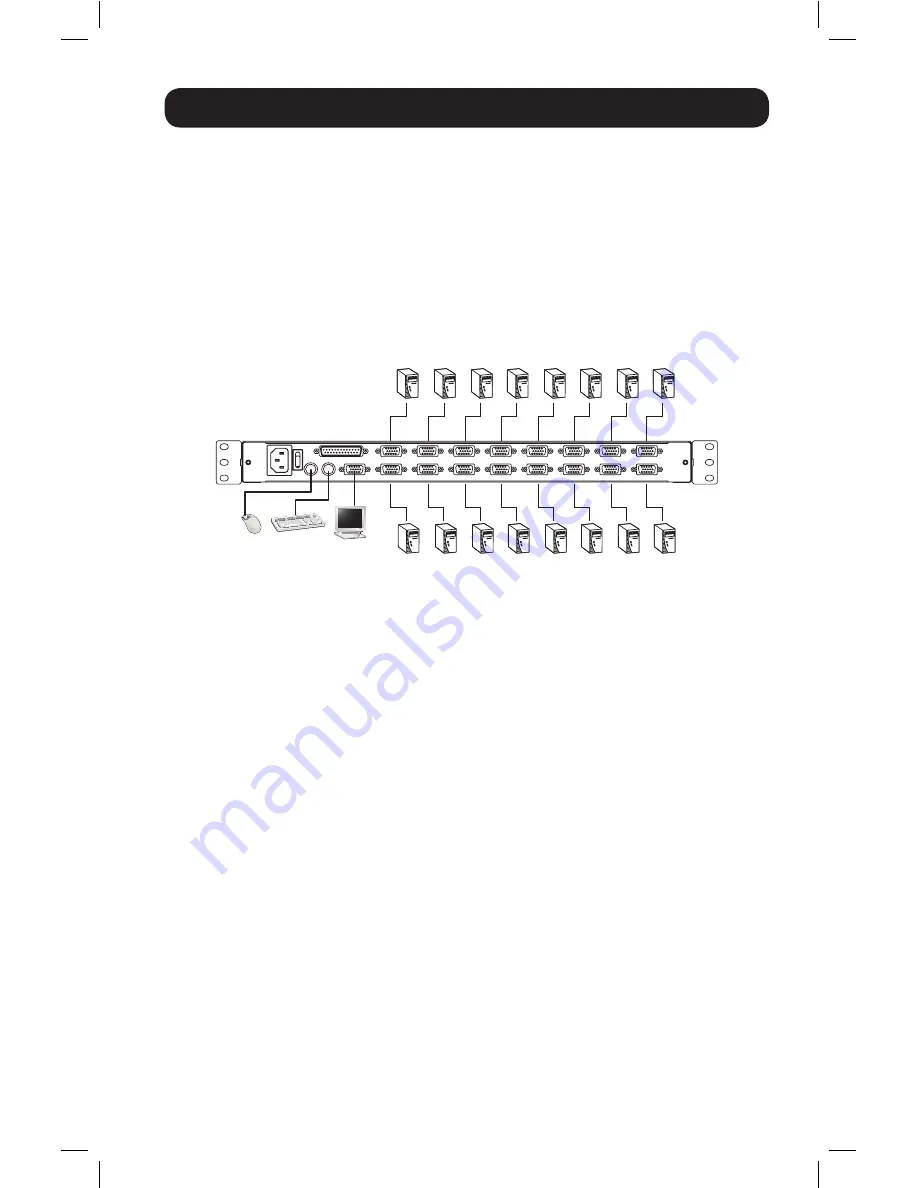
4.3 Single-Station Installation
1. Ensure that power to all the devices to be connected has been turned off.
2.
(Optional)
Connect a separate keyboard, monitor and mouse to the local ports on the back of
the console (Can also be used to connect a B051-000 IP unit).
3. Use the correct Tripp Lite KVM cable kits (as described in the
Cables
section on page 3), to
connect a computer’s Keyboard, Video and Mouse ports to any available port on the KVM
switch.
4. Plug the power cord into the KVM’s power jack, then plug into a UPS, surge or other AC power
source.
5. Turn on the power to the computers.
4.4 Hot Plugging
All KVM Switches support hot plugging—components can be removed and added back into the
installation by unplugging their cables from the ports without having to shut the switch down.
However, in order for Hot Plugging to work properly, these procedures must be followed:
Hot Plugging CPU Ports
Switch CPU ports by unplugging the KVM cable kit and replugging into the desired port. In order
for the OSD menus to correspond to the change made, you must manually reconfigure the OSD
information for the new Port. See the
F3 SET
(page 16) and
F4 ADM
(page 17), functions for
details.
Note:
If the computer’s Operating System does not support hot plugging, this function may not work properly.
Hot Plugging Console Ports
Keyboard, monitor, and mouse can all be hot plugged. When hot plugging the mouse:
1. You may unplug the mouse and plug it back in again (to reset the mouse, for example), as long
as you use the
same
mouse.
2. If you plug in a different mouse, all the stations and all the computers on the installation
must be shut down for 10 seconds, then restarted using the Power Up Sequence described in
section 4.3.
Note:
If, after hot plugging (or at any other time), there is no response to keyboard and/or mouse input,
perform a Keyboard and Mouse Reset by pressing in the Reset switch (see page 4).
14-08-026-933077.indd 7
9/9/2014 11:25:41 AM


