


7.1.3
MONITORING AUDIO (ON THE SPEAKERS)
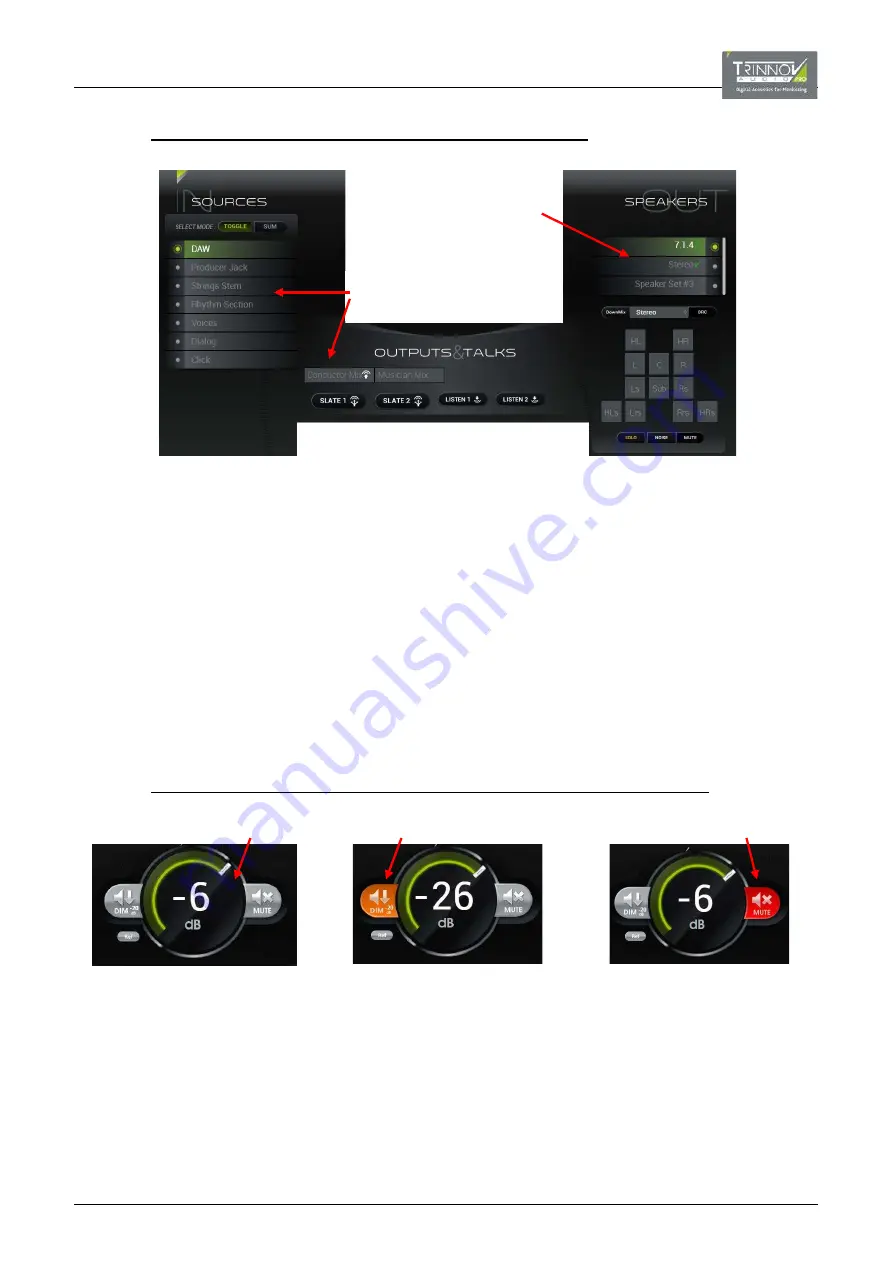
From either the SOURCES or OUTPUTS & TALKS areas, click to choose a monitor source - the selected source or output
(e.g.
DAW
) feeds the selected speaker set (e.g.
7.1.4
).
The available sources and outputs are defined in the
page and are stored and recalled by snapshots
.
You can
listen to any combination of SOURCES and OUTPUTS – use the
TOGGLE
and
SUM
modes to choose whether selections are
exclusive or additive. When selecting an output, take care to click on the button name and NOT the talkback symbol!
Note that the
LISTEN
buttons (see later) and
SPEAKERS
buttons in the
also change the monitor source.
From the SPEAKERS area, click to change the speaker set.
The available speaker sets are defined under
, and are stored and recalled by presets. If more than
one speaker set is defined, then the switching is exclusive. A green “V” (from the Trinnov logo) appears beside each optimized
speaker set; if there is no green “V,” then the speaker set is non-optimized. As you switch between speaker sets, the individual
loudspeaker buttons (
HL
,
HR
,
L
,
C
,
R
, etc.) update to reflect the current format.
Note that a monitor source and speaker set are always selected. Therefore, if you wish to stop audio feeding the speakers, use
the
MUTE
button (described below).
7.1.4
ADJUSTING THE LISTENING LEVEL (SPEAKER VOLUME)
Click and drag to adjust Speaker Level
Click to Dim Speaker Level (by 20dB
1
)
Click to Mute all Speakers
Click and drag on either the dB value or slider handle to increase or decrease the listening level.
If using a mouse, it is easier to drag left/right or up/down (rather than in a circular motion). If a maximum speaker level
1
has been
defined, then you cannot exceed this level. The speaker level can be displayed as an unreferenced dB value (as shown above) or
using one of the referenced level options defined under
STUDIO SETUP -> Options/Levels
Click on
DIM
to reduce the listening level
1
– the button lights in orange when enabled. Click again to cancel.
Click on
MUTE
to cut all speakers within the speaker set – the button lights in red when enabled. Click again to cancel.
Click on
Ref
to reset the listening level to the reference value
1
– this is a one-shot operation.
1
The amount of dim, plus the reference and maximum speaker levels are defined under
STUDIO SETUP -> Options/Levels
Note that different level trims can be applied to individual speaker sets under
Click to select monitor source:
TOGGLE = exclusive; SUM = additive
Click to select speaker set
(always exclusive)


