


The quick-freezing function can be ended manually
at any time by pressing the button
➃
➃
again. The
yellow light goes out.
This time can be shortened, depending on the
quantity of food to be frozen.
After the time has elapsed
place the food to be
frozen in the appliance's two top compartments; if
freezing only a small amount of food, use the top
compartment
.
Once the food is completely frozen (which could take
up to 24 hours) return the fast freeze button to the
«OFF» position; the yellow light
➂
➂
goes off.
Distribute the frozen food packages in the other
compartments, so that the top compartments can be
used for a further freezing operation.
Only freeze top quality, fresh and thoroughly cleaned
foodstuffs.
Do not allow fresh food to touch food which is
already frozen.
During the freezing process, ensure that the freezer
door remains closed.
Frozen food storage
When you first start the freezer or if the freezer has
been out of use for some time, we advise you to run
your appliance for at least two hours in the «fast
freeze» mode before storing frozen food.
To obtain the best performance from this appliance,
we strongly recommend that you make sure that the
commercially frozen foodstuffs were adequately
stored by the retailer and, furthermore, be sure that
these frozen foodstuffs are transferred from the
foodstore to the appliance in the shortest possible
time (a temperature increase of the frozen food could
shorten its storage period).
It is also advisable not to exceed the storage period
indicated by the producer of the food.
Finally, do not open the door frequently or leave it
open longer than is absolutely necessary.
Important
Do not put carbonated liquids, (fizzy drinks
etc.), in the freezer.
Ice lollies, if consumed immediately after
removal from the freezer, can possibly result in
a low temperature skin burn.
Do not remove items from the freezer if your
hands are damp/wet, as this could cause skin
abrasions or "frost/freezer burns".
If there is a power failure do not open the door
during the whole time of the power failure. If
the freezer is fully loaded, the frozen food will
not be affected if the power cut is of short
duration; otherwise, it is recommended to
consume the food within a very short time.
Important
In the event of a power failure causing the
temperature within your freezer to rise, do
not re-freeze the food without checking its
condition.
The following guidelines should assist you:
Ice-cream:
once thawed should be discarded.
Fruits & Vegetables:
if soft should be cooked
and used up.
Breads & Cakes:
can be re-frozen without
danger.
Shellfish:
should be refrigerated and used up
quickly.
Cooked Dishes:
i.e. casseroles should be
refrigerated and used up.
Large Pieces of Meat:
can be re-frozen
providing there are still ice crystals remaining
within them.
Small Joints:
should be cooked and can then
be re-frozen as cooked dishes.
Chicken:
should also be cooked and re-frozen
as a cooked dish.
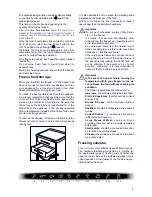
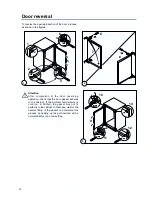
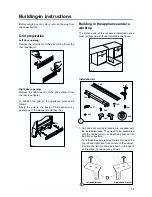
To remove the drawers, proceed as follows: pull the
drawer out until it comes to a stop, then tilt it upwards
(see figure).
PR001c
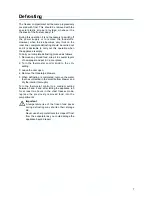
Freezing calendar
These symbols show
different types of frozen goods.
The numbers indicate storage times in months for
the appropriate types of frozen goods. Whether the
upper or lower value of the indicated storage time is
valid depends on the quality of the foods and pre-
treating before freezing.
5
10-12
10-12
10-12
10-12
3 - 6
3 - 6
3 - 6
3 - 6
3 - 4
1 - 2
Содержание TBUF 100
Страница 1: ...2222 724 72 TBUF 100 FREEZER OPERATING AND INSTALLATION INSTRUCTIONS ...
Страница 19: ......