background image

5

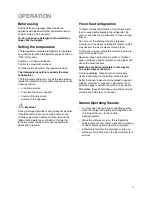
OPERATION

Before using

Remove all securing tapes. Wash inside the

appliance with lukewarm water and bicarbonate of

soda (5 ml to 0.5 litre of water). 

Do not use soap or detergent as the smell may

linger. Dry thoroughly.

Setting the temperature

The temperature inside the refrigerator is regulated

by a thermostat with 6 temperature positions and an

ÒOFFÓ (O) position.
Position 1 = minimum coldness
Position 6 = maximum coldness
Turn the thermostat dial to the required position.

The intermediate position is usually the most

suitable (3-4).

The thermostat setting can vary as the temperature

inside the refrigeration compartment depends on the

following factors:
Ð room temperature
Р how often the door is opened
Р how much food is stored
Р position of the appliance

Important

During prolonged periods of abnormally hot weather,

if the thermostat is set on too high a number, the

cooling system may operate continuously and the

fridge cooling plate may not defrost. Turning the

knob to a lower number will cause the automatic

defrosting to resume.

Normal Operating Sounds 

¥ You may hear faint gurgling or bubbling sounds

when the refrigerant is pumped through the coils

or tubing at the rear, to the cooling

plate/evaporator.

¥ When the compressor is on, the refrigerant is

being pumped round, and you will hear a whirring

sound or pulsating noise from the compressor.

¥ A thermostat controls the compressor, and you

will hear a faint ÕclickÕ when the thermostat cuts in

and out.

Fresh food refrigeration

To obtain the best performance, do not store warm

food or evaporating liquids in the refrigerator; do

cover or wrap the food, particularly if it has a strong

flavour.
Do not cover the shelves with any protective

material, such as paper, cardboard or plastic, which

may obstruct the air circulation through them.
To help you use your refrigerator correctly, here are

some more useful hints:
Raw meat (beef, pork, lamb & poultry or chicken):

wrap in polythene bags and place on the glass shelf

above the salad crispers.

Meat can only be stored safely in this way for

one or two days at the most.

Fruit & vegetables: these should be thoroughly

cleaned and placed in the bottom salad crispers.
Butter & cheese: these should be placed in special

airtight containers or wrapped in aluminium foil or

polythene bags to exclude as much air as possible.
Milk bottles: these should have a cap and should be

stored in the bottle rack on the door. 

16

Door reversal

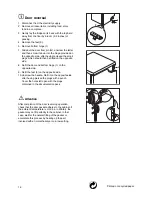
1. Disconnect from the electricity supply.
2. Remove all loose items, including food, store

food in a cool place.

3. Gently lay the fridge on its back with the top held

away from the floor by 5-8 cm (2-3 inches) of

packing;

4. Remove the feet (3).
5. Remove bottom hinge (1).
7. Slide out the door from pin (G), unscrew the latter

and then screw it down into the hinge provided on

the opposite side, after having removed the small

plugs which should then be fitted on the opposite

side.

8. Refit the door and bottom hinge (1) on the

opposite side.

9. Refit the feet (3) on the opposite side.
10.Unscrew the handle. Refit it on the opposite side

after having pierced the plugs with a punch.

Cover the holes left open with the plugs

contained in the documentation pack.

Attention

After completion of the door reversing operation,

check that the door gasket adheres to the cabinet. If

the ambient temperature is cold (i.e. in Winter), the

gasket may not fit perfectly to the cabinet. In that

case, wait for the natural fitting of the gasket or

accelerate this process by heating up the part

involved with a normal hairdryer on a low setting.

G

PR220

Printed on recycled paper

1

2

Содержание TB 80 L

Страница 1: ...2222 105 41 TB 80 L FRIDGE OPERATING AND INSTALLATION INSTRUCTIONS ...

Страница 2: ...amages to the cooling unit with consequent possible fluid leakages The appliance must not be located close to cookers radiators or boilers Avoid prolonged exposure of the appliance to direct sunlight Do not use other electrical appliances such as ice cream makers inside of refrigerating appliances During Use This appliance is designed for domestic use only specifically for the storage of edible fo...

Страница 3: ...ves 6 Positioning the inner shelves 6 Hints and Tips 6 Maintenance and Cleaning 7 Internal cleaning 7 External cleaning 7 When the appliance is not in use 7 Changing the light bulb 7 Defrosting 7 Something Not Working 8 Service and Spare Parts 9 Customer Care 9 Guarantee Conditions 12 Instructions for the Installer Technical Specification 13 Installation 14 Positioning 14 Rear Spacers 14 Electrica...

Страница 4: ...DESCRIPTION OF THE APPLIANCE 4 A C D G E F B A Thermostat control B Dairy compartment C Can storage shelves D Bottle storage shelf E Salad crisper F Glass shelf G Storage shelves ...

Страница 5: ...ling sounds when the refrigerant is pumped through the coils or tubing at the rear to the cooling plate evaporator When the compressor is on the refrigerant is being pumped round and you will hear a whirring sound or pulsating noise from the compressor A thermostat controls the compressor and you will hear a faint ÕclickÕ when the thermostat cuts in and out Fresh food refrigeration To obtain the b...

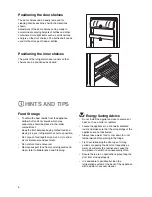
Страница 6: ...r as short as possible Do not push food together too much try to allow air to circulate around each item Do not store food uncovered Remove suspect food from your refrigerator and clean refer to Maintenance and Cleaning Energy Saving Advice Do not install the appliance close to sources of heat such as a boiler or radiator Locate the appliance in a cool well ventilated room and make sure that the a...

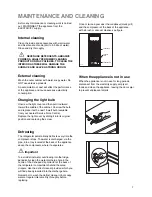
Страница 7: ...e condenser black grill and the compressor at the back of the appliance with a brush or vacuum cleaner see figure D273 CONDENSER COMPRESSOR DEFROST TRAY Changing the light bulb Unscrew the light cover and then pull it outward toward the middle of the cabinet Unscrew the bulb and replace it with a new 15 watt bulb available from your nearest Service Force Centre Replace the light cover by sliding i...

Страница 8: ...liance if necessary Adjust the thermostat control knobto give correct temperature control See ÒSetting the temperatureÓ Check that the door is closed Large quantities of food have recently been placed in the cabinet and or door is frequently opened Check that air ventilation is not obstructed Refer to normal operating sounds Check the drain hole is not blocked see Maintenance and Cleaning If the a...

Страница 9: ... details under the heading ÔSomething Not Working When you contact the Service Force Centre you will need to give the following details 1 Your name address and post code 2 Your telephone number 3 Clear and concise details of the fault 4 The model and serial number of the appliance found on the rating plate 5 The purchase date For general enquiries concerning your Tricity Bendix appliance or for fu...

Страница 10: ...10 ...

Страница 11: ...11 ...

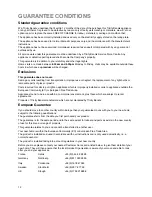
Страница 12: ...r calls to put right an appliance which is improperly installed or calls to appliances outside the European Community EC or European Free Trade Area Appliances found to be in use within a commercial environment plus those which are subject to rental agreements Products of Tricity Bendix manufacture which are not marketed by Tricity Bendix European Guarantee If you should move to another country wi...

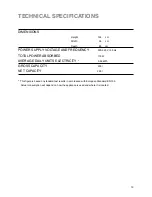
Страница 13: ...EQUENCY 220 240 V 50 Hz TOTAL POWER ABSORBED 110 W AVERAGE DAILY UNITS ELECTRICITY 0 55 kWh GROSS CAPACITY 235 l NET CAPACITY 230 l This figure is based on standard test results in accordance with European Standard EN 153 Actual consumption will depend on how the appliance is used and where it is located ...

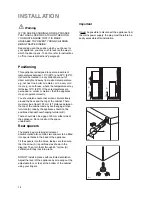
Страница 14: ...he plastic bag containing all relevant documentation also contains two spacers to be fitted into special holes in the back of the appliance Fit the spacers into the holes taking care to ensure that the arrow A is positioned as shown in the diagram Then turn them through 45 arrow A vertical until they lock into place DO NOT install in places with restricted ventilation Adjust the level of the appli...

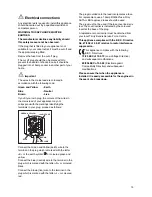
Страница 15: ...ich is marked with the letter ÇEÈ or the earth symbol or coloured green and yellow Connect the blue neutral wire to the terminal in the plug which is marked with the letter ÇNÈ or coloured black Connect the brown live wire to the terminal in the plug which is marked with the letter ÇLÈ or coloured red D207 GREEN YELLOW 13 AMP FUSE BROWN CORD CLAMP BLUE 13 AMP The plug moulded onto the lead incorpo...

Страница 16: ... side 8 Refit the door and bottom hinge 1 on the opposite side 9 Refit the feet 3 on the opposite side 10 Unscrew the handle Refit it on the opposite side after having pierced the plugs with a punch Cover the holes left open with the plugs contained in the documentation pack Attention After completion of the door reversing operation check that the door gasket adheres to the cabinet If the ambient ...

Страница 17: ......

Страница 18: ......

Страница 19: ......

Страница 20: ...Tricity Bendix 55 77 High Street Slough Berkshire SL1 1DZ Consumer care telephone number 08705 950950 Electrolux Household Appliances Limited 2000 ...

Отзывы: