Gas Valve Replacement Kit
Prestige Solo 399
2
PRESTIGE 399 BOILER INSTRUCTIONS:
1. Turn power to the unit “OFF”
2. Shut off the gas supply to the boiler at the main
manual shut off valve.
3. Remove the front jacket panel and swing away
the control module panel.
4. Remove the wires to the gas valve.
5. Disconnect the gas supply piping inside the
PRESTIGE at the union located just before the
gas valve.
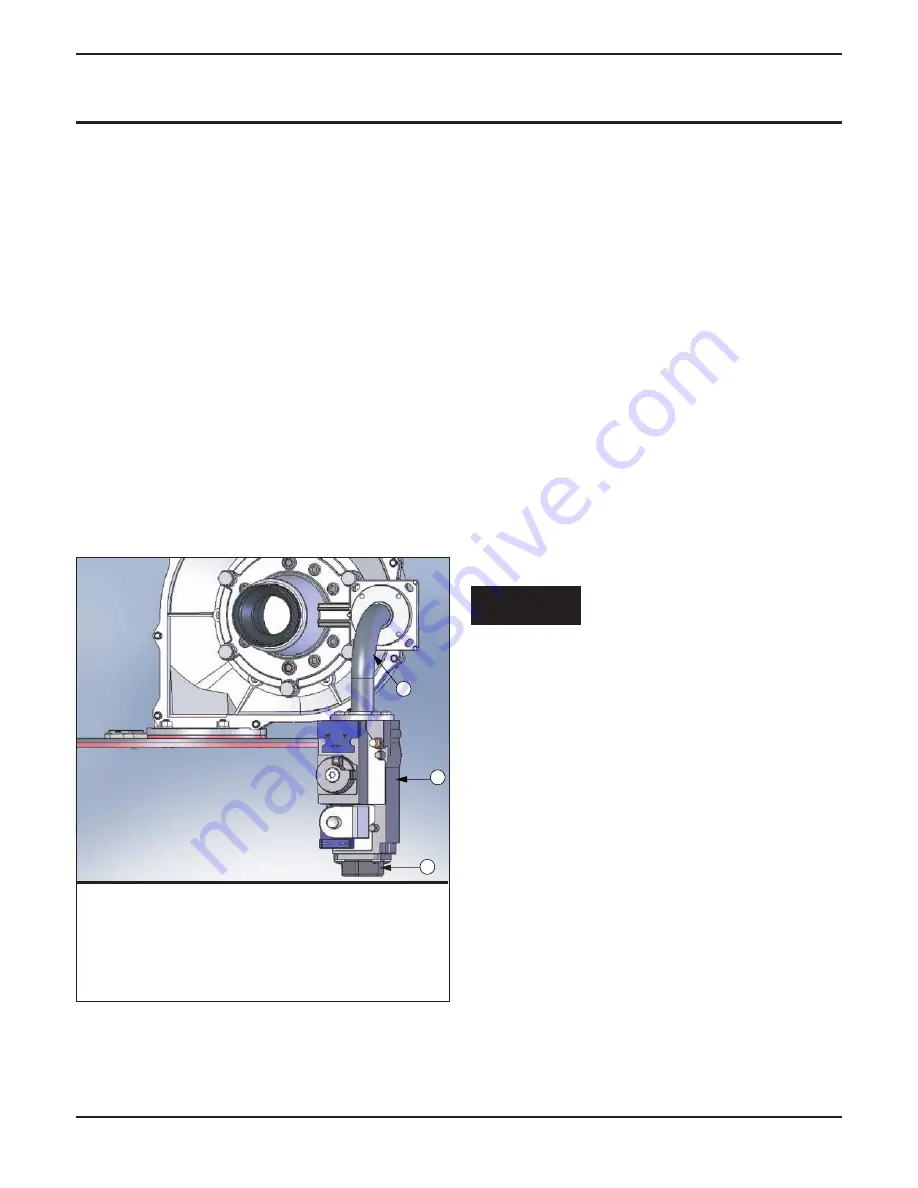
6. Remove the 4 screws on the top of the gas
valve, securing the gas valve outlet extension
pipe to the valve, see Fig. 2.
7. Remove the gas valve from the PRESTIGE
unit.
8. Remove the 4 screws securing the gas valve sup-
ply piping adapter to the gas valve, see Fig. 2.
9. Remove the O-rings in the gas valve supply pip-
ing adapter and gas valve outlet extension pipe.
10. Install the gas valve supply piping adapter and
O-Ring gasket on the new gas valve using 4
screws supplies in kit. Ensure screws are tight.
11. Install the new gas valve and O-Ring gasket to
the gas valve extension using the 4 screws sup-
plies in kit. Ensure screws are tight.
12. Reconnect the gas supply piping using two
wrenches. Open the manual gas shut off valve
to check and test all gas connections for leaks
before placing the PRESTIGE unit back into
operation. Repair leaks if found.
Do not check for gas leaks with an open
flame. Use a bubble test. Failure to check for
gas leaks can cause severe personal injury,
death or substantial property damage
13. Reconnect the wires to the gas valve, see Fig. 3.
14. Reposition the control module panel and reat-
tached the front jacket panel.
15. Turn the electrical power “ON” to the PRES-
TIGE to return the unit back into service.
WARNING
2
1
3
Fig. 2: Prestige 399 Gas Valve Assembly
1. Gas
Valve
2. Gas Valve Supply Piping Adapter
3. Gas Valve Outlet Extension Pipe


