9
of an external timer or separate remote-control system.
-
Before every use, unroll the power cord.
-
Use original spare parts and accessories only.
-
Do not subject the product to strong impacts, serious
damages may result.
GENERAL INFORMATION
Do not connect plug since the installation is not complete.
Do not leave the appliance unattended while it is running.
Unplug after each use. Unplug the unit by pulling the
plug and not the power cord.
Do not immerse product in water or other liquids and
avoid splashing liquids reach the unit.
Before carrying out any cleaning, disconnect the unit
from the electrical outlet.
Before each use, unroll the power cord. Do not insert
anything through the protection grids.
Do not obstruct in any way the protection grids.
Place on solid and stable surfaces and away from
windows or drafts.
DESCRIPTION G50041
1 Control knob
2 Fan
3 Body
4 Protective grid
5 Base
6 Fixing pins
ASSEMBLING
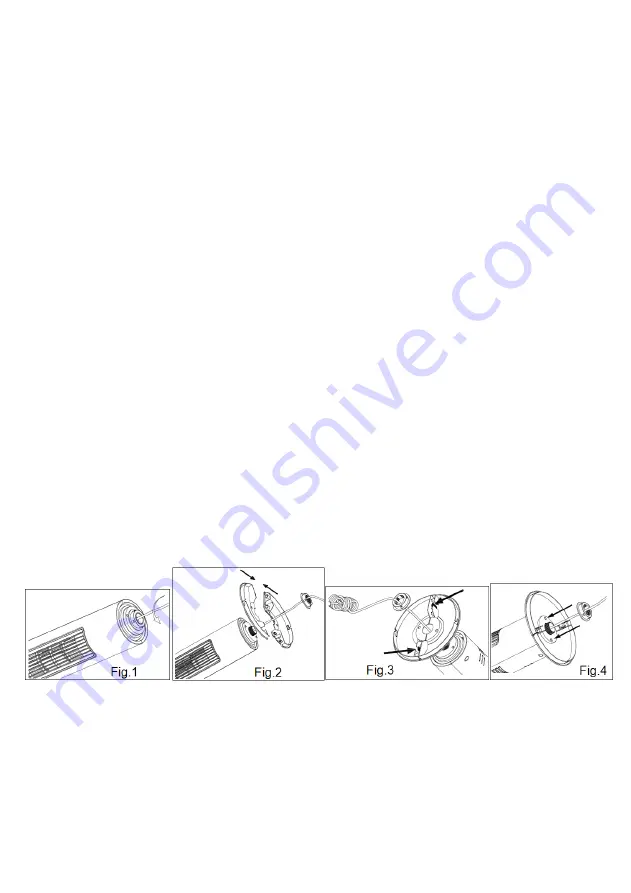
To mount the base (5), follow the steps below.
- Unscrew the knob placed in the bottom of product (Fig.1).
- Take the two parts that make the base (5), insert the power cord between them and join them pushing until
they link each other (Fig.2 - Fig.3). Put the 2 pin placed in the bottom of product in the 2 holes of the base.
- Screw the knob to secure the base (Fig.4).
- Fix the power cord under the base (5).
OPERATING
Once finished assembling the unit, place the fan following the safety instructions, then plug it to the electrical
outlet. By using the control knob (8) the rotation power can be adjusted on different speeds.


