background image

12

XF 3800 PRO

ENGLISH

Set the main switch POWER ON/OFF (18) to "0" to completely switch off the device or charge the battery.
Move the main POWER ON/OFF switch (18) to "II" to turn on and use the device with 30V 

 50Hz power cable.

STAND-BY

You can switch the system to standby mode using the button 

(

2) on unit or button


(22) on the remote;

- In this mode, if the unit is connected by 220V mains cable, the battery will be recharged.
- If the main switch POWER ON/OFF (18) is in position "II" and the machine is then connected by 220V mains cable,

 the Stand-by 

mode the appliance switches on again only by pressing the same button


(2 ) on the unit or the button


(2) the remote 

control

 (the main switch POWER ON/OFF(18) the device will turn on only by turning the main switch (18) to "I").

Caution:
-   The Stand-by function works only when the main POWER ON/OFF switch (18) is in position "I" or "II".
-  In stand-by function there is no LED indicating.
-  We remember leaving the unit in stand-by function the battery discharges faster than using the POWER ON/OFF switch(18).

M

ODE SE

TTING FUNCTION

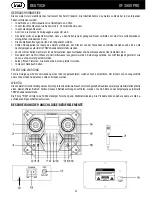
To change the mode function, press more 'times the MODE key (11) on the unit or press the button (31) on the remote control 
to select RADIO (display will show the frequency), BLUETOOTH (the display BLUE), USB/SD (only if the USB/SD socket(16) is 
connected to a memory, the display shows for a few seconds "USB" or "SD"), AUX (the display shows LINE).

ADJUSTING THE VOLUME

1.  Turn the Main Volume control (14) to increase or decrease the overall volume of playback, or use the buttons (29) and (33) on 

the remote control.

2.  Turn the MIC VOL(1) to adjust the volume level signal inputs MIC 1/2(3). The adjustment acts on the two inputs simultaneously.

PRE-EQUALIZER

This unit has a pre audio equalization system set. Press the EQ button (4) on the unit or the (32) button on the remote control to 
select one of five available audio equalizers, and that best suits the sound playback.

SETTING TONE TREBLE AND BASS

Acting on the TREBLE slider(10) to adjust the treble.
Acting on the BASS slider(9) to adjust the bass.

ECHO EFFECT

Acting on the ECHO slider(7) to increase or decrease the echo effect on the inputs MIC1 and MIC2.

Note: the echo only works on microphone inputs.

MIC EQ

Act on the MIC EQ slider(8) to adjust the bass/treble on MIC1 and MIC2 inputs.

Note: The EQ effect acts solely on microphone inputs.

DISCO-LIGHT EFFECTS

To activate the effects Disco Light press the LED button(6).
To cancel the effect Disco-Light, press the LED button(6).

VOICE GUIDE

To activate the voice guide (only in English), press and hold for a few seconds the



(6) 

button on unit or button(26) on remote 

control, the display will show "ON" for 1 sec.
To turn off the voice guide, press and hold for a few seconds the



(6) 

button on unit or button(26) on remote control, the 

display will show "OFF" for 1 sec.

FM RADIO FUNCTION

AUTO MEMORY

1.  Connect the Aux-In cable to the socket(17) for use as a radio antenna.
2.  Turn on the unit and press repeatedly the MODE key(11) on unit, or the button(31) on remote control and select  RADIO function 

(the display will show the frequency).

Содержание XF 3800 PRO

Страница 1: ...nchement BEWEGLICHER LAUTSPRECHER Gebrauchs und Anschlusshandbuch ALTAVOZ AMPLIFICADO PORTATIL Manual para el uso y la conexión LED DISPLAY USB SD PLAYER XF 3800 PRO Guida d uso User guide DISCO LIGHT 300 W MAX BT BLUETOOTH Per informazioni integrative ed aggiornamenti su questo prodotto visita www trevi it For additional information and updates of this product see www trevi it ...

Страница 2: ......

Страница 3: ...llegamento siano installati correttamente L apparecchio non deve essere esposto a stillicidio o a spruzzi d acqua Nessun oggetto pieno di liquido quali vasi deve essere posto sull apparecchio Nessuna sorgente di fiamma nuda quali candele accese deve essere posta sull apparecchio Conservare questo manuale per future consultazioni CURA E MANUTENZIONE Per la pulizia si consiglia l uso di un panno mor...

Страница 4: ... ripetizione di tutti i brani 24 Tasti numerici 0 9 25 Tasto REC registrazione 26 Tasto Play Pausa disattivazione voce guida 27 Tasto 9 PREV Selezione traccia precedente 28 Volume Mic 29 Volume generale 30 Tasto MUTE 31 Tasto MODE selezione funzione 32 Tasto EQ equalizzazioni pre impostate 33 Volume generale 34 Tasto NEXT Selezione traccia successiva 35 Volume Mic 32 Installazione batterie Rimuove...

Страница 5: ...omparelafrequenza BLUETOOTH suldisplaycompare BLUE USBoSD solosesullapresaUSB SD Card 16 vi è collegata una memoria sul display compare USB o SD per qualche secondo AUX sul display compare LINE REGOLAZIONE DEL VOLUME 1 Ruotare la manopola del VOLUME 14 per aumentare o diminuire il volume generale di riproduzione oppure utilizzare i tasti 29 e 33 sul telecomando 2 Ruotare la manopola MIC VOL 1 per ...

Страница 6: ...telecomando e selezionare la funzione bluetooth sul display compare la scritta BLUE 2 Nella modalità Bluetooth il simbolo sul display comincerà a lampeggiare il sistema entra automaticamente in ricerca 3 Attivare la funzionalità Bluetooth sul dispositivo esterno da accoppiare 4 Avviare la ricerca dei dispositivi Al termine selezionare il dispositivo XF 3800 PRO 5 Inserire la password 0000 se richi...

Страница 7: ...elecomando per arrestare la registrazione L apparecchio si porterà automaticamente nella funzione USB SD per riprodurre immediatamente il brano registrato Nota Quando si attiva la funzione Registrazione alcuni comandi dell apparecchio vengono inibiti questi riprenderanno la loro normale funzione quando la registrazione verrà arrestata La funzione di registrazione potrebbe non supportare alcuni dis...

Страница 8: ...i vita 1 Controllare se il cavo di alimentazione è collegato in modo corretto 2 Normalmente ci vogliono 6 8 ore per ricari care completamente la batteria 3 Sostituire la vecchia batteria con una nuova avente le stesse specifiche tecniche Dagli altoparlanti si sentono forti rumori 1 Microfono acceso ma troppo vicino all altoparlante 2 Microfono acceso ma non viene utilizzato 3 Volume del microfono ...

Страница 9: ... per l avvio successivo dell apparecchiatura dimessa al riciclaggio al trattamento e allo smaltimento ambientale compatibile contribuisce ad evitare possibili effetti negativi sull ambiente e sulla salute e favorisce il riciclo dei materiali di cui è composta l apparecchiatura Lo smaltimento abusivo del prodotto da parte dell utente comporta l applicazione delle sanzioni amministrative di cui al D...

Страница 10: ...s check that the power cable and the connection cable are properly installed The apparatus shall not be exposed to dripping or splashing water No objects filled with liquid such as vases should be placed on the unit No naked flame sources such as lighted candles should be placed on Keep this manual CARE AND MAINTENANCE Use a slightly damp soft cloth for cleaning Do not use solvents and abrasive su...

Страница 11: ...in switch POWER ON OFF 18 to I to turn on and use the device with its internal battery 22 Power ON OFF 23 REPEAT Key single repeat repeat all 24 0 9 Keys 25 RECORD Key 26 PLAY PAUSE 27 PREV button 28 MIC Vol 29 Volume 30 MUTE Key 31 MODE Key Shift AUX RADIO USB SD mode 32 EQ Key several sound modes circulated 33 Volume 34 NEXT Key 35 MIC Vol Installing the Batteries Remove the battery cover from t...

Страница 12: ...e control 14 to increase or decrease the overall volume of playback or use the buttons 29 and 33 on the remote control 2 Turn the MIC VOL 1 to adjust the volume level signal inputs MIC 1 2 3 The adjustment acts on the two inputs simultaneously PRE EQUALIZER This unit has a pre audio equalization system set Press the EQ button 4 on the unit or the 32 button on the remote control to select one of fi...

Страница 13: ...3800 PRO 5 Enter the password 0000 if required 6 Press the 13 button on the unit or the key 26 on remote control to start playing and the buttons 15 o 9 12 on the unit or the keys NEXT 34 and 9LAST 27 for selection of songs PLAY ON INPUT USB SD 1 Turn on the unit 2 Insert a USB memory or an SD card into the USB or SD 16 slot Playback starts automatically 3 To pause playback press the 13 button on ...

Страница 14: ...n the USB memory or SD card when using the supplied microphone The device will automatically create a folder called Record inside the USB memory and it will store all log files 1 Turn on the unit 2 Insert a USB memory or a SD Card into the socket 3 Select the USB SD functon by MODE button 11 on the unit or the MODE button 31 on the remote control 4 Press REC button 5 on the unit or the REC button ...

Страница 15: ...too close to the speaker 5 Other wireless equipment may be placed very close to the speaker 1 Keep the microphone 2 meters away from the speaker 2 Turn off microphone if not in use 3 Adjust microphone volume to lower mode 4 Keep mobile away from the speaker whilst a ending a call 5 Keep the speaker away from other wireless equipment INFORMATION NOTE ON THE REMOVAL BATTERY Warning Only high qualifi...

Страница 16: ...ollection for the decommissioned equipment for recycling processing and environmentally compatible disposal helps prevent negative impact on the environment and human health and promotes recycling of the materials making up the product Illegal dumping of the product by the user entails the application of administrative sanctions stated in Legislative Decree n Legislative Decree No 49 of March 14 2...

Страница 17: ...branchement sont correctement installés L appareil ne doit pas être exposé à des éclaboussures d eau Aucun objet rempli de liquide comme des vases doivent être placés sur l appareil Aucune source de flamme nue telle que des bougies allumées doivent être placés sur Conservez ce manuel MANIEMENT ET ENTRETIEN Pourlenettoyage ilestconseilléd utiliserunchiffondouxlégèrementhumide Évitezl emploidesolvan...

Страница 18: ...EQ preset EQ 5 Bouton REC enregistrement 6 Interrupteur marche arrêt LEDs frontales Disco Light 7 Réglage ECHO 8 MIC EQ contrôle de tonalité 9 BASS réglage des basses 10 TREBLE réglage des treble 11 Bouton MODE sélectionnez la fonction 12 Bouton 9 Précédent 13 Bouton Lecture Pause désactivation guidage vocal 14 Réglage du volume 15 Bouton Suivant 16 Entrée USB SD Card 17 Entrée AUX In prise d ante...

Страница 19: ... la fréquence BLUETOOTH l écran affiche le mode BLUE USB SD Card uniquement si la prise USB o SD 16 est relié à une mémoire l affichage USB o SD apparaît pendant quelques secondes AUX l écran affiche LINE AJUSTEMENT DU VOLUME 1 Tourner le VOLUME 14 pour augmenter ou pour diminuer le volume global de la lecture pour augmenter ou diminuer le volume global de la lecture ou utilisez les boutons 27 et ...

Страница 20: ...rammes de radio dans ce cas déplacez cette unité BLUETOOTH FONCTIONNEMENT 1 MettezlamachineetappuyezsurlatoucheMODE 11 surl appareil oulebouttonMODE 31 surlatélécommandeetsélectionnez la fonction Bluetooth l écran affiche BLUE 2 En mode Bluetooth le symbole sur l écran se met à clignoter le système passe automatiquement en recherche 3 Activez la fonction Bluetooth sur l appareil externe pour être ...

Страница 21: ...mmande pour arrêter l enregistrement Le dispositif se met automatiquement en fonction USB SD pour lire immédiatement le morceau enregistré Remarque E peut enregistrer uniquement les fonctions audio de Radio Même insertion et l utilisation du microphone fourni l appareil enregistrera seulement le signal audio transmis à partir de ces sources il ne sera pas enregistrer les voix réalisés avec le micr...

Страница 22: ... 2 La batterie est pas complètement chargée 3 La batterie peut avoir exécuter son cycle de vie 1 Vérifiez si le câble d alimentation est correctement connecté 2 Normalement il prend 6 8 heures pour charger complètement la batterie 3 Remplacez la pile par une nouvelle avec les mêmes spécifications techniques Les haut parleurs que vous entendez des bruits forts 1 Microphone sur mais trop près 2 Micr...

Страница 23: ...arée appropriée pour l équipement mis hors service pour le recyclage le traitement et l éli mination respectueuse de l environnement contribue à éviter les effets négatifs sur l environnement et la santé humaine et favorise le recyclage des matériaux qui composent le produit le dumping illégal du produit par l utilisateur substitutions l application des sanctions administratives prévues par le déc...

Страница 24: ...icherzustellen dass Netzkabel und Anschlusskabel korrekt installiert sind Das Gerät darf nicht mit Wasser oder Spritzwasser ausgesetzt werden Keine Gegenstände die mit Flüssigkeit gefüllt ist wie Vasen auf das Gerät gestellt werden Keine offenen Flammen wie brennende Kerzen platziert werden In diesem Handbuch halten PFLEGE UND WARTUNG Für die Reinigung wird die Verwendung eines leicht angefeuchtet...

Страница 25: ...mit seiner internen Batterie 1 MIC VOL einstellen Mic Band 1 2 2 Stand by Taste 3 Eingang MIC1 MIC2 4 EQ Taste voreingestellten Equalizern 5 REC Taste Aufnahme 6 Ein Aus Taste Front LED Light Disco 7 ECHO Einstellung 8 MIC EQ einstellen Mikrofon Töne 9 BASS Bass Einstellung 10 TREBLE die Anpassung Höhen 11 MODE Taste auswahlfunktion 12 Taste 9 Zurück 13 Taste Play Pause Aus Sprachführung 14 Lautst...

Страница 26: ...ür ein paar Sekunden AUX das Display zeigt LINE LAUTSTÄRKE 1 Drehen Sie den VOLUME Regler 14 zu erhöhen oder die gesamte Wiedergabe Lautstärke zu verringern oder den Tasten 29 und 33 auf der Fernbedienung 2 Drehen Sie den Regler MIC VOL 1 einzustellen um die Lautstärke des Signals an den Eingängen MIC1 und MIC2 3 Die Steuerung arbeitet an beiden Eingängen gleichzeitig EQUALIZER Dieses Gerät verfüg...

Страница 27: ...bedienung und wählen Sie die Bluetooth Funktion auf dem Display erscheint BLAU 2 Wählen Sie im Bluetooth Modus wird das Symbol auf dem Display blinkt geht das System automatisch den Suchmodus 3 Aktivieren Sie die Bluetooth Funktion auf dem externen Gerät gekoppelt werden 4 Initiieren Sie eine Suche nach Geräten Nach wählen Sie die XF 3800 PRO 5 Das Passwort 0000 eingeben falls erforderlich 6 Drück...

Страница 28: ...nn die Taktart 5 Drücken Sie die REC Taste erneut 5 auf dem Gerät oder der REC Taste 25 auf der Fernbedienung die Aufnahme zu stoppen Das Gerät wird automatisch in den USB SD Funktion sofort die aufgezeichneten Spur zu spielen Hinweis Wenn Sie die Record Funktion einige der Gerätesteuerungen werden gesperrt aktivieren werden sie ihre normale Funktion wieder aufnehmen wenn die Aufnahme zu stoppen D...

Страница 29: ...aden 3 Die Batterie kann haben seinen Lebenszyklus laufen 1 Überprüfen Sie ob das Netzkabel richtig angeschlossen ist 2 Normalerweise dauert es 6 8 Stunden vollständig um die Batterie aufzuladen 3 Setzen Sie die alte Batterie durch eine neue mit den gleichen technischen Spezifika tionen DieLautsprecherhörenSielaute Geräusche 1 Mikrofon auf aber zu nah 2 Mikrofon auf aber nicht verwendet 3 Lautstär...

Страница 30: ...gemessene getrennte Sammlung für die stillgelegte Anlagen für Recycling Aufbereitung und umweltgerechte Entsorgung trägt dazu bei die Umwelt und die menschliche Gesundheit negative Auswirkungen zu vermeiden und begünstigt das Recycling der Materialien das Produkt zusammengesetzt Illegal Dumping des Produkts durch den Benutzer Entails die Anwendung von Verwaltungssanktionen erklärte in Gesetzesvero...

Страница 31: ...uebe que los cables de alimentación y de conexión estén instalados correctamente antes de encender el aparato El aparato no debe exponerse a goteos o salpicaduras de agua Los objetos que contengan líquidos como floreros debe ser colocado en la unidad No hay fuente de llamas como una vela encendida se deben colocar en Mantenga este manual CUIDADO Y MANTENIMIENTO Para efectuar la limpieza se aconsej...

Страница 32: ...vo con su batería interna 1 MIC VOL ajuste de volumen de micrófono 1 2 2 Botón Stand by 3 Entrada MIC1 MIC2 4 Botón EQ preset EQ 5 Botón REC la grabación 6 Tecla de encendido apagado LED Disco Light 7 Ajuste ECHO 8 MIC EQ control de tono micrófono 9 BASS ajuste de graves 10 TREBLE ajuste de agudos 11 Botón MODE función de selección 12 Botón 9 Anterior 13 Botón Play Pausa desactivar la guía de voz ...

Страница 33: ...a memoria la pantalla muestra USB o SD durante unos segundos AUX el display muestra LINE AJUSTE DEL VOLUMEN 1 Gire el VOLUME 14 para aumentar o disminuir el volumen general de reproducción o utilizar los botones 29 y 33 en el control remoto 2 Gire el MIC VOL 1 para ajustar el volumen del las entradas de señal MIC1 y MIC2 3 El ajuste funciona en las dos entradas simultáneamente ECUALIZADOR Esta uni...

Страница 34: ...unidad o el MODE 31 en el mando a distancia y seleccione la función Bluetooth en la pantalla aparece BLUE 2 En el modo Bluetooth el símbolo en la pantalla comenzará a parpadear el sistema entra automáticamente en la búsqueda 3 Active la función Bluetooth en el dispositivo externo a acoplar 4 Inicie una búsqueda de dispositivos Después de seleccionar el XF 3800 PRO 5 Introduzca la contraseña 0000 s...

Страница 35: ... REC 5 en la unidad o el botón REC 25 en el mando a distancia para detener la grabación El dispositivo se pondrá automáticamente en función de USB SD para reproducir de inmediato la canción grabada Nota Cuando se activa la función Record algunos de los controles del dispositivo son inhibidas van a reanudar su funcionamiento normal cuando la grabación se detendrá La función de grabación no es compa...

Страница 36: ...cargar 2 La batería no está completamente cargada 3 La batería puede haber llegado a su ciclo de vida 1 Compruebe si el cable de alimentación está conectado correctamente 2 Normalmente se tarda 6 8 horas para cargar completamente la batería 3 Vuelva a colocar la batería vieja por una nueva con las mismas especificaciones técnicas Los altavoces se oyen ruidos fuertes 1 Micrófono en pero demasiado c...

Страница 37: ...era de servicio para su reciclaje tratamiento y eliminación ambientalmente compatible ayuda a prevenir el impacto negativo sobre el medio ambiente y la salud favoreciendo el reciclaje de los materiales que componen el producto El vertido ilegal del producto por los usuarios conlleva la aplicación de las sanciones administrativas establecidas en el Decreto Legislativo n Decreto Legislativo N 49 de ...

Страница 38: ...INE VOM BENUTZERSELBSTINSTANDSETZBARENTEILEUNDAUCHKEINEERSATZTEILE FÜR JEGLICHE SERVICEARBEITEN WENDEN SIE SICH BITTE AN EINE TREVI AUTORISIERTEN KUNDENDIENSTSTELLE GEFAHR ELEKTRISCHER SCHLÄGE NICHT DER FEUCHTIGKEIT UND DEM REGEN AUSSETZEN ATENCION ATENCION NO ABRIR EL APARATO EN SU INTERIOR NO HAY MANDOS QUE PUEDAN SER MANIPULADOS POR EL USUARIO NI PARTES DE REPUESTO PARA TODAS LAS OPERACIONES DE...

Страница 39: ...39 XF 3800 PRO ...

Страница 40: ...Trevi S p A Strada Consolare Rimini San Marino 62 47924 Rimini Rn Italia Tel 0541 756420 Fax 0541 756430 www trevi it e mail info trevi it Made in CHINA ...

Отзывы: