background image

5

MCX 1045IPD

ITALIANO

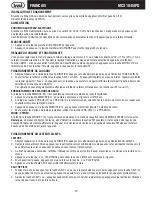
RIPETIZIONE DELL'INTERO DISCO
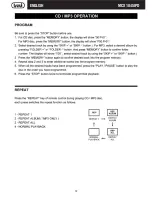
Premere piu' volte il tasto REPEAT(12) sul telecomando fino al comparire sul display della scritta REP ALL; l’apparecchio riproduce 
continuamente l'intero disco.
Per ripristinare il funzionamento normale di riproduzione dell’apparecchio, premere il tasto REPEAT(12) sul telecomando, fino a 
quando la critta REP scompare dal display.
SELEZIONE E RIPRODUZIONE DI UNA SINGOLA CARTELLA DI FILE(CD-MP3)

Questa funzione è attiva solamente se il cd Mp3 contiene directory o cartelle

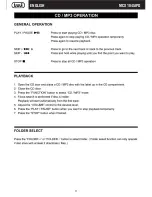
A riproduttore fermo , utlizzare i tasti (7) o FOLDER-(8) per selezionare la cartella di file desiderata; sul display verra' 
mostrato il numero della cartella selezionata. Avviare la riproduzione tramite il tasto 

/

 PLAY/PAUSE.

RIPETIZIONE DI UNA SINGOLA CARTELLA(CD-MP3)
Premere piu' volte il tasto REPEAT(12) sul telecomando fino al comparire sul display della scritta REP ALBUM; l’apparecchio 
riproduce continuamente i brani presenti nella cartella precedentemente selezionata.
Per ripristinare il funzionamento normale di riproduzione dell’apparecchio, premere il tasto REPEAT(12) sul telecomando, fino a 
quando la critta REP scompare dal display.
FUNZIONE PROGRAM
Riproduzione secondo una programmazione impostata dall'utente.
CD audio:
1.  Se il CD è in riproduzione, fermare la lettura premendo il tasto STOP.
2.  Premere il tasto MEMORY(23) sul telecomando, sul display compare la scritta P01.
3.  Premere i tasti  SKIP + o -  per selezionare la traccia da riprodurre per prima(sul display lampeggera' la scritta T**).
4.  Premere il tasto MEMORY(23) sul telecomando per confermare la scelta.
5.  Procedere seguendo i punti 3-4 per impostare il resto delle tracce fino ad un massimo di 20 tracce audio.
6.  Premere il tasto 

/

 PLAY/PAUSE per iniziare la riproduzione programmata.

7.  Premere due volte il tasto STOP per disattivare la programmazione.
CD MP3
1.  Se il CD è in riproduzione, fermare la lettura premendo il tasto STOP.
2.  Premere il tasto MEMORY(23) sul telecomando, sul display compare la scritta P01.
3.  Premere i tasti  (7) o FOLDER-(8) per selezionare la cartella dove e' posizionata la traccia da riprodurre per prima(sul 

display lampeggera' la scritta F**) e confermare premendo nuovamente il tasto MEMORY(23).

4.  Premere i tasti  SKIP + o -  per selezionare la traccia da riprodurre per prima(sul display lampeggera' la scritta T**).
5.  Premere il tasto MEMORY(23) sul telecomando per confermare la scelta.
6.  Procedere seguendo i punti 3-5 per impostare il resto delle tracce fino ad un massimo di 99 tracce mp3.
7.  Premere il tasto 

/

 PLAY/PAUSE per iniziare la riproduzione programmata.

8.  Premere due volte il tasto STOP per disattivare la programmazione.

FUNZIONAMENTO LETTORE USB

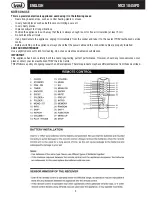
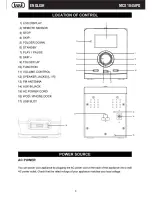
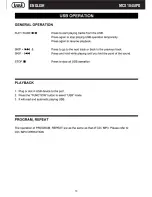
1.  Inserire un dispositivo usb nell'ingresso USB (17).
2.  Accendere l'apparecchio e tramite il tasto FUNCTION premere fino a far comparire sul display l'indicazione USB per attivare la 

lettura da dispositivo USB.

3.  Dopo qualche secondo il lettore partira' automaticamente con la riproduzione dei brani audio trovati.
4.  Premere il tasto 

/

 PLAY/PAUSE per attivare la pausa.

5.  Per disinserire la pausa premere  ancora una volta il tasto 

/

 PLAY/PAUSE.

6.  Per fermare la riproduzione premere il tasto 

 STOP.

Per tutte le altre operazioni possibili sul dispositivo USB (Salto traccia/Ripetizione/Program) vedi il capitolo precedente 

FUNZIONAMENTO LETTORE CD-MP3.

Содержание MCX 1045IPD

Страница 1: ...EOANLAGE MIT PLL RADIO CD USB AUX IN DOCKING STATION Betriebs und Anschlu anleitung EQUIPO ESTEREO CON PLL RADIO CD USB AUX IN DOCKING STATION Manual de uso y conexiones RADIOPLL FM STEREO AUX IN MCX...

Страница 2: ...2 MCX 1045IPD...

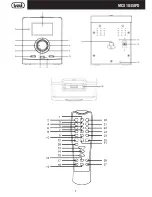
Страница 3: ...luppo Pertanto i prodotti possono presentare caratteristiche diverse da quelle descritte DESCRIZIONE COMANDI 1 Display LCD 2 Ricevitore telecomando 3 Tasto STOP 4 Tasto SKIP 5 Tasto FOLDER DOWN 6 Tast...

Страница 4: ...rsa Nota per ottenere la migliore ricezione in FM estendete e orientate l antenna Se la ricezione non buona provate a regolare diversamente la lunghezza e l orientamento dell antenna comunque la quali...

Страница 5: ...telecomando per confermare la scelta 5 Procedere seguendo i punti 3 4 per impostare il resto delle tracce fino ad un massimo di 20 tracce audio 6 Premere il tasto PLAY PAUSE per iniziare la riproduzi...

Страница 6: ...egliere tra 5 equalizzazioni preimpostate CLASSIC ROCK POP JAZZ FLAT default ID3 TAG solo in riproduzione brani MP3 E possibile visualizzare sul display informazioni relative al brano musicale mp3 che...

Страница 7: ...tandosi in Standby Per disattivare la funzione Timer premere il tasto TIMER 4 con l apparecchio in Standby dal display scompare la scritta TIMER per riattivarla premere di nuovo il tasto TIMER 4 Per e...

Страница 8: ...s the appliance unplug it immediately from the socket and take it to the nearest TREVI authorised service centre Before switching on the appliance always check that the power cable and the connection...

Страница 9: ...9 MCX 1045IPD ENGLISH...

Страница 10: ...10 MCX 1045IPD ENGLISH...

Страница 11: ...11 MCX 1045IPD ENGLISH...

Страница 12: ...12 MCX 1045IPD ENGLISH...

Страница 13: ...13 MCX 1045IPD ENGLISH...

Страница 14: ...14 MCX 1045IPD ENGLISH...

Страница 15: ...15 MCX 1045IPD ENGLISH...

Страница 16: ...16 MCX 1045IPD ENGLISH...

Страница 17: ...17 MCX 1045IPD ENGLISH...

Страница 18: ...ectronic accessory has been designed to connect specifically to iPod or iPhone respectively and has been certified by the developer to meet Apple performance standards Apple is not responsable for the...

Страница 19: ...ce agr TREVI le plus proche TREVI observe une politique de recherche et de d veloppement continus C est pourquoi ses produits peuvent pr senter des caract ristiques diff rentes par rapport celles qui...

Страница 20: ...radio r ceptionn e 3 Appuyez sur la touche MEMORY 23 un num ro commence clignoter sur l afficheur 4 l aide des touches PRE UP 21 ou PRE DN 3 de la t l commande s lectionnez le num ro de m moire sur l...

Страница 21: ...P ou pour s lectionner la piste couter la premi re le message T clignote sur l afficheur 4 Appuyez sur la touche MEMORY 23 de la t l commande pour confirmer 5 R p tez le proc d en suivant les points 3...

Страница 22: ...l et l aide de la touche FUNCTION appuyez sur cette derni re jusqu ce que le message AUX s affiche 3 Contr lez l unit externe travers ses commandes FONCTIONS DIVERSES GALISEUR Vous pouvez changer la d...

Страница 23: ...rs r gl es et l appareil entre automatiquement en mode Standby le message TIMER reste affich l cran l heure de marche r gl e l appareil s allume et lit la source sonore s lectionn e au volume souhait...

Страница 24: ...igung wird die Verwendung eines leicht angefeuchteten weichen Tuchs empfohlen Der Einsatz von L sungsmitteln oder scheuernden Substanzen sollte vermieden werden WICHTIG Derfachgem eBaudiesesGer tsgew...

Страница 25: ...2 Der Suchlauf wird durch die Tasten SKIP und SKIP aktiviert Bei langem Druck der Tasten h lt der Suchlauf beim ersten st rkeren Signal an bei kurzem Druck der Tasten wird ein schrittweiser Suchlauf...

Страница 26: ...sgeblendet wird FUNKTION PROGRAM Wiedergabe nach einer vom Benutzer eingestellten Programmierung Audio CD 1 W hrend der Wiedergabe einer CD wird die Taste STOP gedr ckt um die Wiedergabe abzubrechen 2...

Страница 27: ...und die Taste FUNCTION dr cken bis auf dem Display die Angabe AUX angezeigt wird 3 Das externe Ger t mit den eigenen Bedienelementen steuern SONSTIGE FUNKTIONEN EQUALIZER Die Audio Dynamik der wieder...

Страница 28: ...MER 4 best tigt Das Display zeigt die eingestellten Werte an und das Ger t schaltet automatisch auf Standby um Auf dem Display wird weiterhin die Angabe TIMER angezeigt Zur f r die Einschaltung einges...

Страница 29: ...ultar al Centro de Asistencia autorizado TREVI m s cercano TREVI cultiva una pol tica de investigaci n y desarrollo continuos Por consiguiente los productos pueden presentar caracter sticas distintas...

Страница 30: ...ulse el bot n MEMORY 23 en el display empezar a parpadear un n mero 4 Con los botones PRE UP 21 y PRE DN 3 del mando a distancia seleccione el n mero de memoria en la que desea guardar la emisora de r...

Страница 31: ...de los botones SKIP y seleccione la primera pista que desee escuchar en el display parpadear la palabra T 4 Pulse el bot n MEMORY 23 del mando a distancia para confirmar su elecci n 5 Proceda siguiend...

Страница 32: ...ecualizaciones preconfiguradas CLASSIC ROCK POP JAZZ y FLAT predeterminada ID3 TAG solo para reproducci n de pistas MP3 En el display se puede visualizar informaci n relativa a la pista musical MP3 qu...

Страница 33: ...en Standby Para desactivar la funci n Timer pulse el bot n TIMER 4 con el aparato en Standby la palabra TIMER desaparece del display para reactivarla vuelva a pulsar el bot n TIMER 4 Para efectuar un...

Страница 34: ...es autorit s locales ou bien le rendre au re vendeur quand il ach tera un nouvel appareil quivalent La collecte s par e du produit et les op rations suc cessives de traitement recyclage et limination...

Страница 35: ...DAS GER T NICHT FFNEN IM INNERN BEFINDEN SICH KEINE VOM BENUTZERSELBSTINSTANDSETZBARENTEILEUNDAUCHKEINEERSATZTEILE F R JEGLICHE SERVICEARBEITEN WENDEN SIE SICH BITTE AN EINE TREVI AUTORISIERTEN KUNDEN...

Страница 36: ...www trevi it E mail info trevi it DICHIARAZIONE DI CONFORMIT SI DICHIARA CHE L apparecchio Radio con CD marca TREVI modello MCX 1045IPD risponde alle prescrizioni dell art 2 comma 1 del D M 28 agosto...

Отзывы: