background image

3

DPL 2210

SELEZIONE DELLA SORGENTE DI RIPRODUZIONE

Se è inserito un dispositivo USB, una SD/MMC/MS Card o se nella memoria interna del photoframe 
sono presenti immagini, il sistema riprodurrà automaticamente le foto contenute.

Nota: di fabbrica viene data la precedenza alla scheda SD/MMC Card.

Premendo una volta il tasto EXIT si accede al contenuto della memoria riprodotta, premendolo una 
seconda volta si accede alla schermata delle FUNZIONI PRINCIPALI (vedi paragrafo successivo).
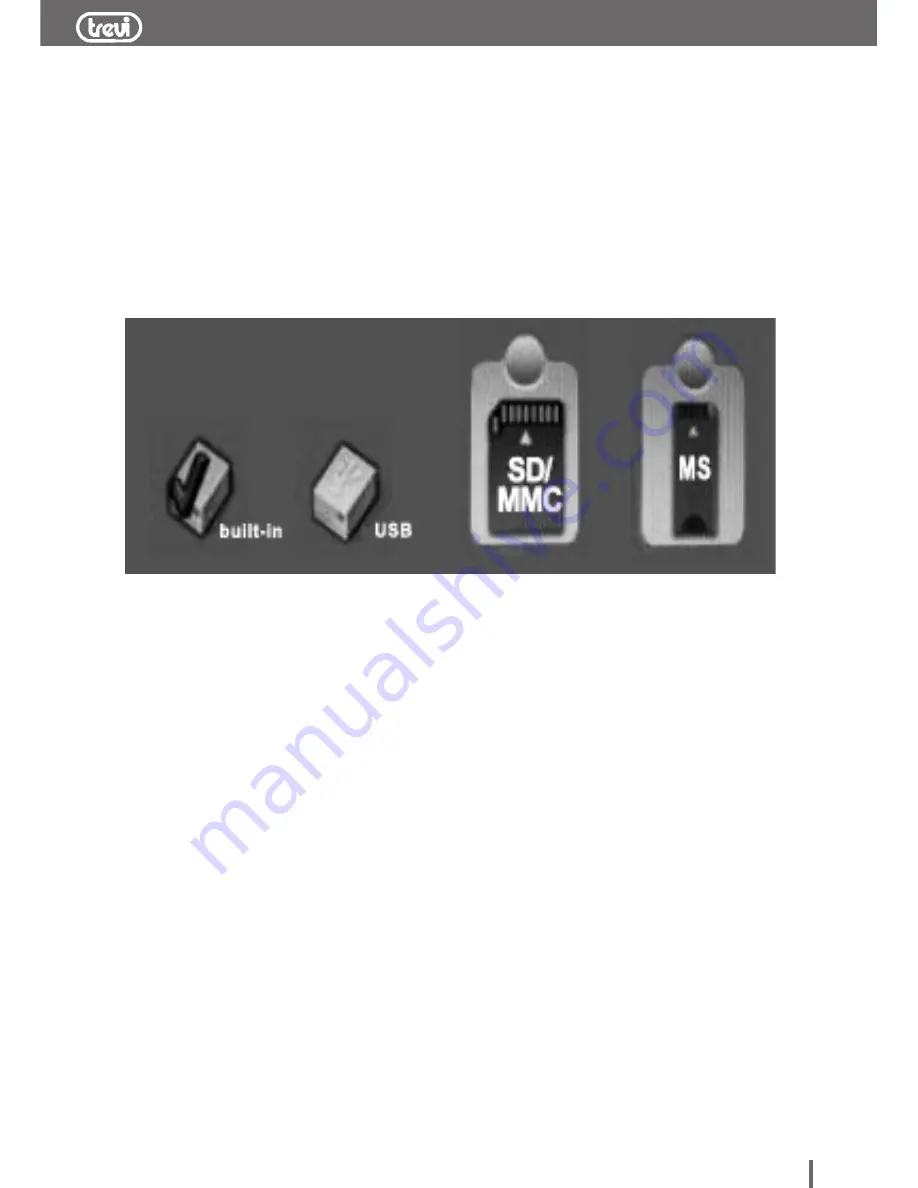
Premendo una terza volta il tasto EXIT si accede alla schermata di selezione della sorgente di 
riproduzione, come da immagine seguente:

ITALIANO

Built-in:   

per selezionare la memoria interna del photoframe (Built in Memory).

USB:     

per selezionare la memoria del dispositivo USB,.

SD/MMC

per selezionare la memoria della SD/MMC Card.

MS:     

per selezionare la memoria MS Card.

Premere i tasti NEXT o PREV per selezionare la sorgente di riproduzione e premere il tasto 
PLAY/PAUSE per confermare la scelta.

Nota: sono attive solo le icone del dispositivo presente (USB, SD/MMC/MS Card).

Содержание DPL 2210

Страница 1: ...DPL 2210 PHOTO FRAME DIGITALE Manuale d uso e collegamento DIGITAL PHOTO FRAME Instruction Manual ...

Страница 2: ...tra estremità del cavo all ingresso DC 3 posto a lato del photo frame DESCRIZIONE COMANDI ITALIANO ACCENSIONE SPEGNIMENTO 1 Per attivare il Photo Frame in modalità Stand by tenere premuto il tasto PLAY PAUSE 4 2 Per riattivare il Photo Frame dalla funzione Stand by tenere premuto il tasto PLAY PAUSE 4 1 Ingresso SD MMC MS Card 2 Ingresso USB 3 Ingresso alimentazione DC 5V 4 Tasto PLAY PAUSE accens...

Страница 3: ...hermata delle FUNZIONI PRINCIPALI vedi paragrafo successivo Premendo una terza volta il tasto EXIT si accede alla schermata di selezione della sorgente di riproduzione come da immagine seguente ITALIANO Built in per selezionare la memoria interna del photoframe Built in Memory USB per selezionare la memoria del dispositivo USB SD MMC per selezionare la memoria della SD MMC Card MS per selezionare ...

Страница 4: ...si alla pagina successiva per visionare ulteriori immagini memorizzate Premendo una volta il tasto PLAY PAUSE verrà mostrata l immagine selezionata premendolo nuovamente si attiverà la funzione Slideshow CALENDARIO mostra in maniera permanente la data e l ora corrente attivando sulla sinistra del display lo Slideshow delle immagini memorizzate sul supporto di memoria MENU IMPOSTAZIONI Premere il t...

Страница 5: ...salvata selezionando NO si ritorna al menù impostazioni ELIMINARE FILE quando la memoria in uso è quella interna Built in Memory permette di cancellare la foto evidenziata con la cornice gialla Verrà visualizzato un messaggio di conferma selezionando SI la foto verrà cancellata selezionando NO si ritorna al menù impostazioni FORMATTAZIONE MEMORIA quando la memoria in uso è quella interna Built in ...

Страница 6: ...eriori richiedono più tempo per il caricamento ma vengono riprodotte ugualmente ITALIANO AVVERTENZE PER IL CORRETTO SMALTIMENTO DEL PRODOTTO Il simbolo riportato sull apparecchiatura indica che il rifiuto deve essere oggetto di raccolta se parata pertanto il prodotto non deve essere smaltito insieme ai rifiuti urbani L utente dovrà consegnare il prodotto presso gli appositi centri di raccolta diff...

Страница 7: ...re decoding speed fast 4 Max support to 4000 4000 pixels 5 Operation Adopt five function keys panel 6 Support three display modes original image size 4 3 and full screen 7 Support SD MMC MS XD memory card 8 Support USB HOST high speed 9 High quality TFT panel resolution 480 234 III Package Contents Digital Photo Frame Bracket 1PCS User s Manual 1PCS DC 5V 2A Power Adapter 1PCS IV Note host keys Di...

Страница 8: ...y picture as following 1 Select Card mode In this mode on keys to various storage devices including memory the choice choose equipment after press ENTER button to enter the Select Mode press SLIDESHOW button to enter the automatic play mode ...

Страница 9: ...lection by the ENTER key as to enter the corresponding functional operation Press EXIT STOP back to the Select Card model press SLIDESHOW key players into the automatic mode 3 1 SLIDESHOW Automatic play mode play picture can choose to play four or full screen playback screen press EXIT STOP back to PHOTO menu ...

Страница 10: ...SETUP can pop up setup menu you can set image display mode the picture zoom rotate copy delete the current equipment for the Memory When not be able to choose copy operation the file copied to the memory inside or removed from memory Press EXIT STOP back to the Select Mode press SLIDESHOW button to enter the automatic play mode ...

Страница 11: ...ther mode SETUP pop up menu select Set Time settings and save time SETUP key invalid in this state Press EXIT STOP back to the Select Mode press SLIDESHOW button to enter the automatic play mode 3 Menu Image Size auto fit pan scan Slide Show Effect Slide Show Speed ...

Страница 12: ...e Delete File Reset Settings Language Brightness Contrast Color Tint Set Time Press SETUP button pop up menu Pop Menu in the auto show and invalid under state CALENDAR Press button to select the settings press ENTER into this setting items Press key adjustment Press EXIT on a return to the menu set out by SETUP menu ...

Страница 13: ...te and subsequent treatment recycling and disposal operations promotes the production of equipment with recycled materials and limits negative effects on the environment and on health caused by improper handling of waste Illegal disposal of the product leads to the enforcement of administrative penalties 4 USB Device Function In any mode can use USB Device functions can be connected to the compute...

Страница 14: ...14 DPL 2210 NOTE ...

Страница 15: ...15 DPL 2210 NOTE ...

Страница 16: ...MADE IN CHINA Trevi S p A Strada Consolare Rimini San Marino 62 47924 Rimini Rn Italy Tel 0541 756420 Fax 0541 756430 www trevi it E mail info trevi it ...

Отзывы: