


© Copyright 2014 TRENDnet. All Rights Reserved.
TRENDnet User’s Guide
TEW-721BRM
36
that makes all the ports and services available on the WAN/Internet side of the router
and forwards them to a single IP address (computer or network device) on your
network. The DMZ feature is an easy way of allowing access from the Internet however,
it is a very
insecure
technology and will open local area network to greater threats from
Internet attacks.
It is strongly recommended to use
Virtual Server
(also called port forwarding, see
) to allow access to your computers or network devices from
the Internet.
1. Make sure to configure your computer or network device to use a static IP address or
you can use the DHCP reservation feature (see “Set up DHCP reservation” on page
53).
2. Log into your router management page (see “Access your router management page”
on
3. Click on
Advanced
, click on
Firewall
, and click on
DMZ
.
4. Select Enable next to DMZ.
5. In
DMZ Host IP Address
enter the IP address you assigned to the computer or
network device to expose to the Internet.
5. To save changes, click
Apply
.
Note:
If using ADSL WAN with multiple PVCs, click the DMZ Mode drop-down list to
select Multi Mode which will allow you which PVC to assign the DMZ Host.
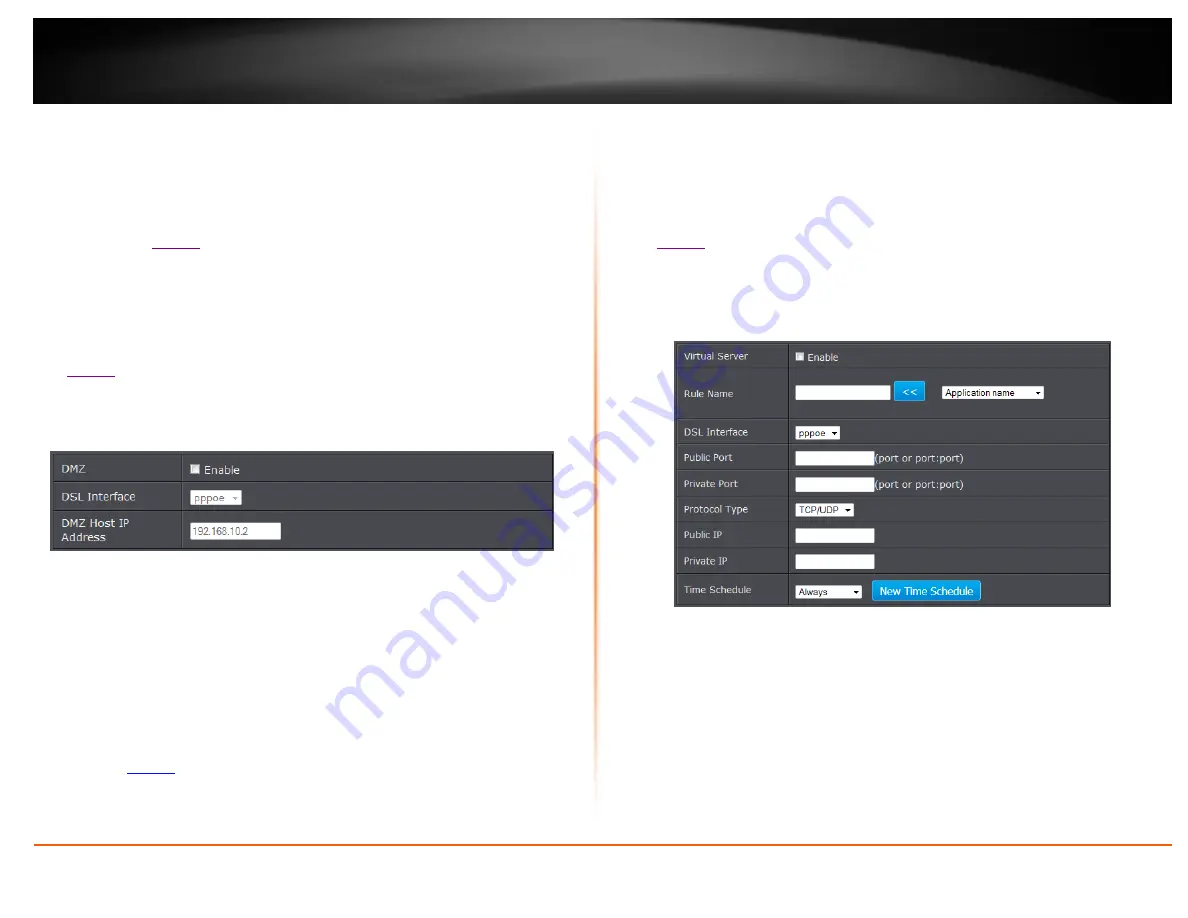
Virtual Server
Advanced > NAT > Virtual Server
Virtual Server (also called port forwarding) allows you to define specific ports (used or
required by a specific application) and forward them to a single IP address (a computer
or device) on your network. Using this feature is more secure compared to using DMZ
(see “DMZ” on
) in which DMZ forwards all ports instead of only specific ports
used by an application. An example would be forwarding a port to an network/IP
camera (typically on TRENDnet IP cameras use HTTP TCP port 80 for remote access web
requests) on your network for to allow remote access to it.
Since most ISPs constantly change your home IP address, to be able to access the
Virtual Server port(s) from the Internet it is recommended to setup Dynamic DNS
service (See DynDNS section).
1. Log into your router management page (see “Access your router management page”
2. Click on
Advanced
, click on
NAT
, and click on
Virtual Server
option and click
Add.
To simplify configuration, there is a list of commonly used pre-defined virtual server
entries to modify by clicking the drop down menu under rule name, otherwise, you
can choose to manually add a new virtual server.
3. Review the virtual server settings. Click
Apply
to save settings.
Virtual Server:
Select to enable rule.
Rule Name:
Enter the name of the rule or select from the predefine pull down
menu list.
DSL Interface:
The interface of the rule to be applied.
Public Ports:
Enter the port number required by your device from the internet. This
will be the same port number used to access the device from the Internet and will
include both TCP and UDP protocols.
Private Ports:
Enter the port number required by your device. This will be the same
port number used to access the device from your network and will include both
TCP and UDP protocols.
Содержание TEW-721BRM
Страница 1: ...TRENDnet User s Guide Cover Page...
Страница 64: ......