8
3
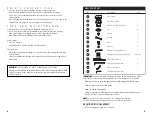
CAUTION:
Fully assembled, the AKZ13 umbrella weighs
over 500 lbs.
Moving the umbrella
fully assembled will increase the risk of damage to your umbrella and/or can cause serious
injury.
We recommend a two-person team for assembly and disassembly.
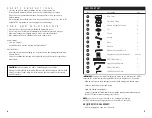
Lg. Hexagon
Wrench
Med. Hex. Wrench
Rotating Hub
Main Frame
(Fig. 1)
(Fig. 3)
(Fig. 4)
(Fig. 5)
(Fig. 6)
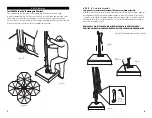
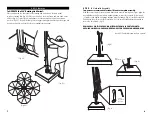
To ATTACH VEGA Umbrella Light: (sold separately)
Loosen the VEGA light adapter built into the umbrella runner by turning counter-clockwise
(Fig. 23). After loosening, pull down light adapter post (Fig. 24) to attach the
VEGA umbrella light (sold separately).
To OPEN and ATTACH VEGA:
Open the VEGA umbrella light by holding firmly with one hand and then depress the clamp
release button with the other hand to release the clamp lock. Open up the VEGA light and
clasp around the light adapter post (Fig. 25). Snap to close (Fig. 26).
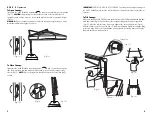
To REMOVE VEGA and CLOSE adapter:
Hold the VEGA umbrella light, depress the clamp release button to release the clamp lock.
Remove VEGA umbrella light, and gently push up the light adapter post back into umbrella
runner and tighten turning clockwise (Fig. 23).
NOTE:
It is not necessary to
remove light to close umbrella.
(Fig. 23)
(Fig. 24)
(Fig. 25)
(Fig. 26)
AKZ13 Features
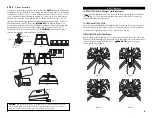
S T E P 1
Base Assembly
Select area to set base frame and place in desired location.
NOTE:
Moving the umbrella will
be difficult once fully assembled. Remove rotating hub from the main frame by removing the
(2) bolts and (2) washers (Fig. 1), set aside bolts and washers for later use in step 2. Screw
(4) feet onto bottom of base frame with supplied (4) screws (Fig. 2). Now, place rotating
hub onto base frame and secure with supplied (5) bolts & (5) washers (Fig. 3). Remove
caps from each add-on weight container and fill with dry playground sand (Fig. 4). The AKZ13
base containers hold up to 400 lbs. of sand.
IMPORTANT:
When filling the containers, it is
necessary to wet down the sand after partial filling. After wet down, fill each add-on weight with
remaining sand. Place each add-on weight container into base frame sections (Fig. 5).
Carefully place base cover onto base frame (Fig. 6).
LEVELING:
If needed, adjust frame
corners using supplied wrench until frame is level (Fig.
7
).
(Fig.
7
)
(Fig. 2)


