Traxxas Slash VXL 58076 Скачать руководство пользователя страница 15

SLASH VXL • 15

TRAXXAS TQ

i

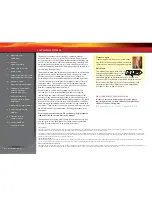
 RADIO & VELINEON POWER SYSTEM

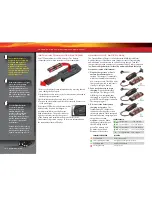
Using Reverse: While driving, 
push the throttle trigger 
forward to apply brakes. 
Once stopped, return the 
throttle trigger to neutral. 
Push the throttle trigger 
forward again to engage 
proportional reverse. 

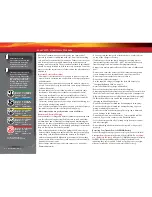
USING THE RADIO SYSTEM

The TQi Radio System has been pre-adjusted at the factory. The 
adjustment should be checked before running the model in case of 
movement during shipping. Here’s how:

1.  Turn the transmitter switch on. The status LED on the transmitter 

should be solid green (not flashing).

2. 

Elevate the model on a block or a stand so that all the tires are 
off the ground.

 Make sure your hands are clear of the moving 

parts of the model.

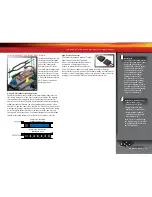
3.  Plug the battery pack in the model into the speed control. 

4.  The on/off switch is integrated into the speed control. Press and 

release the EZ-Set button on the speed control to turn the model 
on. The LED will shine RED or GREEN (see note below). To turn 
the VXL-3s off, press the set button until the LED turns off. 

Note:


If the model is factory equipped with LiPo batteries, the LED will be 
green, indicating that Low-Voltage Detection is activated. If the 
model is factory equipped with NiMH batteries, the LED will be red, 
indicating that Low-Voltage Detection is disabled. 

Never use LiPo 

batteries while Low-Voltage Detection is disabled. 

See page 17 for 

more on VXL-3s setup and operation.

5.  Turn the steering wheel on the transmitter back and forth and 

check for rapid operation of the steering servo. Also, check that 
the steering mechanism is not loose or binding. If the steering 
operates slowly, check for weak batteries.

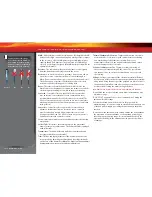
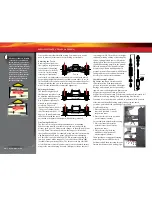
6.  When looking down at the 

model, the front wheels 
should be pointing straight 
ahead. If the wheels are 
turned slightly to the left 
or right, slowly adjust the 
steering trim control on the 
transmitter until they are pointing straight ahead. 

7.  Gently operate the throttle trigger to ensure that you have 

forward and reverse operation, and that the motor stops when 
the throttle trigger is at neutral. 

WARNING

Do not apply full 

throttle in forward or reverse while the model is elevated.

8.  Once adjustments are made, turn off the VXL-3s, unplug the battery 

from the model, then turn off the hand-held transmitter.

Range-Testing the Radio System

Before each running session with your model, you should range-test 
your radio system to ensure that it operates properly.

1.   Turn on the radio system and check its operation as described in 

the previous section.

2.   Have a friend hold the model. Make sure hands and clothing are 

clear of the wheels and other moving parts on the model.

3.   Make sure your transmitter antenna is upright, and then walk 

away from the model with the transmitter until you reach the 
farthest distance you plan to operate the model.

4.   Operate the controls on the transmitter once again to be sure 

that the model responds correctly. 

5.   Do not attempt to operate the model if there is any problem 

with the radio system or any external interference with your 
radio signal at your location. 


Higher Speeds Require Greater Distance


The faster you drive your Slash VXL, the more quickly it will near 
the limit of radio range. At 60mph, a model can cover 88 feet 
every second! It’s a thrill, but use caution to keep your model in 
range. If you want to see your Slash VXL achieve its maximum 
speed, it is best to position yourself in the middle of the truck’s 
running area, not the far end, so you drive the truck towards and 
past your position. In addition to maximizing the radio’s range, 
this technique will keep your model closer to you, making it 
easier to see and control. 


No matter how fast or far you drive your Slash VXL, always leave 
adequate space between you, the model, and others. Never drive 
directly toward yourself or others. 

TQi Binding Instructions

For proper operation, the transmitter and receiver must be
electronically “bound.” 

This has been done for you at the factory.

Should you ever need to re-bind the system or bind to another 
transmitter or receiver, follow these instructions. 

Note

: The receiver 

must be connected to a 4.8-6.0v (nominal) power source for binding, 
and the transmitter and receiver must be within 5 feet of each other.

1.   Press and hold the transmitter’s SET button as you switch the 

transmitter on. The transmitter’s LED will flash red slowly.  
Release the SET button.

2.   Press and hold the receiver’s LINK button as you switch on  

0

°

0

°

-1.5

°

-1.5

°

-1

°

-1

°

0

°

0

°

6,7

Содержание Slash VXL 58076

Страница 1: ...owner s manual MODEL 58076 1...

Страница 2: ...l find it helpful and fast Be sure and read through the rest of the manual to learn about important safety maintenance and adjustment procedures Turn to page 8 to begin 3 BEFORE YOU PROCEED 4 SAFETY P...

Страница 3: ...Helpful Hints Cross References Throughout this manual you ll notice warnings and helpful hints identified by the icons below Be sure to read them An important warning about personal safety or avoidin...

Страница 4: ...ries It is your responsibility to charge and care for the battery packs properly In addition to your battery and charger instructions here are some more tips to keep in mind Do not charge batteries in...

Страница 5: ...tteries Do not attempt to charge LiPo batteries with the Traxxas charger included in this package Make sure you understand how to use your LiPo batteries Be aware that Traxxas shall not be liable for...

Страница 6: ...ttery Compartment Battery Nerf Bar Battery Hold Down Receiver Box LED Light Pipe Antenna Mount Suspension Arm Front Front Bumper Steering Servo Shock Oil Damper Turnbuckle Toe Link Turnbuckle Front Ca...

Страница 7: ...Glue part 6468 CA glue Hobby knife Side cutters and or needle nose pliers Phillips screwdriver Soldering iron For more information on batteries see Use the Right Batteries on page 12 U joint wrench Pr...

Страница 8: ...ence from outside sources 3 Install batteries in the transmitter See page 12 8 Detail your model See sidebar page 9 The transmitter requires 4 AA alkaline batteries sold separately Apply other decals...

Страница 9: ...t energize the electromagnetic windings in sequence to provide rotation Opposite of a brushed motor the brushless motor has its windings coils on the perimeter of the motor can and the magnets are mou...

Страница 10: ...lder tabs Transmitter The hand held radio unit that sends throttle and steering instructions to your model Trim The fine tuning adjustment of the neutral position of the servos made by adjusting the t...

Страница 11: ...Trim Multi Function Knob Throttle Trigger Throttle Neutral Adjust Steering Wheel Power Switch Battery Compartment Set Button Menu Button Red Green Status LED see page 28 for more info Link Button LED...

Страница 12: ...as indicated in the battery compartment 3 Reinstall the battery door and snap it closed 4 Turn on the transmitter and check the status indicator for a solid green light If the status LED flashes red...

Страница 13: ...for use with typical stick type battery packs If you are using side by side racing packs simply flip the hold down over to the 23mm side and use it on the opposite side of the chassis Your model inclu...

Страница 14: ...ansmitter off before adjusting the neutral position You will need to reprogram your electronic speed control to recognize the 70 30 setting Turn to ESC Setup Programming on page 17 for instructions St...

Страница 15: ...ted 8 Once adjustments are made turn off the VXL 3s unplug the battery from the model then turn off the hand held transmitter Range Testing the Radio System Before each running session with your model...

Страница 16: ...e steering motion of the model s front wheels corresponds precisely with the steering wheel The ranges are exaggerated for illustrative purposes Decreased Steering Sensitivity Negative Exponential By...

Страница 17: ...ress SET to clear settings The LED will turn solid green and the transmitter is restored to default VXL 3s Setup Programming Calibrating your ESC and transmitter Read through all of the programming st...

Страница 18: ...drive SelectingTrainingMode Profile 3 50 Forward 100 Brakes 50 Reverse 1 Connect a fully charged battery pack to the VXL 3s and turn on your transmitter 2 With the VXL 3s off press and hold the EZ Se...

Страница 19: ...hat all hardware remains properly tightened About Run Time A large factor affecting run time is the type and condition of your batteries The milliamp hour mAh rating of the batteries determines how la...

Страница 20: ...puddles snow or other similar situations that will restrict the tires and put much higher loads on the motor Motor Precautions Velineon motor life can be greatly reduced in mud and water If the motor...

Страница 21: ...val and installation of the receiver without losing the ability to maintain a watertight seal in the box The patent pending wire clamp feature gives you the ability to also install aftermarket radio s...

Страница 22: ...l life The model s ride height can be adjusted by adding or removing the clip on spring preload spacers Adjust the ride height so that the suspension arms are slightly above being parallel to the grou...

Страница 23: ...gh speed gearing more teeth If you want more acceleration and less top speed use a smaller optional not included pinion gear The included high speed gearing is intended for high speed running on hard...

Страница 24: ...o to channel 1 on the receiver Connect the electronic speed control ESC to channel 2 The white wire on the servo lead is positioned towards the receiver s LED 3 Turn the transmitter power switch on Ma...

Страница 25: ...will help you monitor temperatures and cool your components Temperature sensor To accurately monitor motor temperature and prevent overheating a telemetry temperature sensor part 6523 can be installed...

Страница 26: ...e tie rod ends Traxxas part 2742 Replace these components as needed to restore factory tolerances Motor Every 10 15 runs remove the motor and clean the bearings To access the rear bearing remove the p...

Страница 27: ...settings you select will represent what you wish to be the servo s maximum travel the Steering Percentage or Braking Percentage functions will not override the End Point settings Steering and Throttle...

Страница 28: ...you may wish to delete a model you no longer drive from the memory 1 Switch on the transmitter and receiver you wish to delete 2 Press and hold MENU Release when the status LED blinks green 3 Press ME...

Страница 29: ...to save Push forward to desired end point and press set to save To reset max throw Let go of controls and press SET The Menu Tree below shows how to navigate through the TQi transmitter s various set...

Страница 30: ...LED blinks Press SET red LED blinks x3 Press MENU twice red LED blinks x3 Turn steering wheel to desired max left and right travel x8 Press SET to save each position Turn steering wheel to test settin...

Страница 31: ...owerful tuning options Control Drive Effects settings such as steering and throttle sensitivity steering percentage braking strength and throttle trim by simply touching and dragging the sliders on th...

Страница 32: ...6200 TRAXXAS WAY McKINNEY TEXAS 75070 1 888 TRAXXAS 141006 58076 1 OM EN R00 owner s manual...

Отзывы: