


Optional Equipment
3 5
Travis Industries
4 0 1 1 0 2 5
9 3 5 0 8 1 0 4
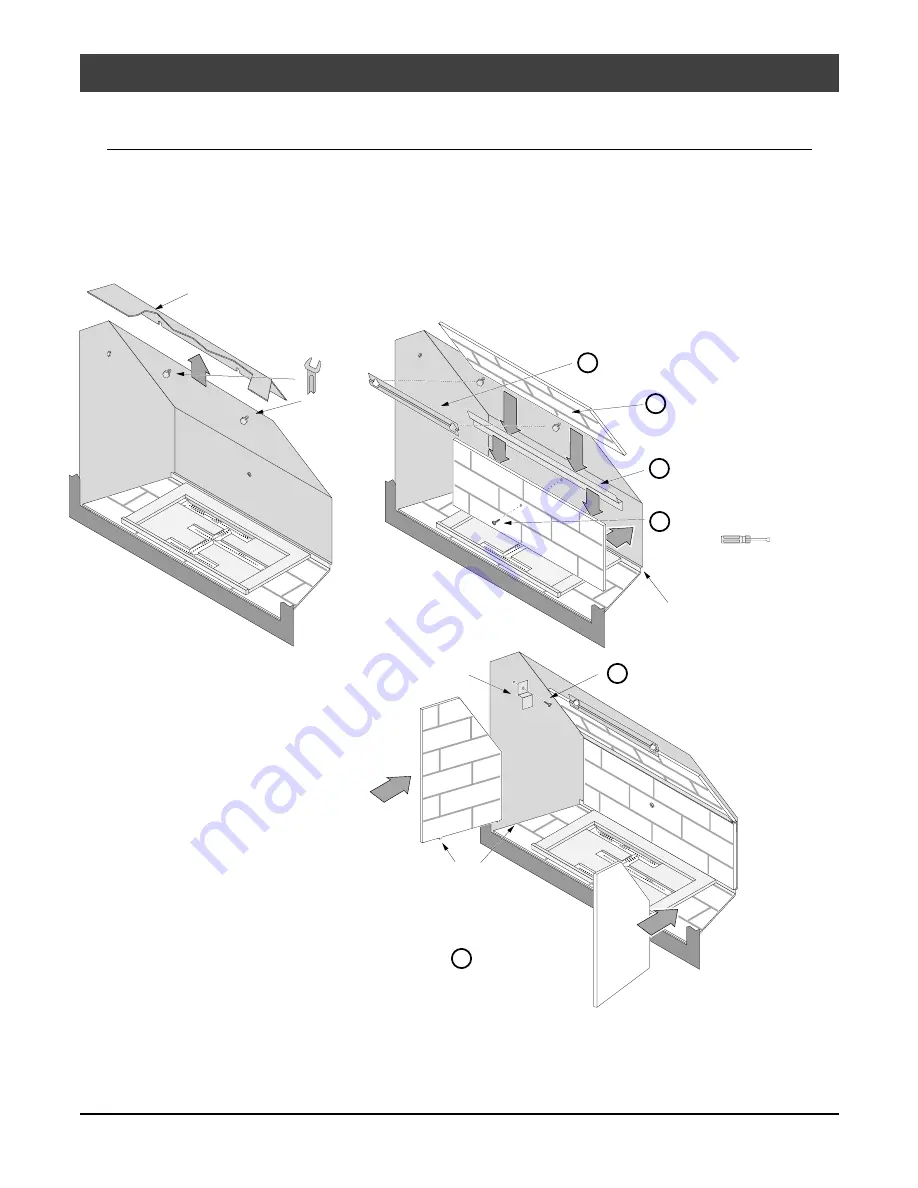
Decorative Firebacks
(Part # - Brick Pattern 98500737, Classic Pattern 98500743)
!
Turn the gas control valve to "OFF" prior to conducting any service.
The decorative cast fireback attaches to the walls of the firebox to enhance aesthetics. Before
installing, remove the face, glass, logs, and embers. The directions below detail installation.
1
Remove the baffle at the top of the firebox following the directions below to the right.
Loose the two bolts at the back
of the firebox. Lift the baffle up
to remove it.
7/16" Wrench
Baffle
2
Install the firebacks following the
directions to the right.
3
Replace the baffle removed in
step 1.
a
b
Remove the screw on the back wall of the firebox.
c
Rest the upper rear fireback on top of the rear
fireback brace.
d
5/16" Nutdriver
Slide the rear fireback brace over the lower rear
fireback (note how the joggle tilts forward). Place
them against the back wall of the firebox and
attach with the screw removed in step a.
Secure the upper rear fireback by installing the upper rear fireback clip
over the bolts (do not tighten the bolts until the baffle is replaced).
The rear fireback rests on this ledge at the rear of the firebox.
Secure the side firebacks by attaching the fireback clips to the
firebox with the screws removed in step “e”.
Make sure the
notches on the side
firebacks fit into the
grooves on the
firebox floor.
Side Fireback Clip
Remove the screws on both
side walls of the firebox.
f
e
Содержание DVL Insert
Страница 2: ......


