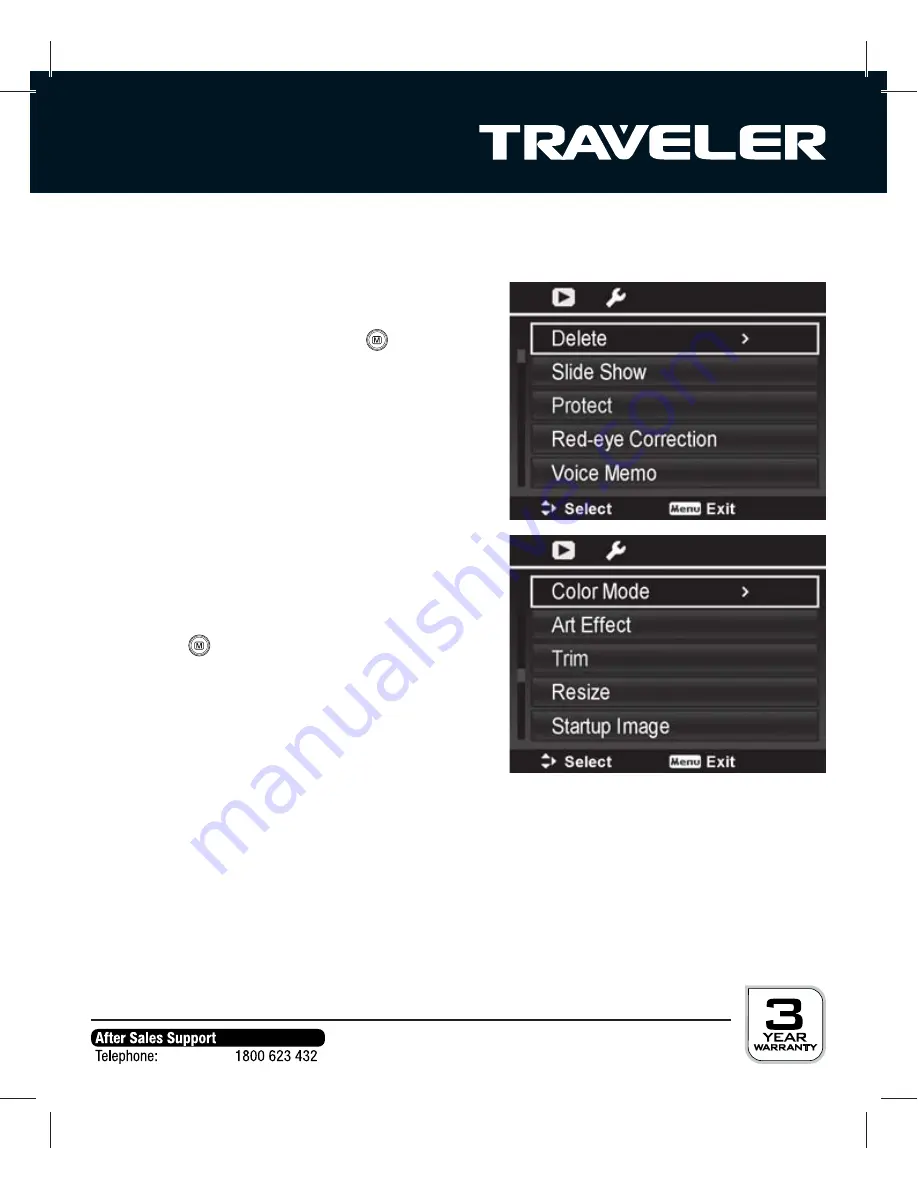
Traveler Z 2000 Скачать руководство пользователя страница 62

62

Playback menu

IIn this menu, the settings for playing back photos and video clips are selected.

1. Press button 

7

.

2.  In the playback mode press the 

 button.

3. Using the 

S

 / 

T

 buttons select the desired 


option and press 

OK

 to access the sub-menu.


„

The available elements diff er depending on


 the selected recording mode. 

 
4. Use the 

W

 / 

X

 / 

S

 / 

T

 buttons to select the 

 desired 

setting.

5. Confi rm your selection by pressing the 

OK 


button or follow the notes on the display. 


6. Press the 

 button to exit the 

 menu.

· Delete

To delete photos see section ”Deleting photos“ starting on page 51.


„

Single / Voice Only / Multi / All

· Slide Show

Determine whether photos should be shown as a slide show. See also page 54 and
following in this Instruction Manual.


„

Start / Cancel / Interval / Repeat

Содержание Z 2000

Страница 1: ...oping a fault Keep these in a safe place together with the Instruction Manual Please include the Instruction Manual when passing on the camera to a third party 1 Contents of box Carefully unpack camer...

Страница 2: ...ode Video playback 13 Playback mode Audio playback 13 5 START 14 Preparation 14 Charging the battery 16 Initial settings 17 Setting data and time 18 Language selection 19 Formatting a memory card 20 6...

Страница 3: ...4 Exposure compensation 35 White balance 36 ISO value 37 Exposure measurement 37 Locking settings 37 Colour mode 38 Artistic effects 39 Photos with fisheye effect 39 Miniature effect photos 40 Photos...

Страница 4: ...55 Red eye correction 56 Recording voice memos 56 Playback of voice memos 57 Cropping of photos 57 DPOF settings 58 12 MENU OPTIONS 59 Recording menu 59 Playback menu 62 Setup menu 65 13 CONNECTING TO...

Страница 5: ...person responsible for their safety or are instructed in the use of the device by this person Children should be supervised to ensure that they are not playing with the camera Electrocution hazard in...

Страница 6: ...Do not remove battery immediately after camera has been used for a longer period of time Batteries may become hot during use Risk of explosion in case of incorrect changing of battery or use of wrong...

Страница 7: ...y not supplied to prevent overheating Do not place any open ignition sources such as lit candles onto or close to the device Ensure that the LCD display is not subjected to impacts or concentrated pre...

Страница 8: ...release 2 Zoom button 3 Flash 4 On Off button 5 Self timer LED 6 Microphone_ 7 Lens Rear view of camera A LCD display B Status LED C USB AV connection D Strap fastening E Battery memorycard compartme...

Страница 9: ...ideo recording Change to recording mode 4 Menu Menu 5 AE AF Lock AE AF lock Photo rotate image 6 O Focus setting Previous photo 7 T Series picture setting Next photo 8 a Flash 9 OK Confirm selection V...

Страница 10: ...ng Text Foliage Auction Smile Capture Blink Detection Pre Composition Love Portrait Self Portrait D Lighting Voice REC 2 Flash mode Auto Flash Red eye Reduction Forced on Slow Sync Forced off 3 Self t...

Страница 11: ...Shutter speed 17 Aperture value 18 Sharpness 19 Saturation 20 Contrast 21 Lighting 22 Focus setting Auto Focus Super Macro Pan Focus Infinity Manual Focus 23 Face recognition 24 White balance Auto Whi...

Страница 12: ...uration 3 Recording status 4 Photos 5 Zoom display Playback mode Photo playback 1 Playback mode 2 Deletion protection 3 Voice memo 4 Button instructions Voice memo 5 File number total number 6 Battery...

Страница 13: ...orage medium 8 Recording date and time 9 Video size 10 Volume 11 Video length 12 Playback time 13 Playback status Playback mode Audio playback 1 Playback mode 2 Deletion protection 3 Button instructio...

Страница 14: ...First pull the short loop of the strap through the lug and then the strap itself 2 The bottom of the camera contains the compartment housing the battery and memory card Open the compartment by lightl...

Страница 15: ...erted or removed whilst the camera is switched on Write position Write protection position 4 The memory card SD SDHC card is inserted into the small compartment next to the battery Slide memory card i...

Страница 16: ...rging of the battery commences automatically The battery can also be charged from the USB connection of the computer 1 Switch off camera 2 Using the USB cable connect camera to computer 3 Charging of...

Страница 17: ...at or time function you wish to enter and change the values with the S T buttons 5 Once the date and time have been set correctly press the OK button to save 6 The camera then changes to the recording...

Страница 18: ...ton to confirm Now determine the order in which the day month and year are displayed in the date 4 Use the W X buttons to select the date format and use the S T buttons to select the order YY MM DD MM...

Страница 19: ...s the menu button 2 Using the W X buttons select the Setup menu 3 Select language using S T buttons and press SET button 4 Select the desired language using W X S T buttons The following languages are...

Страница 20: ...sing the S T buttons and then confirm by pressing the OK button 5 Select Yes using the S T buttons and press OK button again Select Cancel and press the OK button to cancel the operation 6 To exit the...

Страница 21: ...m button to zoom out and show a larger area of the image 4 Press shutter release If the release shutter is half pressed the image is automatically focussed and the correct lighting is set If the relea...

Страница 22: ...mode Description Auto Select this mode to take photos without having to set up special functions or manually enter settings Program In this mode most parameters can be set manually Intelligent scene S...

Страница 23: ...se this mode for taking photos in the snow or on the beach without persons appearing dark or photos developing a blue cast Sports Use this mode for taking photos of fast moving objects Party This func...

Страница 24: ...Pre Composition This function takes a preliminary photo as reference Press the shutter release fully once you have connected the subject of the photo with the reference point Love Portrait Thisfunctio...

Страница 25: ...best mode for the photo scene from Portrait Scenery Sunset Macro Text Snow Back light Back light portrait Night scene Night photo Foliage Back light photos When photographing persons into the sun or...

Страница 26: ...up to 4 images can be directly combined to a 640 x 480 Pixel image This function provides optimum images for instance for online auctions 1 In Photo mode press the button 2 Select the Photo mode using...

Страница 27: ...e using the S T buttons and press the OK button 3 Using the W X buttons select the Smile Capture mode and press the OK button to confirm 4 As soon as the camera detects a smile in the image this is ma...

Страница 28: ...nd then press the OK button 3 Using the W X buttons select the Love Portrait or Self portrait mode and press the OK button to confirm 4 As soon as the camera detects a face for Self portrait or severa...

Страница 29: ...T buttons select the option for setting AE L and AF L 4 Using the W X buttons select AE L AF L both AE L exposure or AF L auto focus and confirm the selection by pressing the OK button To only lock th...

Страница 30: ...re of this mode is Depth of Field DOF this feature is not suitable for close ups Infinity For capturing objects at great distance i e scenery mountain ranges and similar Manual Focus When in Manual fo...

Страница 31: ...following Continuous shooting modes are available Off Continuous shooting deactivated When the shutter release is depressed only single photos are taken Burst Photos are continuously taken as long as...

Страница 32: ...eans of a pre flash Forced On The flash is activated for every photo Slow Sync The flash is synchronised with a longer shutter speed to brigh ten up the background The use of a tripod is recommended f...

Страница 33: ...ction use the W X buttons to toggle between the available op tions of the function 4 Once all settings have been entered press the OK button to save the changes 5 To exit the Function menu without sav...

Страница 34: ...selecting the aspect ratio the Help text also shows the number of remaining photos Setting the image size Image size refers to the resolution of a photo This function allows you to set the resolution...

Страница 35: ...xposure compensation and use the W X buttons to select the desired value The change in brightness is shown directly on the display Press the OK button to save the settings Note t 8IFO TXJUDIJOH PO UIF...

Страница 36: ...scent_1 For internal photos under blue Neon light Fluorescent_2 For internal photos under red Neon light Custom This option allows manual setting of the white balance To manually select White balance...

Страница 37: ...ions are available Multi Exposure is measured across the entire image area Center Takes the average of the light measures within the entire frame but places more emphasis on objects at the centre Spot...

Страница 38: ...our tones Colour Accent Red Retains the red tone whilst the rest of the image becomes black white Colour Accent Green Retains the green tone whilst the rest of the image becomes black white Colour Acc...

Страница 39: ...e lenses distort photos to such an extent that a strong curvature always appears at the edge of a photo The result is a drum effect for the images 1 Select one of the capture modes such as Program or...

Страница 40: ...r position such as a high rise building or viewing towers 1 Select one of the capture modes such as Program or Landscape that allow Artistic effects 2 In Photo mode press the Fn button 3 Using the S T...

Страница 41: ...ite whilst in the Painting mode shapes are also filled with colour 1 Select one of the capture modes such as Program or Landscape that allow Artistic effects 2 In Photo mode press the Fn button 3 Usin...

Страница 42: ...pressing the OK button Self timer The camera offers various self timer options to ensure that you as the photographer can always be part of a photo Off Photos are taken when the shutter release is pre...

Страница 43: ...within a wide frame Center The camera focuses on the centre of the image Tracking AF Use this option to take a photo of a moving object 1 If AF tracking has been selected the symbol appears at the ce...

Страница 44: ...only available for Photos not for videos The option can slow down the AEB sequence modes On vertical or rotated photos the date and time still appear horizontally on the photos Setting up the stabili...

Страница 45: ...o inter rupt or stop recording To continue recording press the S button again The maximum recording time depends on the free memory and subject matter The maximum recording time for a single video cli...

Страница 46: ...can then only be selected if a SDHC memory card of class 4 or higher is used Setting of Wind noise reduction Select option Wind noise from the Function menu to reduce wind noise during video recordin...

Страница 47: ...ayback press the T button The playback stops and you return to the beginning of the video To pause the playback press the S button Functions such as the video editing function will then be available s...

Страница 48: ...option to the next Start point Select the start point for cutting using the W X buttons End point Select the end point for cutting using the W X buttons Preview Playback the edited video Start and en...

Страница 49: ...using the W X buttons Press the W button to display the previous photo Press the X button to display the next photo Press the left Zoom button to enlarge the image Press the right Zoom button to redu...

Страница 50: ...al pages of thumbnails are available 4 Press the OK button to select a photo and display it in full size 5 Exit the thumbnail view by turning the Zoom wheel once in clockwise direction Calendar mode A...

Страница 51: ...rged To exit the Zoom view press button Deleting photos Deleting one or more photos Using the Delete function individual or all photos can be deleted from the camera 1 Press button 7 The last photo is...

Страница 52: ...y pressing OK Multi For deleting several photos simultaneously The photos appear in thumbnail view on the display Using the W X S T buttons select a photo to be deleted and then press the OK button Th...

Страница 53: ...OK button Select Cancel and press OK if you wish to keep the photo Where the option File no is set to Series in the menu the deletion of photos does not affect the numbering of new photos Numbering i...

Страница 54: ...e OK button 3 Using the S T buttons select one of the following options Start Select the option and then press the OK button to start a slideshow A slideshow can be interrupted by pressing the OK butt...

Страница 55: ...Select Cancel to return to the Playback mode Multi Photos are displayed in thumbnail view Using the W X S T buttons select a photo whose protection status you wish to change Press the OK button to ma...

Страница 56: ...that can be confirmed by pressing the OK button Overwrite Save and replace the existing image with the edited image Save as Save the edited image to a new file Cancel Cancel the correction without sa...

Страница 57: ...ns select the image to be cropped 3 Press the button and select Trim The Cropping window then appears in the display 4 Use the Zoom wheel to determine the cropping size 5 Use the W X S T buttons to mo...

Страница 58: ...play 2 Press button Menu button and select function DPOF 3 3 options are available Single DPOF settings for a single photo All DPOF settings for all photos on the memory card Reset Resets DPOF setting...

Страница 59: ...e W X S T buttons select the desired setting 4 Confirm the selection by pressing the OK button or follow the notes on the display 5 Press the to exit the menu The default values are marked with an ast...

Страница 60: ...or determining the Auto focus range See also page 43 Face recognition Wide Centre AF tracking t 4IBSQOFTT This determines the image sharpness of the photo Hard Normal Low t 4BUVSBUJPO This function is...

Страница 61: ...lows you to determine whether a photo should be briefly shown on the display after it has been taken On Off t SJE JOF The grid line function is used to display a frame grid in the preview mode for tak...

Страница 62: ...pending on the selected recording mode 4 Use the W X S T buttons to select the desired setting 5 Confirm your selection by pressing the OK button or follow the notes on the display 6 Press the button...

Страница 63: ...ur shades can be applied to photos to produce an enhanced artistic effect Images processed with this function are stored as a new file Off Sepia B W Red Green Blue Art Effect The function Artistic eff...

Страница 64: ...ur photos as a start image or change back to the original image System My photo Off DPOF Read section DPOF settings page 58 for further information on this function Single All Reset Radial Blur Radial...

Страница 65: ...e desired setting and press OK to confirm 5 Press the to exit the menu The default values are marked with an asterisk in the below list t 4PVOET Determine the sounds and volume of the sounds for certa...

Страница 66: ...are shown on the display On Standard setting with little but important camera information Detailed information Display showing all information Off No camera information allowing full focus on subject...

Страница 67: ...o options are explained in detail below t PSNBU See section Formatting of memory card Page 20 for further details t PQZ UP BSE Copy all files stored in the internal memory to the memory card If no mem...

Страница 68: ...te the file DCIM The recorded photos and videos are located in sub folders of the DCIM folder You can copy or move the photo and video files to a folder on the computer Windows Macintosh Pentium IV 1...

Страница 69: ...menu Select whether a single image Print selection all images Print all or all thumbnails images Print index should be printed 6 Where applicable select the individual image and the number of copies...

Страница 70: ...ert yellow connector into Video input and white connector into one of the audio inputs of the TV 4 Set the Video input source of the TV to the used AV socket V R L Yellow White Note t 0ODF UIF DBNFSB...

Страница 71: ...FBTF CBDL VQ ZPVS EBUB QSJPS UP JOTUBMMJOH UIF TVQQMJFE TPGUXBSF 5IF NBOVGBDUVSFS JT OPU SFTQPOTJCMF foranydataloss t 5IF DBNFSB DBO BMTP CF DPOOFDUFE UP UIF DPNQVUFS GPS USBOTGFSSJOH QIPUPT WJEFP DMJ...

Страница 72: ...ocussing range Normal 0 05 m to infinity W 0 6 m to infinity D Super Macro 0 05 m W Exposure Normal mode 2 1 2000 sec Night 15 1 2000 sec Fireworks 2 sec Digital zoom 5x recording mode 12x playback mo...

Страница 73: ...3478 x Fine 153 311 607 1203 2389 4763 w Normal 249 505 1002 1996 3981 7839 3 264 x 2 448 y Super fine 290 576 1141 2286 4565 9122 x Fine 455 898 1778 3563 7120 14231 w Normal 670 1328 2629 5268 1052...

Страница 74: ...a video clip exceeds 4 GB or 29 minutes For recording videos we recommend a memory card of class 6 or higher to avoid automatic stopping or unexpected results If using a slower SD SDHC card causes a...

Страница 75: ...hutter release The shutter release was not depressed fully Depress shutter release fully 5IF NFNPSZ EPFT OPU IBWF TV DJFOU memory Insert a new memory card or delete unwanted files The memory card is w...

Страница 76: ...Ensure that there is enough space on the used drive The battery level is too low Charge battery again Service address Schenker Australia Pty Ltd TRAVELER Service P O Box 329 Villawood NSW 2163 Austral...

Страница 77: ...received including interference that may cause undesired operation or operational faults In the event of radio or television reception being affected by this device this can be easily tested by switch...

Страница 78: ...teries may not be disposed of in domestic waste Consumers are obliged by law to return used batteries to communal collection points or dealers selling batteries Storage batteries and batteries do ther...

Страница 79: ...posal 78 Downloading file 68 E Exposure compensation 35 Exposure measuring 37 F Face recognition 28 File no 66 Fisheye effect 39 Flash mode 10 32 Focus adjustment 10 30 Formatting 20 67 Front view 8 F...

Страница 80: ...ng mode soft skin tone 31 Red eye correction 56 S Safety notes 4f Saturation 60 Saving tools 67 Self portrait 28 Self timer 28 42 Self timer LED 8 Service address 76 SET button 9 Sharpness 60 Shutter...

Отзывы: