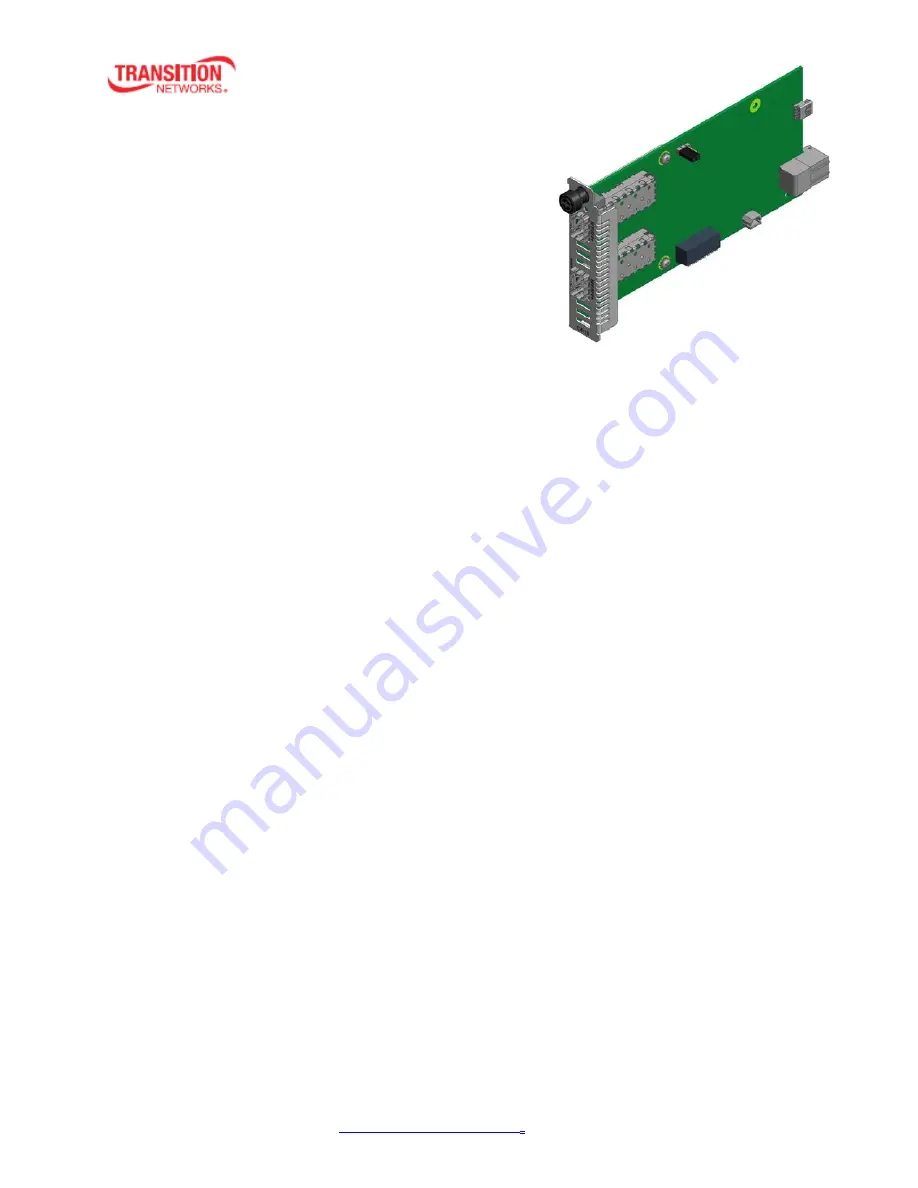
Transition Networks C4110 Скачать руководство пользователя страница 1


33572 Rev. B 

https://www.transition.com/ 

Page 1 of 33 

C4110-4848 

Install Guide 

10 Gbps Fiber-to-Fiber Converter 

  DMI (Diagnostic Monitoring Interface) 

  For use in ION Chassis 

  Manageable when installed in a managed ION Chassis 

  Supports various physical media types 

  Fiber repeater, performs 3R signal regeneration 

  Link Pass Through (LPT) 

  No packet size limitation 


Contents 

Introduction .................................................................................................................................................. 3 

Models .......................................................................................................................................................... 3 

Accessories (ordered separately) .................................................................................................................. 4 

Document Overview ..................................................................................................................................... 4 

Related Manuals and Online Help ................................................................................................................ 4 

Application Examples .................................................................................................................................... 5 

Network Scenarios .................................................................................................................................... 6 

Pre-Installation .............................................................................................................................................. 7 

Safety ........................................................................................................................................................ 7 

Unpacking ................................................................................................................................................. 7 

Ship Kit Contents ...................................................................................................................................... 7 

DIP Switch (SW1) and Jumper (J9) ............................................................................................................ 8 

Installation and Setup ................................................................................................................................. 10 

General ................................................................................................................................................... 10 

Install the C4110 in the ION Chassis ....................................................................................................... 10 

Installing SFP/SFP+ Devices .................................................................................................................... 11 

Cabling .................................................................................................................................................... 12 

Install Fiber Cable ................................................................................................................................... 13 

Focal Point™ Installation ........................................................................................................................ 13 

IONMM Installation ................................................................................................................................ 13 

Operation .................................................................................................................................................... 14 

Power and Fiber Status LEDs .................................................................................................................. 14 

Accessing the C4110 ............................................................................................................................... 15 

Product Features .................................................................................................................................... 24 

Technical Specifications .............................................................................................................................. 25 

Defaults ................................................................................................................................................... 25 

Cable Specifications ................................................................................................................................ 26 

Cable Types ............................................................................................................................................. 26 

Messages ................................................................................................................................................ 28 

Troubleshooting .......................................................................................................................................... 29 

Contact Us ................................................................................................................................................... 30 

Compliance Information ............................................................................................................................. 30 

Содержание C4110

Страница 1: ...4 Document Overview 4 Related Manuals and Online Help 4 Application Examples 5 Network Scenarios 6 Pre Installation 7 Safety 7 Unpacking 7 Ship Kit Contents 7 DIP Switch SW1 and Jumper J9 8 Installation and Setup 10 General 10 Install the C4110 in the ION Chassis 10 Installing SFP SFP Devices 11 Cabling 12 Install Fiber Cable 13 Focal Point Installation 13 IONMM Installation 13 Operation 14 Power ...

Страница 2: ...2 Rev B https www transition com Page 2 of 33 Declaration of Conformity 30 FCC Regulations 31 Canadian Regulations 31 European Regulations 31 Electrical Safety Warnings 32 Safety Instructions for Rack Mount Installations 33 Record of Revisions 33 ...

Страница 3: ... Gbps SONET OC 192 SDH STM 64 at 9 95 Gbps 10G Fiber Channel at 10 52 Gbps 1 2 4 8 Gbps Fiber channel OTU2 at 10 709 Gbps OTU1e at 11 05 Gbps OTU1f at 11 27 Gbps OTU2e at 11 09 Gbps OTU2f at 11 32 Gbps SONET OC 48 SDH STM 16 at 2 40 Gbps Legacy 1G Ethernet at 1 25 Gbps Any other rate in the range of 1 11 5 Gbps Models The C4110 is an ION chassis slide in card SIC The S4110 is an ION Stand alone de...

Страница 4: ...ion Networks is not responsible Other ION system and related device manuals are listed below 1 Product Documentation Postcard 33504 2 ION C4110 Install Guide 33572 this manual 3 ION S4110 Install Guide 33573 4 ION x4110 Web User Guide 33574 5 ION x4110 CLI Reference 33575 6 Focal Point 3 0 Management Application User Guide 33293 7 ION Management Module IONMM Install Guide 33420 and User Guide 3345...

Страница 5: ...nstall Guide 33572 Rev B https www transition com Page 5 of 33 Application Examples The figures below show switch to switch and switch to server appliaction examples Figure 1 10Gig Switch to Switch Figure 2 10Gig Switch to Server ...

Страница 6: ...rio F ION Chassis S4110 4848 1 2 Customer Network C4110 Customer Network Port 2 1 S4110 Port 2 1 S4110 Port 2 1 Customer Network Customer Network S4110 Port 2 1 Customer Network Customer Network ION Chassis 1 2 Customer Network C4110 4848 Customer Network Scenario A Scenario B ION Chassis S4120 1048 1 2 C4110 10G Ethernet Port 2 1 Scenario F Port 1 RJ45 Port 2 SFP 10G Ethernet Port 1 SFP Port 2 SF...

Страница 7: ...trical Safety Warnings on page 32 for Electrical Safety Warnings translated into multiple languages Unpacking 1 Carefully unpack all C4110 contents 2 Verify receipt of all C4110 components see Ship Kit Contents below 3 Place the C4110 and related materials in the desired install location 4 Save the C4110 shipping carton and packing materials for future use Ship Kit Contents The C4110 is shipped wi...

Страница 8: ...n this position the mode of the C4110 is determined by the most recently saved software settings This is the default setting H Hardware In this position the mode of the C4110 is determined by the 8 position DIP switch hardware settings Note you must change the J9 setting to H Hardware mode to be able to use the DIP Switch settings see below Use the CLI command show card info to show the current Co...

Страница 9: ...own 10GE 10 gigabit Ethernet also 10GbE or 10 GigE This is the factory default setting Up Down Down Down 10GFC FEC 10GbE Fibre Channel with Forward Error Correction Down Up Down Down 10GFC 10GbE Fibre Channel Up Up Down Down WAN OC 192 FEC OC 192 network line with transmission speeds up to 9953 28 Mbit s with Forward Error Correction Down Down Up Down WAN OC 192 OC 192 network line with transmissi...

Страница 10: ...ssis Caution Failure to wear a grounding device and observe electrostatic discharge precautions when installing the C4110 could result in damage or failure of the module Figure 5 Chassis Installation IMPORTANT The C4110 slide in cards are hot swappable devices and can be installed with chassis power on 1 Locate an empty slot in the ION System chassis If necessary remove a chassis slot cover from t...

Страница 11: ...ure 6 Port Locations Installing SFP SFP Devices The C4110 lets you install SFP SFP devices of choice to make a fiber connection The C4110 has two SFP SFP ports Figure 7 SFP SFP Installation Note The S4100 is an any rate to same rate device meaning the two SFPs used must both support the same data rate However two SFPs can support different types of fiber and different transmission distances ...

Страница 12: ...m per MSA To install an SFP SFP device in the C4110 1 Position the SFP SFP device at either installation slot with the label facing up 2 Carefully slide the SFP SFP device into the slot aligning it with the internal installation guides 3 Ensure that the SFP SFP device is firmly seated against the internal mating connector 4 Connect the fiber cable to the fiber port connector of the SFP SFP device ...

Страница 13: ...nnect the male RX cable connector to the female RX connector 3 Connect the fiber cables to the 10GE fiber port on the other device another media converter hub S4110 etc as described Connect the male TX cable connector to the female RX connector Connect the male RX cable connector to the female TX connector Figure 9 SFP Installation Focal Point Installation For Focal Point 3 0 Management Applicatio...

Страница 14: ...ted next to the fiber port Port 2 Use the status LEDs to monitor C4110 operation in the network LED Label Meaning Operation PWR Power Green ON for power applied to board PORT 1 LINK SDF Fiber Status 1 On Fiber Signal Detected Off Fiber Signal Not Detected PORT 2 LINK SDF Fiber Status 2 On Fiber Signal Detected Off Fiber Signal Not Detected Figure 10 Power and Fiber Status LEDs ...

Страница 15: ...ce it in an accessible folder on the local drive of the PC You must log in or create an account to download firmware For further assistance see the Contact Us section 2 Connect the C4110 to the USB port on the PC Note for slide in modules installed in an ION Chassis the USB connection will be made to the ION Management Module IONMM if one is installed in the ION chassis The Welcome to the Found Ne...

Страница 16: ...ntical to this procedure To install the USB driver on a computer with the Windows 8 operating system do the following 1 Extract the driver from the Product Support webpage and place it in an accessible folder on the local drive of the PC 2 Connect the IONMM to the USB port on the PC 3 Press the Windows key and type startup Choose Change advanced startup options 4 On the right side click on the Res...

Страница 17: ...2 Rev B https www transition com Page 17 of 33 6 At the Troubleshoot screen choose Advanced options 7 In the Advanced options screen choose Startup Settings 8 A list of Windows Startu Settings displays click the Restart button Your PC will reboot ...

Страница 18: ...ger expand Ports COM LPT to view your connection with an error on the driver 14 Right click on the driver and choose Update driver software 15 You will get a pop up with two options choose Browse my PC for driver 16 Point to the folder location where you have the driver installed and click install 17 You will receive another Windows Security pop up choose Install this driver software anyway 18 The...

Страница 19: ...riginal settings for the PC as you will need to reset them after setting the IP configuration for the C4110 Starting a Telnet Session The C4110 can be controlled from a remote management station via a Telnet session over an Ethernet connection The C4110 is controlled and configured through CLI commands Use the following procedure to connect to and access the C4110 via a Telnet session 1 Click Star...

Страница 20: ...the C4110 For web GUI configuration see the x4110 Web User Guide For CLI command descriptions see the x4110 CLI Reference manual Note If required by your organization s security policies and procedures use the CLI command set community write xx to change the default password See the x4110 CLI Reference manual Terminating a Telnet Session To terminate the Telnet session 1 Type q uit 2 Press the Ent...

Страница 21: ...causes the connection to drop Do not use the keyboard s back space key in grayed out fields This causes the connection to drop For DHCP operations a DHCP server must be on the network and available To sign in to the C4110 via the Web 1 Open a web browser 2 In the address URL block type the IP address of the IONMM the default address is 192 168 1 10 3 Click Go or press Enter The ION System sign in ...

Страница 22: ...refresh device status 5 Click the plus sign next to Chassis to unfold the chassis devices 6 Select the appropriate C4110 4848 device The MAIN screen displays for the selected C4110 7 You can use the various fields to configure the device and ports For web GUI configuration see the x4110 Web User Guide Note If required use the set community CLI command to change the default password according to yo...

Страница 23: ... the upper left corner of the ION System Web Interface 1 Click the System dropdown 2 Click Sign out The ION sign in screen displays Note The C4110 does not automatically log out upon exit or after a timeout period which could leave it vulnerable if left unattended Follow your organizational policy on when to sign out from the ION System via the Web Interface ...

Страница 24: ...tal Monitoring Interface DMI The Diagnostic Monitoring Interface DMI feature allows diagnosing problems within the network The DMI function displays C4110 diagnostic maintenance information such as 10Gbps fiber interface characteristics diagnostic monitoring parameters and supported fiber media lengths All DMI events will trigger notification Intrusion detection based on Rx Power level is availabl...

Страница 25: ...he information in this user s guide is subject to change For the latest information see the online user s guide at https www transition com WARNING Visible and invisible laser radiation when open DO NOT stare into the beam or view the beam directly with optical instruments Failure to observe this warning could result in an eye injury or blindness WARNING Use of controls adjustments or the performa...

Страница 26: ...to 10 000m 6 2 miles with standard transceivers and can work at longer distances with special transceivers and switching infrastructure The C4110 supports 10GBase SR The most common type of fiber optic 10GbE cable that supports an SFP connector with an optical transceiver rated for 10Gb transmission speed also known as short reach fiber optic cables 10GBase LR The the long reach fiber optic cables...

Страница 27: ...G 709 for more information Fibre Channel FC FC Fibre Channel is a high speed network technology common rates of 2 4 8 and 10 Gbps often used to connect computer data storage Fibre Channel is standardized in the T11 Technical Committee of INCITS the International Committee for Information Technology Standards an ANSI standards committee Note When FC technology was developed it supported only optica...

Страница 28: ...y PDH system for transporting large amounts of telephone calls and data traffic over the same fiber without synchronization problems SONET generic criteria are detailed in Telcordia Technologies Generic Requirements document GR 253 CORE Both SDH and SONET are widely used today SONET in the United States and Canada and SDH in the rest of the world Although the SONET standards were developed before ...

Страница 29: ...onnection to the SFPs Verify that the cable specs are met See Cable Specifications on page 26 Contact Tech Support See Contact Us below YES Proceed to step 3 3 Is the CLI accessible NO Check the Install process See Installation and Setup on page 10 Check the cabling See Install Fiber Cable on page 13 Contact Tech Support See Contact Us below YES Proceed to step 4 4 Is the web GUI accessible NO Che...

Страница 30: ...US and Canada 1 800 260 1312 International 00 1 952 941 7600 Main Office tel 1 952 941 7600 toll free 1 800 526 9267 fax 952 941 2322 sales transition com techsupport transition com customerservice transition com Address Transition Networks 10900 Red Circle Drive Minnetonka MN 55343 U S A Web https www transition com Compliance Information Declaration of Conformity ...

Страница 31: ...European Regulations Warning This is a Class A product In a domestic environment this product may cause radio interference in which case the user may be required to take adequate measures Achtung Dieses ist ein Gerät der Funkstörgrenzwertklasse A In Wohnbereichen können bei Betrieb dieses Gerätes Rundfunkstörungen auftreten In diesem Fäll ist der Benutzer für Gegenmaßnahmen verantwortlich Attentio...

Страница 32: ...ften worden geïnstalleerd Sécurité électrique IMPORTANT Cet équipement doit être utilisé conformément aux instructions de sécurité Sähköturvallisuus TÄRKEÄÄ Tämä laite on asennettava turvaohjeiden mukaisesti Sicurezza elettrica IMPORTANTE questa apparecchiatura deve essere installata rispettando le norme di sicurezza Elektrisk sikkerhet VIKTIG Dette utstyret skal nstallers I samsvar med sikkerhets...

Страница 33: ...ing give consideration to the connection of the equipment to the supply circuit and the effect that overloading of the circuits might have on overcurrent protection and supply wiring Consider all equipment nameplate ratings when addressing this concern 5 Reliable Earthing maintain reliable earthing of rack mounted equipment pay particular attention to supply connections other than direct connectio...

Отзывы: