background image


19


2.  Follow the on-screen instructions to complete 

U-Storage Tool 

installation. 

3. Plug 

JetFlash

 into an available USB port of your computer. 

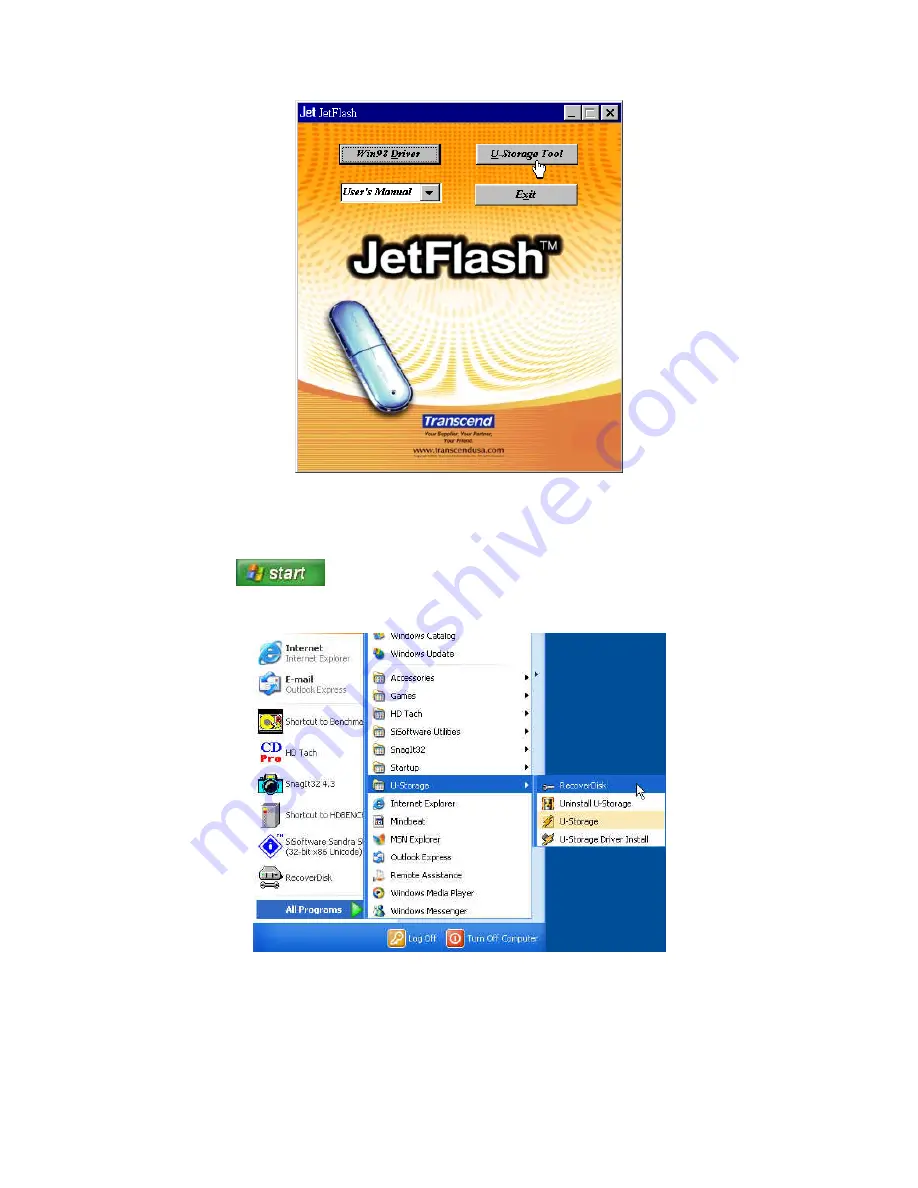
4. Click the 

 button on the task bar and select 

Programs > U-Storage > 

RecoverDisk 

to run the 

RecoverDisk

 program. 


RecoverDisk

 performs a low-level format on your 

JetFlash

, erasing all data and 

returning 

JetFlash

 to the default configuration. 

5. Check the 

Read & Write test box, 

and then click 

Start 

to initiate


the low-level format. 

Содержание 32MB4GB

Страница 1: ...32MB 4GB JetFlash User s Manual...

Страница 2: ...Windows Me 2000 and XP 4 To Remove JetFlash in Mac OS 4 To Remove JetFlash in Linux 4 Write Protect Function 5 Security Function Partition Types 5 Security Function for Windows 98 98SE Me 2000 and XP...

Страница 3: ...will provide you with a brand new data storage experience Package Contents The JetFlash package includes the following items JetFlash Label Neck Strap Driver CD USB Extension Cable Quick Installation...

Страница 4: ...kernel 2 4 or later Driver Installation Driver Installation for Windows 98 98SE 1 Put the Driver CD into the CD ROM drive Auto Run supported Click the Win98 Driver button 2 Follow the on screen instru...

Страница 5: ...r No driver is required Just plug JetFlash into an available USB port and your computer will automatically detect it A new Disk icon appears on the Desktop Driver Installation for Linux Kernel 2 4 or...

Страница 6: ...rring To Remove JetFlash in Windows Me 2000 and XP 1 Click the icon on the system tray 2 The Safely Remove Hardware pop up menu appears Click to continue 3 Follow the on screen instructions to complet...

Страница 7: ...Unlocked and carefully read the following sections Partition Types U Storage Tool can be used to partition JetFlash into two partition types Before partitioning you need to understand the following t...

Страница 8: ...n supported Click the U Storage Tool button When using Windows 2000 or XP you must plug JetFlash into an available USB port before clicking the U Storage Tool button When using Windows 98 98SE the Win...

Страница 9: ...ions to reinstall the driver for JetFlash 4 Backup the data on your JetFlash Make sure the Write Protect switch is set to the position 5 Double click on or in the system tray The U Storage window appe...

Страница 10: ...to the Public Area and Security Area ii Key in a New Password Maximum size for password is 8 characters iii Key in a Password Hint if you want to set up a reminder for your new password iv Click OK 7...

Страница 11: ...2 Enter the correct password and click OK To access the data in the Public Area click Cancel If a Password Hint was set up during the partition procedure you can click on the Hint button to display y...

Страница 12: ...no data are being transferred to or from your JetFlash In Windows 2000 the File Manager must be closed 2 Double click on the icon in the system tray If there is a file open or if data are being trans...

Страница 13: ...torage window appears Click on the Change Password button 3 Key in the Current Password and enter the new password in both the New Password and the Confirm Password fields Maximum size for a password...

Страница 14: ...h a Rescue Disk for Windows nor does it put Windows Startup files onto JetFlash After booting with JetFlash if you wish to enter Windows you must then start Windows from your hard drive or a previousl...

Страница 15: ...n the Windows system tray 4 Perform a backup of the data on your JetFlash Make sure the Write Protect switch is set to the position 5 Double click on the or icon in the system tray and the U Storage w...

Страница 16: ...ady for use as an MS DOS Boot Disk Click OK to close the window When you have completed this process JetFlash will contain the files needed to use the Boot up function Do not remove any of these files...

Страница 17: ...15 2 Select Create an MS DOS Startup Disk then click Start 3 Click OK 4 Click OK to complete the format...

Страница 18: ...een instructions to complete U Storage Tool installation 7 Plug JetFlash into an available USB port of your computer and a or icon appears in the Windows system tray 8 Perform a backup of the data on...

Страница 19: ...Click OK to continue or Cancel to exit 12 The Completed alert box appears JetFlash is now ready for use as an MS DOS Boot Disk Click OK to close the window When you have completed this process JetFla...

Страница 20: ...to Locked Please reset the Write Protect switch to Unlocked Recovery Function If your JetFlash is ever damaged you can use the RecoverDisk program to restore its default settings Running the RecoverD...

Страница 21: ...computer 4 Click the button on the task bar and select Programs U Storage RecoverDisk to run the RecoverDisk program RecoverDisk performs a low level format on your JetFlash erasing all data and retu...

Страница 22: ...20 6 Click YES if you want to recover your JetFlash 7 When finished the following status message appears Click Close and unplug your JetFlash Plug it in again to continue to use it...

Страница 23: ...21 Uninstall the U Storage Tool 1 Click the button on the Task Bar and select Programs U Storage Uninstall U Storage 2 Follow the on screen instructions to uninstall the U Storage Tool...

Страница 24: ...rtificates CE FCC BSMI Ordering Information Transcend P N Memory Size Features TS32MJF2B 32MB Blue Mini Size TS64MJF2B 64MB Blue Mini Size TS64MJF2L 64MB Lilac Mini Size TS128MJF2B 128MB Blue Mini Siz...

Страница 25: ...e to accident abuse mishandling improper installation alteration acts of nature improper usage or problems with electrical power Transcend JetFlash must be used with devices that conform to the recomm...

Отзывы: