background image

RTWB-SVN01B-E4

11

Installation Mechanical

Isolation pads

The elastomeric pads shipped are
adequate for most installations. For
additional details on isolation
practices, consult an acoustical
engineer for sensitive installations.

Water piping

Piping connections

C

CA

AU

UT

TIIO

ON

N

To prevent equipment damage,
bypass the unit if using an acidic
flushing agent.

Make water piping connections to
the evaporator and condenser.
Isolate and support piping to
prevent stress on the unit. Construct
piping according to local and
national codes. Isolate and flush
piping before connecting it to the
unit.

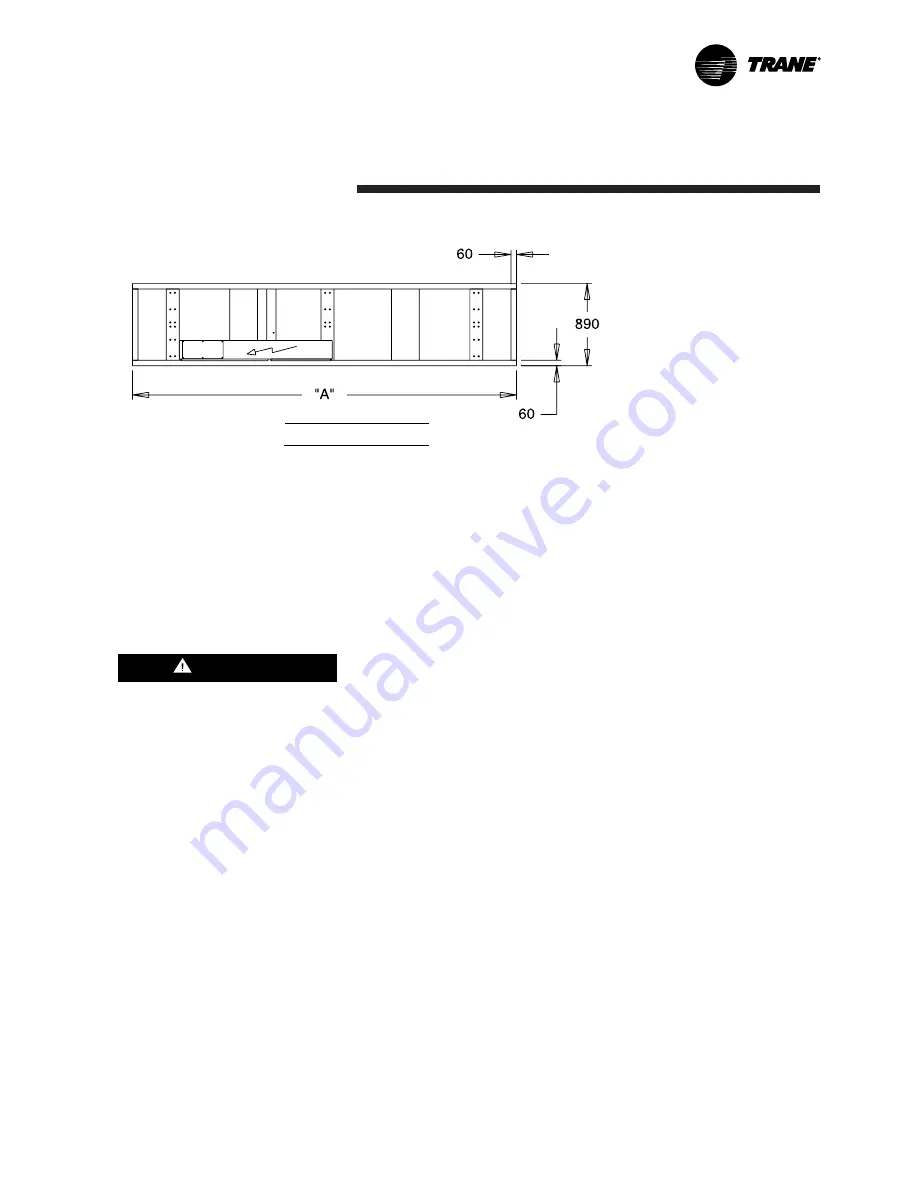
Figure 6 – Isolator pad location

Evaporator water piping

Figure 7 illustrates typical
evaporator piping components.
Components and layout will vary
slightly, depending on the location
of connections and the water
source.

The chilled-water connections are
on the back of the unit, when facing
the control panel.

A vent is provided on the top of the
evaporator at the return end. Be
sure to provide additional vents at
high points in the piping to bleed air
from the chilled-water system.
Install necessary pressure gauges to
monitor the entering and leaving
chilled-water pressures. 

To prevent damage to chilled-water
components, do not allow
evaporator pressure (maximum
working pressure) to exceed 10 bar.

Provide shutoff valves in lines to the
gauges, in order to isolate them
from the system when they are not
in use. Use rubber vibration
eliminators to prevent vibration
transmission through the water
lines.

If desired, install thermometers in
the lines to monitor entering and
leaving-water temperatures. Install a
balancing valve in the leaving-water
line to control the balance of the
water flow. Install shutoff valves on
both the entering and leaving-water
lines so that the evaporator can be
isolated for service. 

A pipe strainer should be installed in
the entering water line to prevent
water-borne debris from entering the
evaporator.

Dimensions in mm

Size

“A”

207 and 208

2880

210 to 224

4150

Содержание RTWB Helical-Rotary

Страница 1: ...RTWB Helical Rotary Chillers 200 to 700 kW Sizes 207 224 RTWB SVN01B E4 Installation Operation Maintenance...

Страница 2: ...c refer to national regulation RTWB SVN01B E4 Important Notice American Standard Inc 2001 Refrigerant emission control In respect of the environment all service operation must use recovery systems to...

Страница 3: ...mometers Water pressure relief valves Flow sensing devices Refrigerant pressure relief valve venting Thermal insulation Installation Electrical General recommendations Power supply wiring Compressor m...

Страница 4: ...tion and maintenance of RTWB units When the unit arrives compare all nameplate data with ordering submittal and shipping information A typical nameplate is shown in Figure 1 Figure 1 Typical unit name...

Страница 5: ...r obvious damage to the unit or packing material Inspect the unit for concealed damage as soon as possible after delivery and before it is stored Concealed damage must be reported within 72 hours afte...

Страница 6: ...ion of the unit Adaptive Control logic can correct these variables when necessary to optimize operational efficiencies avoid chiller shutdown and keep producing chilled water Compressor unloaders are...

Страница 7: ...y and install valves in the water piping upstream and downstream of the evaporator and condenser water boxes to isolate the shells for maintenance and to balance and trim the system Supply and install...

Страница 8: ...7 208 210 211 212 214 216 217 218 220 222 224 Evaporator type EG 120 EG 120 EG 140 EG 170 EG 170 EG 200 EG 200 EG 200 EG 250 EG 250 EG 340 EG 340 Condenser type CG 120 CG 120 CG140 CG 170 CG 170 CG 20...

Страница 9: ...sulting from an improperly designed or constructed foundation Vibration eliminators Provide rubber boot type isolators for all water piping at the unit Provide flexible conduit for electrical connecti...

Страница 10: ...t damage Connect an anti rotation strap between the lifting beam and the compressor before lifting the unit Failure to do so may result in personal injury or death if a lifting cable fails Installatio...

Страница 11: ...l panel A vent is provided on the top of the evaporator at the return end Be sure to provide additional vents at high points in the piping to bleed air from the chilled water system Install necessary...

Страница 12: ...e components and their general location are given above Entering chilled water piping Air vents to bleed air from system Water pressure gauges with shutoff valves Vibration eliminators Shutoff isolati...

Страница 13: ...entage of load on the chiller Nevertheless it is required to maintain a minimum temperature differential of 18 C between the leaving chilled water temperature and the leaving condenser temperature Thi...

Страница 14: ...ine or brackish water Figure 9 Cooling device bypass Cooling device bypass is also a valid control method if the chiller temperature requirements can be maintained 1 3 way valve or 2 2 way valves 2 Cu...

Страница 15: ...Flow switches must stop or prevent compressor operation if either system water flow drops off drastically Follow the manufacturer s recommendations for selection and installation procedures General g...

Страница 16: ...2844 653 408 959 258 279 854 1064 214 1898 1832 2844 653 408 959 258 279 854 1064 216 1898 1832 2844 653 408 959 258 279 854 1064 217 1898 1832 2844 653 408 959 258 279 854 1064 218 2008 1932 2952 59...

Страница 17: ...denser water flow L s Condenser Code Pass Number Minimum Water Flow Maximum Water Flow Connection Diameter in CG 120 1 8 4 31 0 5 CG 140 1 9 5 34 9 5 CG 170 1 11 9 43 7 5 CG 200 1 17 0 61 0 5 CG 230 1...

Страница 18: ...89 0 90 0 90 0 89 0 89 0 89 0 89 Fuse size 2 80A 100A 125A 60 125 160A 2 160 160 200 2 200 250 200 2 250 2 315 2 315 A 315 315 315 400 400 400 630 630 630 630 800 800 mm 240 240 240 240 240 240 2 300...

Страница 19: ...iring in conduit to access opening s on the starter control panel Compressor motor phase sequencing Always verify that proper rotation of the RTWB compressors is established before the machine is star...

Страница 20: ...11 Zone temperature sensor 6R3 or ice machine control 6S55 option 6R3 and 6S55 cannot be used together module A9TB1 1 2 12 External chilled water setpoint 4 20 mA or 2 10 V dc with communication inter...

Страница 21: ...ls 1UTB3 3 and 4 would be a time clock ambient thermostat building automation system 2 UCM Pump Control Contacts Terminals A1TB4 8 and 9 This output is a set of contacts that will close starting the c...

Страница 22: ...YES YES NO 7 2 YES YES YES 8 2 YES NO YES 9 3 YES NO NO 10 3 YES YES NO 11 3 YES YES YES 12 3 YES NO YES Notes MMR Machine Manual Reset CMR Circuit Manual Reset MAR Machine Auto Reset CAR Circuit Aut...

Страница 23: ...l run normally when the contact is closed When the contact opens the unit will trip off on a manually resettable diagnostic This condition requires manual reset at the chiller switch on the front of t...

Страница 24: ...ce building mode to be reentered until the unit has been switched out of ice building mode open 6S55 contacts and then switched back into ice building mode In ice building the current setpoint will be...

Страница 25: ...V dc Current mA Resulting current limit setpoint RLA 2 0 4 0 40 3 0 6 0 50 4 0 8 0 60 5 0 10 0 70 6 0 12 0 80 7 0 14 0 90 8 0 16 0 100 9 0 18 0 110 10 0 20 0 120 Outdoor air temperature sensor This se...

Страница 26: ...to the designated shield terminal at the Tracer module 3 Connect leads to terminals 1 and 2 ofTB2 of the module A9 of the UCM to theTracer There is no polarity requirement for the connection 4 At the...

Страница 27: ...move and discard all shipping materials Install optional neoprene if required Level the unit and secure it to the mounting surface Unit water piping Flush all unit water piping before making final con...

Страница 28: ...or 4 Oil separator 5 Electronic expansion valve 6 Oil cooler option 7 Low pressure switch 8 High pressure switch 9 Solenoid valve 10 Refrigerant charging valve 11 Oil separator draining valve 12 Oil c...

Страница 29: ...be connected in the A B C phase sequence to prevent equipment damage due to reverse rotation Fill the evaporator and condenser chilled water circuits Refer to Table 2 for liquid capacities Vent the s...

Страница 30: ...erative that L1 L2 L3 in the starter be connected in the A B C phase sequence to prevent equipment damage due to reverse rotation It is important that proper rotation of the compressors be established...

Страница 31: ...e of refrigerant is indicated if the operating pressures are low and the subcooling is also low If the operating pressures superheat and subcooling readings indicate a refrigerant shortage gas charge...

Страница 32: ...T TI IO ON N Lock the disconnects on the Open position to prevent accidental start up and damage to the system when it has been set up for extended shutdown At least every three months check the press...

Страница 33: ...or unusual conditions Monthly maintenance Perform all weekly maintenance procedures Measure and record the system superheat Refer to the Start up procedure paragraph Measure and record the system subc...

Страница 34: ...mperature differential between the entering and leaving condenser water and abnormally high condensing temperatures There are two accepted methods of cleaning the condenser tubes as discussed in the f...

Страница 35: ...r the unit has been off for 10 minutes move the sight glass up and down until the level can be seen 4 After the level has been determined remove the sight glass and hoses Figure 15 System Oil Specific...

Страница 36: ...ies are shown inTable 2 Pressure drop across the oil filter is shown in Figure 13 Oil filter pressure drop is the difference between the two pressure control ports Refrigerant filter change If the tem...

Страница 37: ...rigerant oil 7 Install the cover plate and cover plate gasket Periodic Maintenance 8 Install a new copper gasket under the bolt head that had one at time of removal Replace all other bolts and tighten...

Страница 38: ...ove the cover and the oil filter element 6 Install the new filter element 7 Coat the new cover gasket with refrigerant oil 8 Install the cover plate and cover plate gasket 9 Install a new copper gaske...

Страница 39: ...1 Connect 110 V power to the female stepload solenoid and the male load unload solenoids This must be done to evacuate all of the cavities in the compressor 2 Open all service valves 3 Connect hoses f...

Страница 40: ...tion by a specialist in our equipment Regular maintenance ensures that any malfunction is detected and corrected in good time and minimizes the possibility that serious damage will occur Finally regul...

Отзывы: