3270 3319 Rev B
4
To connect to the router via terminal emulation:
1.
At the login prompt, type:
root
2.
Press
ENTER
.
3.
At the password prompt, type:
1q2w3e4r
4.
Press
ENTER
.
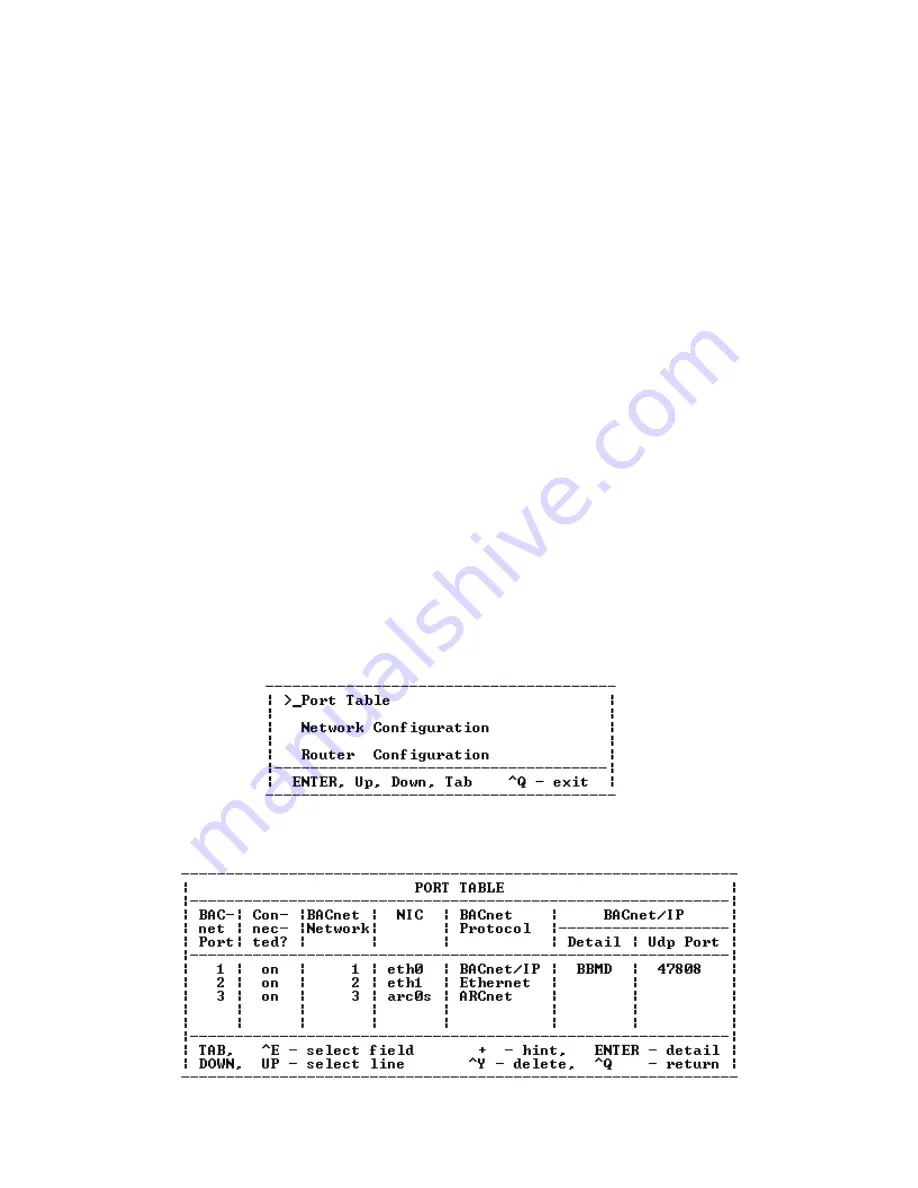
The setup menu displays
(Figure 4).
5.
Go to
Configure router
After connecting to the router via terminal
emulation, you must configure the router.
Configuring the router begins at the setup menu.
The setup menu enables you to set, change, and save
TCP/IP information in a file on the router flash disk.
Note:
If the setup menu is not displayed on the PC screen,
use the RCONFIG editing program to access it. At
the command line, type RCONFIG, then press
ENTER
until the setup menu displays (Figure 4).
View the PORT TABLE screen and note LANs setup:
1.
At the setup menu (Figure 4), use the
TAB
key to
move the cursor to Port Table.
2.
Press
ENTER
. The PORT TABLE screen displays
Note:
The bottom of the PORT TABLE screen shows
the navigation commands. The most commonly
used commands are
TAB
,
+
, and
^
Q
(
CTRL
key
and
Q
key pressed simultaneously). The
^
Q
(return) command steps the display back
through the program.
3.
At the BACnet Network column, verify that each
BACnet LAN has a network number from 1
through 65,534 (FFFE hex).
Note:
The network number is the same as the BCU
network number in the site configuration
information.
4.
At the NIC and BACnet Protocol columns, verify
eth0 is a BACnet/IP LAN, eth1 is an Ethernet
LAN, and arc0 is an ARCNET LAN.
Note:
The router supports one eth0 connection and
either one eth1 or one arc0 connection
(Figure 3 on page 3).
5.
Use the
^
Q
command to return to the setup
menu (Figure 4).
6.
Configure eth0 from the NETWORK
Figure 4:
Setup menu
Figure 5:
Sample PORT TABLE screen


