background image

TL-WR641G

108M Wireless Router User Guide


- 22 - 


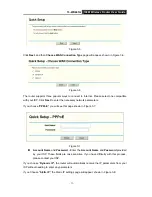
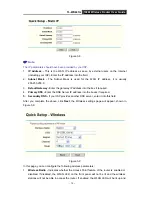
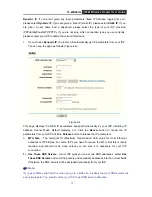
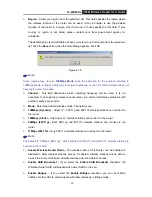
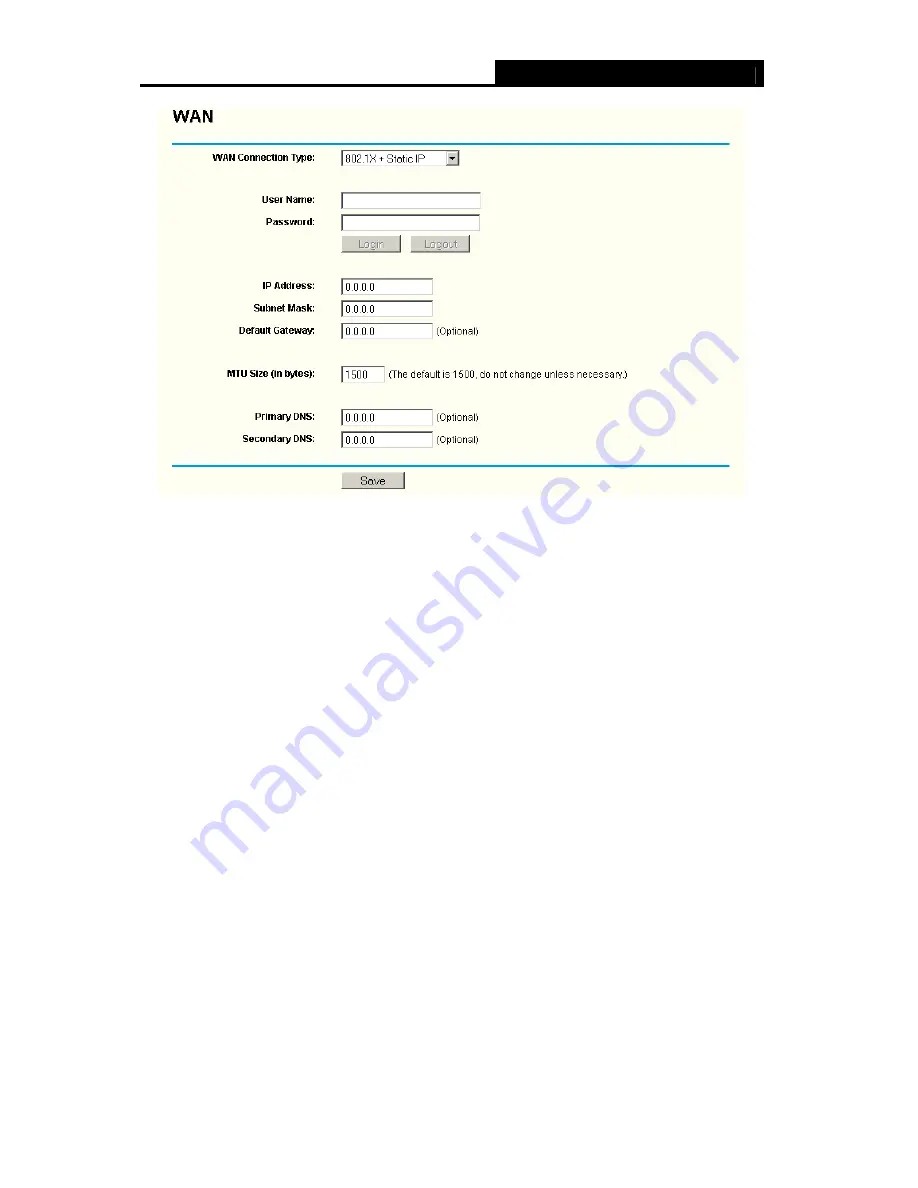
Figure 4-9 

1. 

User Name -

 Enter the user name for 802.1X authentication provided by your ISP 

¾


Password -

 Enter the password for 802.1X authentication provided by your ISP. 

Click 

Login

 to start 802.1X authentication. 

Click 

Logout

 to end 802.1X authentication. 

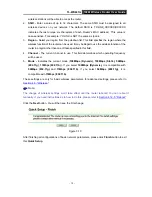
¾


IP Address 

- Enter the IP address in dotted-decimal notation provided by your ISP. 

¾


Subnet Mask

 - Enter the subnet Mask in dotted-decimal notation provided by your ISP. 

¾


Default Gateway

 - (Optional) Enter the default gateway IP address in dotted-decimal 

notation provided by your ISP. 

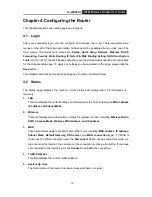
6.  If you choose

 Big Pond Cable, 

you should enter the following parameters (Figure 4-10): 

Содержание TL-WR641G

Страница 1: ...TL WR641G 108M Wireless Router Rev 1 1 0 19100100141 ...

Страница 2: ...oduct names are trademarks or registered trademarks of their respective holders No part of the specifications may be reproduced in any form or by any means or used to make any derivative such as translation transformation or adaptation without permission from TP LINK TECHNOLOGIES CO LTD Copyright 2009 TP LINK TECHNOLOGIES CO LTD All rights reserved ...

Страница 3: ...r an experienced radio TV technician for help This device complies with part 15 of the FCC Rules Operation is subject to the following two conditions 1 This device may not cause harmful interference 2 This device must accept any interference received including interference that may cause undesired operation Any changes or modifications not expressly approved by the party responsible for compliance...

Страница 4: ...on use Refarming of the 2 4 GHz band has been ongoing in recent years to allow current relaxed regulation Full implementation planned 2012 Italy If used outside of own premises general authorization is required Luxembourg None General authorization required for network and service supply not for spectrum Norway Implemented This subsection does not apply for the geographical area within a radius of...

Страница 5: ...product is in conformity with the following standards or other normative documents ETSI EN 300 328 V1 7 1 2006 ETSI EN 301 489 1 V1 8 1 2008 ETSI EN 301 489 17 V1 3 2 2008 EN 61000 3 2 2006 EN 61000 3 3 1995 A1 2001 EN60950 1 2006 EN50371 2002 Directives 2004 108 EC The above product is in conformity with the following standards or other normative documents EN 55022 2006 EN 55024 1998 A1 2001 A2 2...

Страница 6: ... 6 Chapter 3 Quick Installation Guide 8 3 1 TCP IP configuration 8 3 2 Quick Installation Guide 10 Chapter 4 Configuring the Router 14 4 1 Login 14 4 2 Status 14 4 3 Quick Setup 15 4 4 Network 16 4 4 1 LAN 16 4 4 2 WAN 16 4 4 3 MAC Clone 27 4 5 Wireless 28 4 5 1 Wireless Settings 28 4 5 2 MAC Filtering 33 4 5 3 Wireless Statistics 36 4 6 DHCP 37 4 6 1 DHCP Settings 37 4 6 2 DHCP Clients List 38 4 ...

Страница 7: ...4 11 1 Binding Setting 56 4 11 2 ARP List 58 4 12 DDNS 59 4 12 1 Dyndns org DDNS 59 4 12 2 Oray net DDNS 60 4 12 3 Comexe cn DDNS 60 4 13 System Tools 61 4 13 1 Time 62 4 13 2 Firmware 63 4 13 3 Factory Defaults 63 4 13 4 Backup Restore 64 4 13 5 Reboot 64 4 13 6 Password 65 4 13 7 Syslog 66 4 13 8 Remote Management 66 4 13 9 Statistics 67 Appendix A FAQ 69 Appendix B Configuring the PCs 73 Append...

Страница 8: ...reless Router One Power Adapter for TL WR641G 108Mbps Wireless Router Quick Installation Guide One Resource CD for TL WR641G 108Mbps Wireless Router including This Guide Other Helpful Information Note Make sure that the package contains the above items If any of the listed items are damaged or missing please contact with your distributor ...

Страница 9: ...ion rate is up to 108Mbps It adopts 2x to 3x eXtended Range WLAN transmission technology so that transmission distance is 2 3 times that of traditional IEEE 802 11g and IEEE 802 11b solutions up to a distance of 855 36m tested in China Transmission range is extended to 4 9 times It is compatible with all IEEE 802 11g and IEEE 802 11b products The TL WR641G 108Mbps Wireless Router provides flexible...

Страница 10: ...n firewall supporting IP address filtering Domain Name filtering and MAC address filtering Supports connecting disconnecting from the Internet on a specified time of day Supports access control parents and network administrators can establish restricted access policies based on time of day for children or staff Provides 64 128 152 bit WEP encryption security and wireless LAN ACL Access Control Lis...

Страница 11: ...sabled WLAN Flashing The Wireless function is enabled Off There is no device linked to the corresponding port On There are devices linked to the corresponding ports but no data transmitted or received WAN 1 4 LAN Flashing Sending or receiving data over corresponding port 1 3 2 The Rear Panel Figure 1 2 The following parts are located on the rear panel View from left to right AC power socket Please...

Страница 12: ... are two ways to reset the router s factory defaults 1 Use the Factory Defaults function on System Tools Factory Defaults page in the router s Web based Utility 2 Use the Factory Default Reset button With the router powered on use a pin to press and hold the Reset button about 5 seconds until the SYS LED becomes quick flash from slow flash And then release the button and wait the router to reboot ...

Страница 13: ...ng the Router Before you install the router you should connect your PC to the Internet through your broadband service successfully If there is any problem please contact your ISP After that please install the router according to the following steps Don t forget to pull out the power plug and keep your hands dry 1 Power off your PC Cable DSL Modem and the router 2 Locate an optimum location for the...

Страница 14: ...TL WR641G 108M Wireless Router User Guide 7 7 Power on your PC and Cable DSL Modem Figure 2 1 ...

Страница 15: ...or your PC If you need instructions as to how to do this please refer to Appendix B Configuring the PC 2 Configure the network parameters The IP address is 192 168 1 xxx xxx is from 2 to 254 Subnet Mask is 255 255 255 0 and Gateway is 192 168 1 1 The router s default IP address Obtain an IP address automatically 1 Set up the TCP IP Protocol in Obtain an IP address automatically mode on your PC If ...

Страница 16: ...igure 3 2 Please check the connection following these steps 1 Is the connection between your PC and the router correct Note The 1 2 3 4 LEDs of LAN port which you link to on the router and LEDs on your PC s adapter should be lit 2 Is the TCP IP configuration for your PC correct Note If the router s IP address is 192 168 1 1 your PC s IP address must be within the range of ...

Страница 17: ...ure 3 3 After a moment a login window will appear similar to that shown in Figure 3 4 Enter admin for the User Name and Password both in lower case letters Then click the OK button or press the Enter key Figure 3 4 Note If the above screen does not pop up it means that your Web browser has been set to a proxy Go to Tools menu Internet Options Connections LAN Settings in the screen that appears can...

Страница 18: ...network parameters If you choose PPPoE you will see this page shown in Figure 3 7 Figure 3 7 Account Name and Password Enter the Account Name and Password provided by your ISP These fields are case sensitive If you have difficulty with this process please contact your ISP If you choose Dynamic IP the router will automatically receive the IP parameters from your ISP without needing to enter any par...

Страница 19: ...if required 4 Primary DNS Enter the DNS Server IP address into the boxes if required 5 Secondary DNS If your ISP provides another DNS server enter it into this field After you complete the above click Next the Wireless settings page will appear shown in Figure 3 9 Figure 3 9 In this page you can configure the following wireless parameters 1 Wireless Radio Indicates whether the Access Point feature...

Страница 20: ... in this field 4 Channel The current channel in use This field determines which operating frequency will be used 5 Mode Indicates the current mode 108Mbps Dynamic 108Mbps Static 54Mbps 802 11g 11Mbps 802 11b If you select 108Mbps Dynamic it is compatible with 54Mbps 802 11g and 11Mbps 802 11b If you select 54Mbps 802 11g it is compatible with 11Mbps 802 11b These settings are only for basic wirele...

Страница 21: ...atus The Status page displays the router s current status and configuration All information is read only 1 LAN This field displays the current settings or information for the LAN including the MAC address IP address and Subnet Mask 2 Wireless This field displays basic information or status for wireless function including Wireless Radio SSID Channel Mode Wireless MAC address and IP address 3 WAN Th...

Страница 22: ...TL WR641G 108M Wireless Router User Guide 15 Figure 4 1 4 3 Quick Setup Please refer to Section 3 2 Quick Installation Guide ...

Страница 23: ... factory default 192 168 1 1 Subnet Mask An address code that determines the size of the network Normally use 255 255 255 0 as the subnet mask Note If you change the IP Address of LAN you must use the new IP Address to login the router If the new LAN IP Address you set is not in the same subnet the IP Address pool of the DHCP server will not take effect until they are re configured If the new LAN ...

Страница 24: ...y by your ISP including IP address Subnet Mask Default Gateway etc Click the Renew button to renew the IP parameters from your ISP Click the Release button to release the IP parameters MTU Size The normal MTU Maximum Transmission Unit value for most Ethernet networks is 1500 Bytes For some ISPs you need to reduce the MTU But this is rarely required and should not be done unless you are sure it is ...

Страница 25: ...bnet Mask Enter the subnet Mask in dotted decimal notation provided by your ISP usually is 255 255 255 0 Default Gateway Optional Enter the gateway IP address in dotted decimal notation provided by your ISP MTU Size The normal MTU Maximum Transmission Unit value for most Ethernet networks is 1500 Bytes For some ISPs you may need to modify the MTU But this is rarely required and should not be done ...

Страница 26: ...le Time field Otherwise enter the number of minutes you want to have elapsed before your Internet connection terminates Caution Sometimes the connection cannot be disconnected although you specify a time to Max Idle Time since some applications is visiting the Internet continually in the background Connect Automatically Connect automatically after the router is disconnected To use this option clic...

Страница 27: ...n the background Click the Connect button to connect immediately Click the Disconnect button to disconnect immediately Click the Advanced Settings button to set up the advanced option the page shown in Figure 4 7 will then appear Figure 4 7 Packet MTU The default MTU size is 1480 bytes which value is usually fine For some ISPs you need modify the MTU This should not be done unless you are sure it ...

Страница 28: ...NS server If a secondary DNS server address is available enter it as well Click the Save button to save your settings 4 If you choose 802 1X Dynamic IP you should enter the follow parameters Figure 4 8 Figure 4 8 User Name Enter the user name for 802 1X authentication provided by your ISP Password Enter the password for 802 1X authentication provided by your ISP Click Login to start 802 1X authent...

Страница 29: ...start 802 1X authentication Click Logout to end 802 1X authentication IP Address Enter the IP address in dotted decimal notation provided by your ISP Subnet Mask Enter the subnet Mask in dotted decimal notation provided by your ISP Default Gateway Optional Enter the default gateway IP address in dotted decimal notation provided by your ISP 6 If you choose Big Pond Cable you should enter the follow...

Страница 30: ...connection has been terminated due to inactivity Connect on Demand enables the router to automatically re establish your connection as soon as you attempt to access the Internet again If you wish to activate Connect on Demand click the radio button If you want your Internet connection to remain active at all times enter 0 in the Max Idle Time field Otherwise enter the number of minutes you want to...

Страница 31: ...dio button If you want your Internet connection to remain active at all times enter 0 in the Max Idle Time field Otherwise enter the number in minutes that you wish to have the Internet connecting last unless a new link is requested Note Sometimes the connection cannot be disconnected although you specify a time to Max Idle Time since some applications are visiting the Internet continually in the ...

Страница 32: ...s Note Sometimes the connection cannot be disconnected although you specify a time to Max Idle Time since some applications is visiting the Internet continually in the background Connect Automatically Connect automatically after the router is disconnected To use this option click the radio button Connect Manually You can configure the router to make it connect or disconnect manually After a specif...

Страница 33: ...k the Connect button to connect immediately Click the Disconnect button to disconnect immediately Connect on Demand You can configure the router to disconnect from your Internet connection after a specified period of inactivity Max Idle Time If your Internet connection has been terminated due to inactivity Connect on Demand enables the router to automatically re establish your connection as soon a...

Страница 34: ...ime field Otherwise enter the number in minutes that you wish to have the Internet connecting last unless a new link is requested Note Sometimes the connection cannot be disconnected although you specify a time to Max Idle Time since some applications are visiting the Internet continually in the background 4 4 3 MAC Clone You can configure the MAC address of the WAN port on this page Figure 4 13 F...

Страница 35: ...you click the Save button the router will prompt you to reboot 4 5 Wireless Figure 4 14 There are three submenus under the Wireless menu shown in Figure 4 14 Wireless Settings MAC Filtering and Wireless Statistics Click any of them and you will be able to configure the corresponding function The detailed explanations for each submenu are provided below 4 5 1 Wireless Settings The basic settings fo...

Страница 36: ...assigned to all wireless devices in your network The default SSID is TP LINK_XXXXXX XXXXXX indicates the last unique six characters of each Router s MAC address but it is recommended strongly that you change your networks name SSID to a different value This value is case sensitive For example TP LINK is NOT the same as tp link ...

Страница 37: ... channel unless you notice interference problems with another nearby access point Mode Select the desired wireless mode The options are 108Mbps Dynamic Super G 802 11g and 802 11b wireless stations can connect to the router 108Mbps Static Only Super G wireless stations can connect to the router 54Mbps 802 11g Both 802 11g and 802 11b wireless stations can connect to the router 11Mbps 802 11b Only ...

Страница 38: ...y that you choose this option to encrypt your wireless network The encryption settings are described below Authentication Type You can select one of the following authentication types WEP Select WEP authentication type based on 802 11 authentications WPA PSK WPA2 PSK Select WPA WPA2 authentication type based on pre shared passphrase WPA WPA2 Select WPA WPA2 authentication type based on Radius Serv...

Страница 39: ...For 64 bit encryption You can enter 10 hexadecimal digits any combination of 0 9 a f A F zero key is not permitted or 5 ASCII characters For 128 bit encryption You can enter 26 hexadecimal digits any combination of 0 9 a f A F zero key is not permitted or 13 ASCII characters For 152 bit encryption You can enter 32 hexadecimal digits any combination of 0 9 a f A F zero key is not permitted or 16 AS...

Страница 40: ...e 4 5 2 MAC Filtering The Wireless MAC Filtering for wireless networks is set on this page Figure 4 19 Figure 4 19 The Wireless MAC Address Filtering feature allows you to control wireless stations accessing the router which depend on the station s MAC addresses MAC Address The wireless station s MAC address that you want to access Status The status of this entry either Enabled or Disabled Privile...

Страница 41: ...ar shown in Figure 4 20 Figure 4 20 To add or modify a MAC Address Filtering entry follow these instructions 1 Enter the appropriate MAC Address into the MAC Address field The format of the MAC Address is XX XX XX XX XX XX X is any hexadecimal digit For example 00 0A EB B0 00 0B 2 Enter a simple description of the wireless station in the Description field For example Wireless station A 3 Privilege...

Страница 42: ...teps Click the Enable button to enable this function Select the radio button Deny the stations not specified by any enabled entries in the list to access for Filtering Rules Delete all or disable all entries if there are any entries already Click the Add New button and enter the MAC address 00 0A EB 00 07 BE in the MAC Address field enter wireless station A in the Description field select Allow in...

Страница 43: ...less Statistics This page shows MAC Address Current Status Received Packets and Sent Packets for each connected wireless station Figure 4 22 1 MAC Address The connected wireless station s MAC address 2 Current Status The connected wireless station s running status one of STA AUTH STA ASSOC AP UP WPA WPA PSK WPA2 WPA2 PSK None 3 Received Packets Packets received by the station 4 Sent Packets Packet...

Страница 44: ...wn in Figure 4 24 Figure 4 24 DHCP Server Enable or Disable the DHCP server If you disable the Server you must have another DHCP server within your network or else you must manually configure the computer Start IP Address This field specifies the first of the addresses in the IP address pool 192 168 1 100 is the default start address End IP Address This field specifies the last of the addresses in...

Страница 45: ...ned IP and Lease Time for each DHCP Client attached to the router Figure 4 25 Figure 4 25 Index The index of the DHCP Client Client Name The name of the DHCP client MAC Address The MAC address of the DHCP client Assigned IP The IP address that the router has allocated to the DHCP client Lease Time The time of the DHCP client leased Before the time is up DHCP client will request to renew the lease ...

Страница 46: ...X XX XX and IP address in dotted decimal notation of the computer you wish to add 3 Click the Save button when finished Figure 4 27 To modify or delete an existing entry 1 Click the Modify in the entry you want to modify If you want to delete the entry click the Delete 2 Modify the information 3 Click the Save button Click the Enable All button to make all entries enabled Click the Disabled All bu...

Страница 47: ...e computer specified by the server IP Any PC that was used for a virtual server must have a static or reserved IP Address because its IP Address may change when using the DHCP function You can set up virtual servers on this page shown in Figure 4 29 Figure 4 29 1 Service Port The numbers of External Ports You can type a service port or a range of service ports the format is XXX YYY XXX is the star...

Страница 48: ...her service and enter the same IP Address for that computer or server To modify or delete an existing entry Click the Modify in the entry you want to modify If you want to delete the entry click the Delete Modify the information Click the Save button Click the Enable All button to make all entries enabled Click the Disabled All button to make all entries disabled Click the Delete All button to del...

Страница 49: ...one of the ports defined in the Incoming Ports field Trigger Port The port for outgoing traffic An outgoing connection using this port will Trigger this rule Trigger Protocol The protocol used for Trigger Ports either TCP UDP or All all protocols supported by the router Incoming Ports Range The port or port range used by the remote system when it responds to the outgoing request A response using o...

Страница 50: ... in the Trigger Port incoming Ports Range boxes and select the Enable checkbox It has the same effect as adding a new rule To modify or delete an existing entry 1 Click the Modify in the entry you want to modify If you want to delete the entry click the Delete 2 Modify the information 3 Click the Save button Click the Enable All button to make all entries enabled Click the Disabled All button to m...

Страница 51: ... 1 Click the Enable radio button 2 Enter the local host IP Address in the DMZ Host IP Address field 3 Click the Save button Note After you set the DMZ host the firewall related to the host will not work 4 7 4 UPnP The Universal Plug and Play UPnP feature allows the devices such as Internet computers to access the local host resources or devices as needed UPnP devices can be automatically discovere...

Страница 52: ...s inactive Click Refresh to update the Current UPnP Settings List 4 8 Security Figure 4 35 There are five submenus under the Security menu shown in Figure 4 35 Firewall IP Address Filtering Domain Filtering MAC Address Filtering and Advanced Security Click any of them and you will be able to configure the corresponding function The detailed explanations for each submenu are provided below 4 8 1 Fi...

Страница 53: ...omain Filtering set Domain Filtering is enabled or disabled Enable MAC Filtering set MAC Address Filtering is enabled or disabled You can select the default filtering rules of MAC Address Filtering either Allow or Deny accessing the router 4 8 2 IP Address Filtering The IP address Filtering feature allows you to control Internet Access by specific users on your LAN based on their IP addresses The ...

Страница 54: ... entry please follow these instructions 1 Effective Time Enter a range of time in HHMM format which point to the range time for the entry to take effect For example 0803 1705 the entry will take effect from 08 03 to 17 05 2 LAN IP Address Enter a LAN IP Address or a range of LAN IP addresses in the field in dotted decimal notation format For example 192 168 1 20 192 168 1 30 Keep the field open wh...

Страница 55: ...elete 4 Modify the information 5 Click the Save button Click the Enable All button to make all entries enabled Click the Disabled All button to make all entries disabled Click the Delete All button to delete all entries You can change the entry s order as desired Fore entries are before hind entries Enter the ID number in the first box you want to move and another ID number in second box you want ...

Страница 56: ...M format specifying the time for the entry to take effect For example if you enter 0803 1705 than the entry will take effect from 08 03 to 17 05 2 Domain Name Type the domain or key word as desired in the field A blank in the domain field means all websites on the Internet For example www xxyy com cn net 3 Status Select Enabled or Disabled for this entry on the Status pull down list 4 Click the Sa...

Страница 57: ...o limit for other websites you should specify the following Domain filtering list Figure 4 42 4 8 4 MAC Address Filtering Like the IP Address Filtering page the MAC Address Filtering page shown in Figure 4 43 allows you to control access to the Internet by users on your local network based on their MAC Address Figure 4 43 Before setting up MAC Filtering entries you must ensure that Enable Firewall...

Страница 58: ... existing entry 1 Click the Modify in the entry you want to modify If you want to delete the entry click the Delete 2 Modify the information 3 Click the Save button Click the Enable All button to make all entries enabled Click the Disabled All button to make all entries disabled Click the Delete All button to delete all entries Click the Next button to go to the next page and click the Previous bu...

Страница 59: ...tection function Only when it is enabled will the flood filters be effective Enable ICMP FLOOD Attack Filtering Enable or Disable the ICMP FLOOD Attack Filtering ICMP FLOOD Packets threshold 5 3600 The default value is 50 Enter a value between 5 3600 packets When the current ICMP FLOOD Packets numbers is beyond the set value the router will start up the blocking function immediately Enable UDP FLO...

Страница 60: ...on to save the settings Click the Blocked DoS Host Table button to display the DoS host table by blocking The page will appear that shown in Figure 4 47 Figure 4 47 This page shows Host IP Address and Host MAC Address for each host blocked by the router Host IP Address The IP address that blocked by DoS are displayed here Host MAC Address The MAC address that blocked by DoS are displayed here To u...

Страница 61: ... the host portion Gateway This is the IP Address of the gateway device that allows for contact between the router and the network or host Select Enabled or Disabled for this entry on the Status pull down list Click the Save button to save it Figure 4 49 To modify or delete an existing entry Click the Modify in the entry you want to modify If you want to delete the entry click the Delete Modify the...

Страница 62: ...tion for better performance and experience with online games and other interactive applications such as VoIP The following IP Range QoS configuration won t be effective unless it is enabled Choose Bandwidth Type Specifies your network connection type Here you can select either ADSL or Other z ADSL Select if you are using a dial up connection z Other Select if you are using other connection types B...

Страница 63: ...the minimum bandwidth for PC A such as 100Kbps Note 1 The conversion relation of bandwidth 1 Mbps 1000Kbps 2 Please choose the Network Connection Type and set the bandwidth according to your Network If you are not clear about that please contact with your ISP for help 3 IP address range for different entries could not have intersection with each other 4 After the configuration click the Save butto...

Страница 64: ...ify an IP MAC Binding entry you can click the Add New button or Modify button and then you will go to the next page This page is used for adding or modifying an IP MAC Binding entry shown in Figure 4 53 Figure 4 53 To add IP MAC Binding entries 1 Click the Add New button 2 Enter the MAC Address and IP Address 3 Select the Bind checkbox 4 Click the Save button to save it To modify or delete an exis...

Страница 65: ...you could configure the items on the ARP list also This page displays the ARP List it shows all the existing IP MAC Binding entries shown in Figure 4 55 Figure 4 55 1 MAC Address The MAC address of the controlled computer in the LAN 1 IP Address The assigned IP address of the controlled computer in the LAN Status Enabled or Disabled of the MAC address and IP address binding Configure Load or delet...

Страница 66: ...this feature you need to sign up for DDNS service providers such as www dyndns org www oray net or www comexe cn The Dynamic DNS client service provider will give you a password or key To set up for DDNS follow these instructions 4 12 1 Dyndns org DDNS If your selected dynamic DNS Service Provider is www dyndns org the page will appear as shown in Figure 4 56 Figure 4 56 To set up for DDNS follow ...

Страница 67: ...Type the User Name for your DDNS account 2 Type the Password for your DDNS account 3 Click the Login button to login the DDNS service 1 Connection Status The status of the DDNS service connection is displayed here z Domain Name The domain names are displayed here Click Logout to logout the DDNS service 4 12 3 Comexe cn DDNS If your selected dynamic DNS Service Provider is www comexe cn the page wi...

Страница 68: ...count Type the Password for your DDNS account Click the Login button to login to the DDNS service z Connection Status The status of the DDNS service connection is displayed here Click Logout to logout of the DDNS service 4 13 System Tools Figure 4 59 There are nine submenus under the System Tools menu shown in Figure 4 59 Time Firmware Factory Defaults Backup Restore Reboot Password Syslog Remote ...

Страница 69: ...HH MM SS into the right blanks Time setting follows these steps below 4 Select your local time zone 5 Enter date and time in the right blanks 6 Click Save Click the Get GMT button to get GMT time from Internet if you have connected to Internet If you re using Daylight saving time please follow the steps below 1 Select using daylight saving time 2 Enter daylight saving beginning time and end time i...

Страница 70: ... make sure you backup the router s settings before you upgrade its firmware To upgrade the router s firmware follow these instructions 1 Download the latest firmware upgrade file from the TP LINK website www tp link com 2 Click Browse to view the folders and select the downloaded file 3 Click the Upgrade button Firmware Version Displays the current firmware version Hardware Version Displays the cu...

Страница 71: ... as backup or restore the configuration file you saved before Figure 4 63 Click the Backup button to save all configuration settings as a backup file in your local computer To restore the router s configuration follow these instructions 1 Click the Browse button to select the backup file which you want to restore 2 Click the Restore button Note The current configuration will be covered with the up...

Страница 72: ...he router s settings to factory default system will reboot automatically 4 13 6 Password This page shown in Figure 4 65 allows you to change the factory default user name and password of the router Figure 4 65 It is recommended strongly that you change the factory default user name and password of the router All users who try to access the router s Web based utility or Quick Setup will be prompted...

Страница 73: ... 4 67 This feature allows you to manage your Router from a remote location via the Internet Figure 4 67 Web Management Port Web browser access normally uses the standard HTTP service port 80 This router s default remote management Web port number is 80 For greater security you can change the remote management Web interface to a custom port by entering that number in this box provided Choose a numb...

Страница 74: ...ter s default password to a very secure password 4 13 9 Statistics The Statistics page shown in Figure 4 68 displays the network traffic of each PC in LAN including total traffic and traffic of the last Packets Statistic interval seconds Figure 4 68 Current Statistics Status Enable or Disable The default value is disabled To enable click the Enable button If disabled the function of DoS protection...

Страница 75: ...econds ICMP Tx The total amount of the ICMP packets transmitted to WAN in the last Packets Statistic interval seconds UDP Tx The total amount of the UDP packets transmitted to WAN in the last Packets Statistic interval seconds Current TCP SYN Tx The total amount of the TCP SYN packets transmitted to WAN in the last Packets Statistic interval seconds Click the Save button to save the Packets Statis...

Страница 76: ... in the User Name field and password in the Password field finish by clicking Connect Figure A 1 4 If your ADSL lease is in pay according time mode select Connect on Demand or Connect Manually for Internet connection mode Type an appropriate number for Max Idle Time to avoid wasting paid time Otherwise you can select Auto connecting for Internet connection mode Figure A 2 Note Sometimes the connec...

Страница 77: ...s will fill in the WAN MAC Address field Or else type the MAC Address into the WAN MAC Address field The format for the MAC Address is XX XX XX XX XX XX Then click the Save button It will take effect after rebooting Figure A 3 3 I want to use Netmeeting what do I need to do 1 If you start Netmeeting as a sponsor you don t need to do anything with the router 2 If you start as a response you need to...

Страница 78: ...as an example remember to click the Save button Figure A 6 4 I want to build a WEB Server on the LAN what should I do 1 Because the WEB Server port 80 will interfere with the WEB management port 80 on the router you must change the WEB management port number to avoid interference 2 To change the WEB management port number Login to the router click the Security menu on the left of your browser and ...

Страница 79: ...e Add or Modify a Virtual Server page enter 80 into the blank behind the Service Port and your IP address behind the IP Address assuming 192 168 1 188 for an example remember to Enable and Save Figure A 8 Figure A 9 5 The wireless stations cannot connect to the router 1 Make sure the Wireless Router Radio is enabled 2 Make sure that the wireless stations SSID accord with the router s SSID 3 Make s...

Страница 80: ...the adapter s manual if necessary 6 Configure TCP IP component 1 On the Windows taskbar click the Start button and then click Control Panel 2 Click the Network and Internet Connections icon and then click on the Network Connections tab in the appearing window 3 Right click the icon that showed below select Properties on the prompt page Figure 0 1 4 In the prompt page that showed below double click...

Страница 81: ...rties window will display and the IP Address tab is open on this window by default Now you have two ways to configure the TCP IP protocol below Setting IP address automatically Select Obtain an IP address automatically Choose Obtain DNS server automatically as shown in the Figure below ...

Страница 82: ...g items available 4 If the router s LAN IP address is 192 168 1 1 specify the IP address as 192 168 1 x x is from 2 to 254 and the Subnet mask as 255 255 255 0 5 Type the router s LAN IP address the default IP is 192 168 1 1 into the Default gateway field 6 Select Use the following DNS server addresses In the Preferred DNS Server field you can enter the same value as the Default gateway or type th...

Страница 83: ...TL WR641G 108M Wireless Router User Guide 76 Now Click OK to keep your settings ...

Страница 84: ...ing Auto MDI MDIX Cabling Type 10BASE T UTP category 3 4 5 cable maximum 100m EIA TIA 568 100Ω STP maximum 100m 100BASE TX UTP category 5 5e cable maximum 100m EIA TIA 568 100Ω STP maximum 100m Radio Data Rate 108 54 48 36 24 18 12 9 6Mbps or 11 5 5 3 2 1Mbps LEDs PWR SYS WLAN WAN 1 2 3 4 Safety Emissions FCC CE Environmental and Physical Operating Temp 0 40 32 104 Operating Humidity 10 90 RH Non ...

Страница 85: ...ce of traditional 802 11b and 802 11g products for a coverage area that is up to nine times greater A traditional 802 11b and 802 11g product transmission distance is about 300m a 2x to 3x eXtended Range based client and access point can maintain a connection transmission distance may be up to 830m 802 11b The 802 11b standard specifies a wireless networking at 11 Mbps using direct sequence spread...

Страница 86: ...ction by simulating a dial up connection SSID A Service Set Identification is a thirty two character maximum alphanumeric key identifying a wireless local area network For the wireless devices in a network to communicate with each other all devices must be configured with the same SSID This is typically the configuration parameter for a wireless PC card It corresponds to the ESSID in the wireless ...

Отзывы: