background image

TL-WN727N 

150Mbps Wireless N USB Adapter 


24

Chapter 4  Management 

This section will show you how to configure your TL-WN727N adapter using the TP-LINK 

Wireless Configuration Utility (TWCU). 

The TL-WN727N adapter uses the TP-LINK Wireless Configuration Utility as the management 

software. The utility provides users with an easy interface to change any settings related to the 

adapter. Double-clicking on the 

  icon on your desktop will start the utility. 

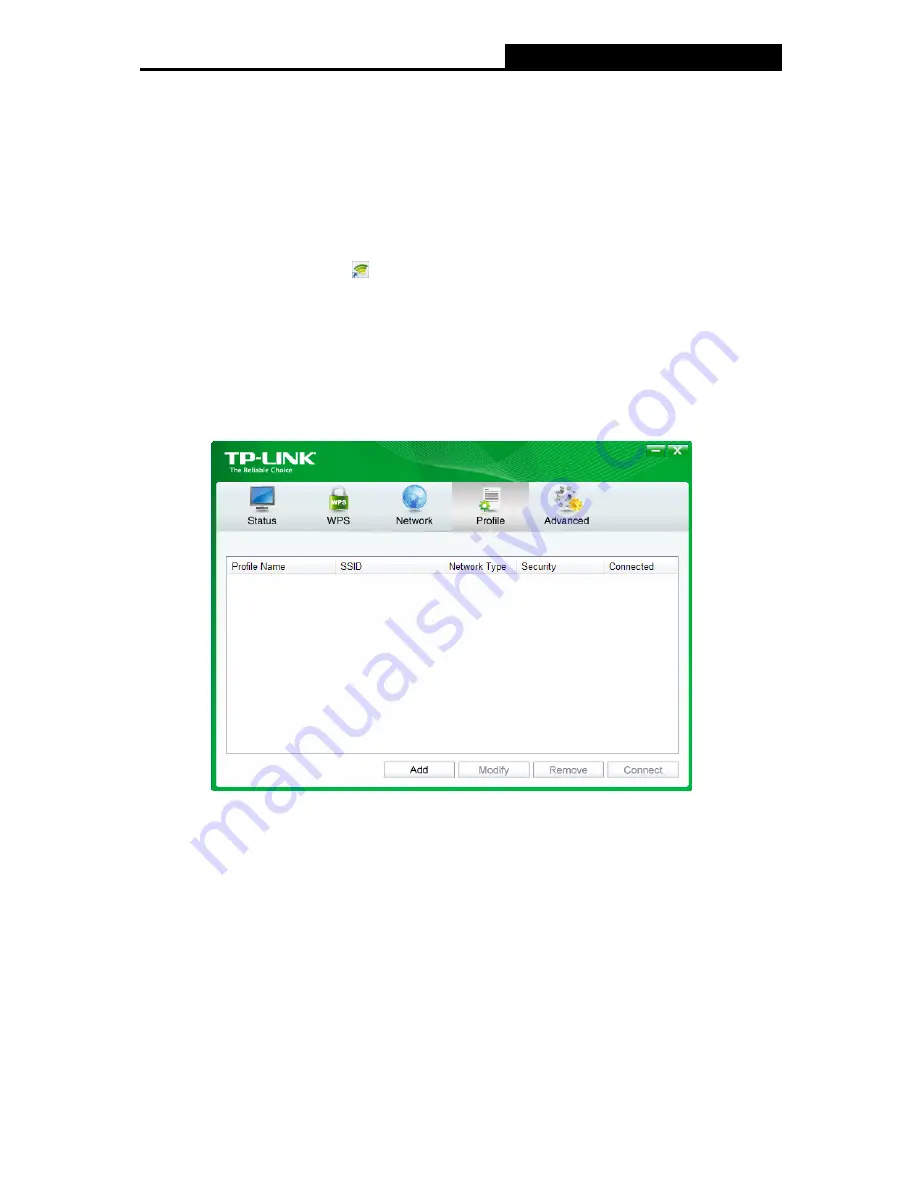
4.1  Profile 

Your wireless networks may vary in different places like home, office or coffee shop. With 

Profile

 management, you can easily save and manage various networks to be connected, 

saving you the trouble of having to repeat the same configurations. Click 

Profile

 in the tools 

section, the following page will appear.   


Figure 4-1 

4.1.1  Add a profile 

To add a profile, click the 

Add

 button on the bottom of the screen. Then the configuration 

window will appear.   

Содержание TL-WN727N

Страница 1: ...TL WN727N 150Mbps Wireless N USB Adapter Rev 4 0 0 1910010945 ...

Страница 2: ...s are trademarks or registered trademarks of their respective holders No part of the specifications may be reproduced in any form or by any means or used to make any derivative such as translation transformation or adaptation without permission from TP LINK TECHNOLOGIES CO LTD Copyright 2013 TP LINK TECHNOLOGIES CO LTD All rights reserved http www tp link com ...

Страница 3: ...nnected Consult the dealer or an experienced radio TV technician for help This device complies with part 15 of the FCC Rules Operation is subject to the following two conditions 1 This device may not cause harmful interference 2 This device must accept any interference received including interference that may cause undesired operation Any changes or modifications not expressly approved by the part...

Страница 4: ...et appareil ne doit pas provoquer d interférences et 2 cet appareil doit accepter toute interférence y compris celles susceptibles de provoquer un fonctionnement non souhaité de l appareil Industry Canada Statement Complies with the Canadian ICES 003 Class B specifications Cet appareil numérique de la classe B est conforme à la norme NMB 003 du Canada This device complies with RSS 210 of Industry ...

Страница 5: ...инними законодавчими актами України Safety Information z When product has power button the power button is one of the way to shut off the product when there is no power button the only way to completely shut off power is to disconnect the product or the power adapter from the power source z Don t disassemble the product or make repairs yourself You run the risk of electric shock and voiding the li...

Страница 6: ...tisfy all the technical regulations applicable to the product within the scope of Council Directives Directives 1999 5 EC Directives 2006 95 EC Directives1999 519 EC Directives 2011 65 EU The above product is in conformity with the following standards or other normative documents ETSI EN 300 328 V1 7 1 2006 ETSI EN 301 489 1 V1 9 2 2011 ETSI EN 301 489 17 V2 2 1 2012 EN 60950 1 2006 A11 2009 A1 20...

Страница 7: ...lt in wireless utility 18 3 3 1 In Windows XP 18 3 3 2 In Windows 7 20 3 3 3 In Windows 8 21 Chapter 4 Management 24 4 1 Profile 24 4 1 1 Add a profile 24 4 1 2 Modify a profile 26 4 1 3 Delete a profile 27 4 2 Advanced 27 4 3 About 28 Chapter 5 AP Mode 29 Chapter 6 Uninstall Software 31 6 1 In Windows XP 7 31 6 1 1 Uninstall the utility software from your PC 31 6 1 2 Uninstall the driver software...

Страница 8: ... cable One Resource CD for TL WN727N including TP LINK Wireless Configuration Utility TWCU and Drivers User Guide Other helpful information Make sure that the above items are contained in the package If any of the above items are damaged or missing please contact your distributor Note The adapter mentioned in this User Guide stands for TL WN727N 150Mbps Wireless N USB Adapter without any explanati...

Страница 9: ...m being exposed The adapter is easy to install and manage with the Quick Setup Wizard guiding you step by step through the installation process and the TP LINK Wireless Configuration Utility instructing you to quickly set up a wireless connection With unmatched wireless performance reception and security protection the TL WN727N is the best choice for easily adding or upgrading wireless connectivi...

Страница 10: ...n installed The adapter s radio has been disabled Flashing Slowly The driver has been installed but no data is being transmitted or received Flashing Quickly Data is being transmitted or received Note When the card failed to connect to a wireless network the LED may be off Please choose your network and try to connect again ...

Страница 11: ...up when the adapter is installed correctly Click Cancel 2 2 Software Installation The adapter s Setup Wizard will guide you through the installation procedures for Windows XP Windows 7 and Windows 8 The procedures in different systems are quite similar therefore here we use the procedures in Windows 7 as an example 1 Insert the Resource CD into your CD ROM drive and the window below will appear Se...

Страница 12: ...eld Wizard window will appear Click Next to continue Figure 2 2 3 Choose a setup type It is recommended to select Install TP LINK Wireless Configuration Utility and Driver Selecting Install Driver Only will only install driver Click Next to continue Figure 2 3 ...

Страница 13: ...reless N USB Adapter 6 4 Click Change to specify the destination location for the software or you can leave it default Click Next in the screen below to continue Figure 2 4 5 Click Install to continue the setup Figure 2 5 ...

Страница 14: ...150Mbps Wireless N USB Adapter 7 6 The utility and drivers will install This may take 1 2 minutes Figure 2 6 7 After all the steps above you will see the screen below Click Finish to complete the setup Figure 2 7 ...

Страница 15: ... After installation the utility configuration page will automatically pop up as shown in the following figure and the icon will appear in your system tray To connect to a network please refer to Chapter 3 Connect to a Wireless Network Figure 2 8 ...

Страница 16: ...etwork quickly on the condition that your router or access point supports QSS or WPS as is called by some other brands Method Three To connect using Windows built in wireless utility Windows users may use the built in wireless utility to connect to a wireless network For specific operations please go to To connect using Windows built in wireless utility 3 1 To connect using TWCU 1 After installati...

Страница 17: ...Wireless network of WPA WPA2 Personal If you selected a wireless network of the security type WPA WPA2 Personal you will be prompted to enter the password in the security key field as shown in Figure 3 3 Or you can push the WPS QSS button on your Router if it features the WPS QSS function to quickly build a connection without entering the security key password Figure 3 3 Note The Security Key pass...

Страница 18: ...tificate as your authentication you need to select one specific certificate from the drop down list as shown in Figure 3 4 With Password as your authentication you should enter the right user name and password in the corresponding field as shown in Figure 3 5 Figure 3 4 Figure 3 5 3 Wireless network of None If you selected a wireless network of None that is no security is set you can get directly ...

Страница 19: ...igure 3 6 5 You have now successfully connected to your network Click Close to enjoy the Internet Figure 3 7 6 To view more information about the network currently connected click Status in the tools section and the page will display information such as the network type link quality and wireless mode ...

Страница 20: ...an establish a wireless connection between wireless card and router using either Push Button Configuration PBC method or PIN method 3 2 1 PBC Push Button Configuration method 1 Press the WPS RESET button for 2 3 seconds on the back panel of the router Here takes router TL WR841ND for example 2 Press the WPS button on the adapter There are two ways Method One Press and hold the WPS button on the ad...

Страница 21: ...N USB Adapter 14 Figure 3 9 Method Two Open TWCU and click WPS tab Select Push the button on my access point or wireless router and then click Connect Figure 3 10 3 The adapter will be connecting to the target network Figure 3 11 ...

Страница 22: ...r a PIN into your AP device Following are detailed configuration procedures of each way 3 2 2 1 Enter the PIN from your AP device 1 Open TWCU and click WPS tab Select Enter the PIN of my access point or wireless router In the empty field beside PIN enter the PIN labeled on the bottom of the router here takes 13492564 for example If you have generated a new PIN code for your router please enter the...

Страница 23: ...WPS tab Select Enter the PIN of this device into my access point or wireless router In the field beside PIN you will see the PIN value of the adapter which is randomly generated Click Connect to continue Figure 3 15 2 Open your router s Web based Utility and click WPS link on the left of the main menu Then click Add device and the following figure will appear Enter the PIN value of the adapter in ...

Страница 24: ...r 17 Figure 3 16 3 When Connect successfully appears on the screen the WPS configuration is complete Or you can view the adapter s utility page to see whether the connection has been successful as shown in Figure 3 18 Figure 3 17 Figure 3 18 ...

Страница 25: ... below 1 Right click on the utility icon in your system tray lower right corner Select Switch to Windows wireless configuration tool Figure 3 19 Or double click the utility icon to load the utility configuration page Click Advanced in the tools section and then select Use Windows wireless configuration tool in the figure shown below Click OK when Figure 3 21 appears to continue Figure 3 20 ...

Страница 26: ...the wireless computer icon in your system tray lower right corner Select View Available Wireless Networks Figure 3 22 3 The utility will display any available wireless networks in your area Click on a network displayed using the SSID and click the Connect button Figure 3 23 ...

Страница 27: ...1 Left click the wireless icon in your system tray lower right corner The utility will display any available wireless networks in your area Highlight the wireless network displayed using the SSID to be connected and then click Connect Figure 3 25 2 If the network you would like to connect is security enabled enter the same security key or passphrase that is on your router Or push the WPS QSS butto...

Страница 28: ...l be built without entering a key Figure 3 26 3 You have now successfully connected to the network Figure 3 27 3 3 3 In Windows 8 Windows 8 users may use the built in wireless utility Follow the steps below 1 Click the icon at the bottom of your screen and a network list will appear at the right side of your screen Select your target network and then click Connect ...

Страница 29: ... will directly connect to it If the network is encrypted enter the password network security key and then click Next to continue Figure 3 29 Note You can also push the WPS QSS button on your router as hinted You can also connect by pushing the button on the router Then click Next to continue ...

Страница 30: ...s shown below you have successfully connected to the target network Figure 3 30 Note If the adapter is connected to the network for the first time you will be asked whether to turn on sharing or connect to devices Please select Yes or No according to your Internet environment Figure 3 31 ...

Страница 31: ...tings related to the adapter Double clicking on the icon on your desktop will start the utility 4 1 Profile Your wireless networks may vary in different places like home office or coffee shop With Profile management you can easily save and manage various networks to be connected saving you the trouble of having to repeat the same configurations Click Profile in the tools section the following page...

Страница 32: ... you are connecting to another wireless client such as an adapter select ad hoc Security Type Select the security type from the list Three options are available WPA PSK WPA2 PSK WEP and None The security type should be the same as on your router or access point otherwise you will not be able to build a successful connection WPA PSK WPA2 PSK uses a passphrase or key to authenticate your wireless co...

Страница 33: ...ide it Start this connection automatically check this box to automatically connect to this network next time Save Click Save to save your settings Having completed the above settings the Profile page should look like the following figure To connect to a desired network just highlight the network you would like to connect to and click the Connect button on the bottom of the window Figure 4 4 4 1 2 ...

Страница 34: ... To select wireless configuration tool Here you can decide which tool to use either the TP LINK Configuration Utility or the Windows wireless configuration tool This option is available only in Windows XP 2 To switch to another wireless network adapter Here you can switch to another adapter installed in your computer The adapters successfully installed in your computer will be listed in the drop d...

Страница 35: ... N USB Adapter 28 Figure 4 7 4 3 About The About screen gives you information about the Driver and Utility versions of the adapter Right click on the icon in your system tray and select About from the list Figure 4 8 Figure 4 9 ...

Страница 36: ...oft AP mode saving you the trouble of having to get a separate access point or a router With this feature a computer can use a single physical wireless adapter to connect as a client to a hardware access point while at the same time acting as a software AP allowing other wireless capable devices to connect to it To switch to this mode right click on the utility icon in your system tray and select ...

Страница 37: ... The security type here is set to be WPA2 PSK which is based on 802 11i and uses Advanced Encryption Standard instead of TKIP It was designed to improve the security features of WEP WPA2 PSK uses a passphrase or key to authenticate your wireless connection You needn t make any configuration here Encryption Type The encryption type here is set to be AES Security Key Enter the Key in the field to ma...

Страница 38: ...install the utility software from your PC 1 On the Windows taskbar click the Start button click All programsÆTP LINK and then click Uninstall TP LINK Wireless Configuration Utility Figure 6 1 Uninstall Utility 2 Follow the Install Shield Wizard to uninstall the utility software from your PC Figure 6 2 ...

Страница 39: ...6 1 2 Uninstall the driver software from your PC 1 On the Windows taskbar click the Start button click All programsÆTP LINK and then click Uninstall TP LINK TL WN727N Driver Figure 6 4 Uninstall Driver 2 Following the steps then the system will uninstall the driver software of the adapter from your PC ...

Страница 40: ...er the Metro interface right click any blank place in the Metro interface then App Bar will appear below the Metro interface click All apps Find the TP LINK application and click Uninstall TP LINK Wireless Configuration Utility Figure 6 5 2 Click Yes to start uninstalling the utility software from your PC Figure 6 6 ...

Страница 41: ... 7 4 Click Finish when the figure below appears Figure 6 8 6 2 2 Uninstall the driver software from your PC 1 Enter the Metro interface right click any blank place in the Metro interface then App Bar will appear below the Metro interface click All apps Find the TP LINK application and click Uninstall TP LINK TL WN727N Driver ...

Страница 42: ...N 150Mbps Wireless N USB Adapter 35 Figure 6 9 2 Click Yes to start uninstalling the driver software from your PC Figure 6 10 3 It may take a few minutes to undergo the whole un installation process Figure 6 11 ...

Страница 43: ...TL WN727N 150Mbps Wireless N USB Adapter 36 4 Click Finish when the figure below appears Figure 6 12 ...

Страница 44: ...1b CCK QPSK BPSK 11g OFDM 11n QPSK BPSK 16 QAM 64 QAM Media Access Protocol CSMA CA with ACK Data Security WPA WPA2 WEP TKIP AES Frequency 2 4 2 4835GHz Spread Spectrum Direct Sequence Spread Spectrum DSSS Safety Emissions FCC CE Environmental and Physical Working Temperature 0 40 32 104 Working Humidity 10 90 RH Non condensing Storage Temperature 40 70 40 158 Storage Humidity 5 90 RH Non condensi...

Страница 45: ...n Independent Basic Service Set IBSS or as peer to peer mode and is useful at a departmental scale or SOHO operation DSSS Direct Sequence Spread Spectrum DSSS generates a redundant bit pattern for all data transmitted This bit pattern is called a chip or chipping code Even if one or more bits in the chip are damaged during transmission statistical techniques embedded in the receiver can recover th...

Страница 46: ...ess Access Point and to the wireless network name See also Wireless Network Name and ESSID WEP Wired Equivalent Privacy A data privacy mechanism based on a 64 bit or 128 bit or 152 bit shared key algorithm as described in the IEEE 802 11 standard To gain access to a WEP network you must know the key The key is a string of characters that you create When using WEP you must determine the level of en...

Отзывы: