


TL-R4199G
SMB Broadband Router User Guide
47
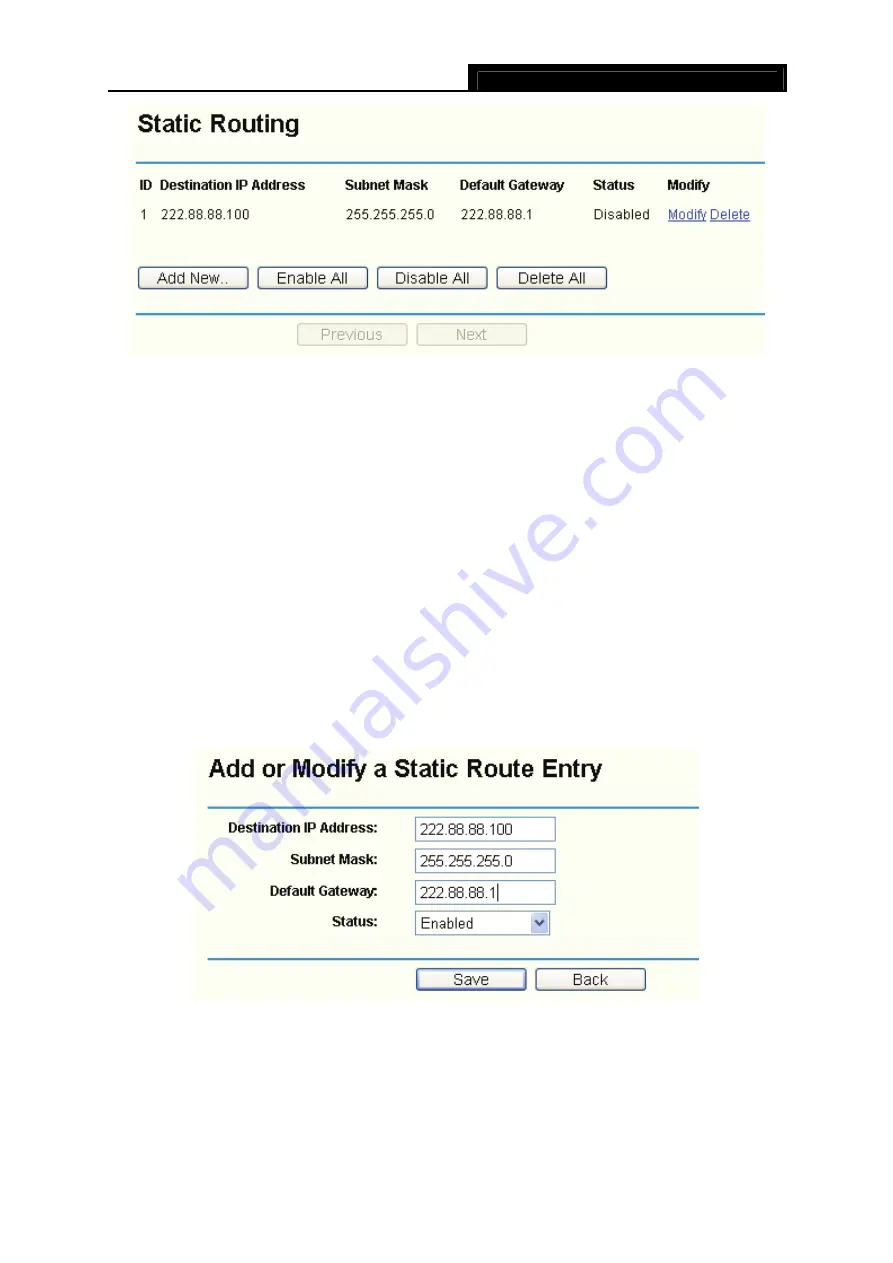
Figure 4-38
¾
Destination IP Address
-
The “Destination IP Address” is the address of the network or host
that you want to assign to a static route.
¾
Subnet Mask
-
The “Subnet Mask” determines which portion of an IP address is the network
portion, and which portion is the host portion.
¾
Default Gateway
-
This is the IP address of the gateway device that allows for contact
between the router and the network or host.
¾
Status
-
This field displays the status,
Enabled
means the rule is effective,
Disabled
means
the rule is ineffective.
To add/modify a static routing entry:
Step 1:
Click
Add New…
/
Modify
shown in Figure 4-38, you will see a new screen shown in
Step 2:
Enter the appropriate Destination IP Address, Subnet Mask and Default Gateway, and
then select the status.
Figure 4-39
Step 3:
Click
Save
to make the entry take effect.
)
Note:
If you want to add more than one static route, please go to
step 1
to continue.
Other configurations for the entries as shown in Figure 4-28:


