background image

TUNDRA (34413U)

87

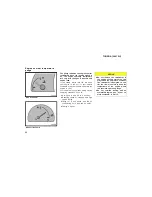
Oil  pressure  gauge

Idling

Normal
driving

The  oil  pressure  gauge  indicates  engine
oil  pressure  when  the  ignition  switch  is
on.  Check  it  while  driving  to  make  sure
that  the  needle  is  in  the  proper  range.

If  the  oil  pressure  should  stay  below  the
normal  range,  pull  off  the  road  to  a  safe
place  and  stop  the  engine  immediately.
Call  a  Toyota  dealer  or  qualified  repair
shop  for  assistance.

Oil  pressure  may  not  build  up  when  the
oil  level  is  too  low.  The  oil  pressure
gauge  is  not  designed  to  indicate  oil  level,
and  the  oil  level  must  be  checked  using
the  level  dipstick.

NOTICE

Do  not  drive  the  vehicle  with  the  oil
pressure  below  the  normal  range  until
the  cause  is  fixed—it  may  ruin  the
engine.

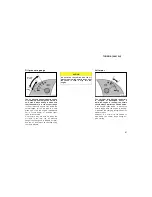
Voltmeter

The  voltmeter  tells  whether  the  battery
is  charged  or  discharged.  Check  it
while  the  engine  is  running—the  needle
should  always  indicate  as  shown  above.

If  the  needle  reads  below  or  above  the
normal  range  while  the  engine  is  running,
it  indicates  the  charging  system  needs  im-
mediate  repair.

However,  it  is  normal  for  the  needle  to
drop  below  the  normal  range  during  en-
gine  starting.

Содержание 2000 Tundra

Страница 1: ...y other assistance you may require Please leave this Owner s Manual in this vehicle at the time of resale The next owner will need this information also All information and specifications in this manual are current at the time of printing However because of Toyota s policy of continual product improve ment we reserve the right to make changes at any time without notice Please note that this manual...

Страница 2: ...e informed what you must or must not do in order to avoid or reduce the risk to yourself and other people NOTICE This is a warning against something which may cause damage to the vehicle or its equipment if the warning is ignored You are informed what you must or must not do in order to avoid or reduce the risk of damage to your vehicle and its equipment Safety symbol In this manual you will also ...

Страница 3: ...NDRA 34413U 1 Part 1 OPERATION OF INSTRUMENTS AND CONTROLS Chapter 1 1 Overview of instruments and controls Instrument panel overview Instrument cluster overview Indicator symbols on the instrument panel ...

Страница 4: ... Side defroster outlet 7 Power door lock switches 8 Power window switches 9 Glove box 10 Manual transmission gear shift lever 11 Front drive control lever 12 Parking brake lever vehicles with manual transmission 13 Lower vent 14 Hood lock release lever 15 Parking brake pedal vehicles with automatic transmission 16 Power rear view mirror control switch ...

Страница 5: ...ch 6 Emergency flasher switch 7 Car audio 8 Air conditioning controls 9 Passenger airbag manual on off switch 10 Clock 11 Cup holder 12 Power outlets 13 4LO button 14 2WD 4HI button 15 Ashtray 16 Cigarette lighter 17 Cruise control switch 18 Ignition switch 19 Tilt steering lock release lever 20 Instrument panel light control knob 21 Clutch start cancel switch ...

Страница 6: ... 2 Service reminder indicators and indicator lights 3 Tachometer 4 Speedometer 5 Voltmeter 6 Fuel gauge 7 Trip meter reset knob 8 Odometer and two trip meters 9 Engine coolant temperature gauge Instrument cluster overview With tachometer ...

Страница 7: ...TUNDRA 34413U 5 1 Engine coolant temperature gauge 2 Service reminder indicators and indicator lights 3 Speedometer 4 Fuel gauge 5 Trip meter reset knob 6 Odometer and two trip meters Without tachometer ...

Страница 8: ...cator lamp 1 Anti lock brake system warning light 1 SRS warning light 1 type A type B Automatic transmission fluid temperature warning light 1 Unengaged Park warning light 1 Low windshield washer fluid level warning light 1 Headlight high beam indicator light Overdrive off indicator light Turn signal indicator lights Open door warning light 1 Passenger airbag off indicator light Automatic transmis...

Страница 9: ...pter 1 5 2 If this light flashes see Four wheel drive system in Chapter 1 6 3 If this light flashes see Cruise control in Chapter 1 6 Cruise control indicator light 3 Low speed four wheel drive indicator light 2 Four wheel drive indicator light High speed four wheel drive indicator light 2 ...

Страница 10: ...TUNDRA 34413U 8 ...

Страница 11: ...locked without a key you should always carry a spare key in case you accidentally lock your key inside the vehicle KEY NUMBER PLATE Your key number is shown on the plate Keep the plate in a safe place such as your wallet not in the vehicle If you should lose your keys or if you need additional keys duplicates can be made by a Toyota dealer using the key number We recommend you to write down the ke...

Страница 12: ...nd twice in succession will un lock the driver s door and passenger s door simultaneously LOCKING AND UNLOCKING WITH INSIDE LOCK KNOB Move the lock knob To lock Push the knob forward To unlock Pull the knob backward Closing the door with the lock knob in the lock position will also lock the door Be careful not to lock your keys in the ve hicle Vehicles with power door lock system The door will not...

Страница 13: ...icle during an accident It also helps prevent the doors from being opened unintentionally For easy access to the rear seat open the access door rear door To open First open the front door widely Then pull the outside handle or inside le ver of the access door If you try to open the front and rear doors simultaniously they will not open To close First close the access door completely Then close the...

Страница 14: ...tch is turned off They stop working when either front door is opened OPERATING THE DRIVER S WINDOW Use the switch on the driver s door Normal operation The window moves as long as you hold the switch To open Lightly push down the switch To close Pull up the switch Automatic operation to open only Push the switch completely down and then release it The window will fully open To stop the window part...

Страница 15: ...s If someone s neck head or hands gets caught in a closing window it could result in a serious injury When anyone closes the power windows be sure that they operate the windows safe ly When small children are in the ve hicle never let them use the power window switches without supervi sion Use the window lock button to prevent them from making unex pected use of the switches Never leave small chil...

Страница 16: ...e horizontal See Luggage stowage precautions in Part 2 for precautions to observe for load ing luggage After closing the tailgate try pulling and pushing it to make sure it is securely closed NOTICE Avoid driving with the tailgate open Support cable bracket REMOVAL 1 Open the tailgate to the angle where you can release the brackets on the support cables from the lugs on both sides To release the s...

Страница 17: ...e in reverse order After closing the tailgate try pulling it to ward you to make sure it is securely closed We recommend you keep the tailgate closed when not in use NOTICE Make sure the support brackets are securely latched on both side panels when installing the tailgate LOCKING AND UNLOCKING WITH KEY Insert the key into the keyhole and turn it to lock or unlock the tailgate To lock Turn the key...

Страница 18: ... check to see that you have not forgotten any tools rags etc Then lower the hood and make sure it locks into place If necessary press down gently on the front edge to lock it Fuel tank cap 1 To open the fuel filler door insert the key and turn it counterclockwise When refueling turn off the engine CAUTION Do not smoke cause sparks or al low open flames when refueling The fumes are flammable When o...

Страница 19: ...he cap hang it on the cap hanger It is not unusual to hear a slight swoosh when the cap is opened When installing turn the cap clockwise till you hear a click If the cap is not tightened securely the malfunction indicator lamp comes on Make sure the cap is tightened securely The indicator lamp goes off after driving several times If the indicator lamp does not go off contact your Toyota dealer as ...

Страница 20: ...TUNDRA 34413U 18 ...

Страница 21: ...is being driven all ve hicle occupants should have the seatback upright sit well back in the seat and prop erly wear the seat belts provided CAUTION Do not drive the vehicle unless the occupants are properly seated Do not allow sitting on top of a folded down seatback or in the luggage compartment Persons not properly seated and not properly re strained by seat belts can be se verely injured in th...

Страница 22: ...y sliding it forward and backward to make sure it is locked in posi tion After adjusting the seatback exert body pressure to make sure it is locked in position Do not put objects under the seats The objects may interfere with the seat lock mechanism or unexpect edly push up the seat position ad justing lever the seat may suddenly move causing the driver to lose control of the vehicle While adjusti...

Страница 23: ...angle and release the lever CAUTION To reduce the risk of sliding under the lap belt during a collision avoid reclining the seatback any more than needed The seat belts provide maxi mum protection in a frontal or rear collision when the driver and the pas senger are sitting up straight and well back in the seats If you are reclined the lap belt may slide past your hips and apply restraint forces d...

Страница 24: ... seat back at that position CAUTION To reduce the risk of sliding under the lap belt during a collision avoid reclining the seatback any more than needed The seat belts provide maxi mum protection in a frontal or rear collision when the driver and the pas senger are sitting up straight and well back in the seats If you are reclined the lap belt may slide past your hips and apply restraint forces d...

Страница 25: ...eir foot on the press pedal while the vehicle is moving Pull the seatback lock release lever and fold down the seatback Hold the lever until you have swung the seatback forward slightly CAUTION When returning the seatback to the upright position Make sure the seat belts are not twisted or caught in the seatback and are arranged in their proper position and are ready to use Make sure the seatback i...

Страница 26: ...ll the lock release strap and down the armrest To raise Push down the lock release knob and up the armrest Type B Pull the armrest down as shown in the illustration Type C Pull the armrest out as shown in the illustration NOTICE To prevent damage to the armrest avoid putting heavy loads on it ...

Страница 27: ...he bottom cushion while pushing the lock release lever CAUTION When returning the bottom cushion to its original position Make sure the seat belts are not twisted or caught under the bottom cushion and are arranged in their proper position and are ready to use Make sure the bottom cushion is securely locked by trying to pull up the edge of the bottom cushion Failure to do so will prevent seat belt...

Страница 28: ... and or the severity of injury in accidents Child Use a child restraint system ap propriate for the child until the child be comes large enough to properly wear the vehicle s seat belts See Child restraint for details STANDARD CAB MODELS If a child is too large for a child restraint system the child should sit in the seat and must be restrained using the vehicle s seat belt ACCESS CAB MODELS If a ...

Страница 29: ...r seats properly wearing their seat belts whenever the vehicle is moving Otherwise they are much more likely to suffer serious bodily injury or death in the event of sudden braking or a collision When using the seat belts observe the following Use the belt for only one person at a time Do not use a single belt for two or more people even children Avoid reclining the seatbacks too much The seat bel...

Страница 30: ...of the retractor When a passenger s shoulder belt is com pletely extended and is then retracted even slightly the belt is locked in that position and cannot be extended This fea ture is used to hold the child restraint system securely For details see Child restraint in this chapter To free the belt again fully retract the belt and then pull the belt out once more CAUTION After inserting the tab ma...

Страница 31: ...from your neck but not falling off your shoulder Failure to do so could reduce the amount of protection in an accident and cause severe injuries in a collision Take up slack Too high Keep as low on hips as possible Adjust the position of the lap and shoulder belts Position the lap belt as low as possible on your hips not on your waist then ad just it to a snug fit by pulling the shoulder portion u...

Страница 32: ...s into the buckle If the belt is not long enough for you hold the tab at a right angle to the belt and pull on the tab CAUTION After inserting the tab make sure the tab and buckle are locked and that the belt is not twisted Do not insert coins clips etc in the buckle as this may prevent you from properly latching the tab and buckle If the seat belt does not function normally immediately contact yo...

Страница 33: ...ON High positioned and loose fitting lap belts could cause serious injuries due to sliding under the lap belt during a collision or other unintended result Keep the lap belt positioned as low on hips as possible To release the belt press the buckle re lease button The rear seat belt and buckles can be stowed when not in use Seat belt and buckles must be stowed before you swing up the bottom cushio...

Страница 34: ... in case of vehicle acci dent increasing the chance of per sonal injury Never use the seat belt extender if you can fasten the seat belt without it Remember that the extender pro vided for you may not be safe when used on a different vehicle or for another person or at a different seating position than the one origi nally intended for To connect the extender to the seat belt insert the tab into th...

Страница 35: ...ted in response to a severe fron tal impact When the airbag sensor detects the shock of a severe frontal impact the front seat belt is quickly drawn back in by the re tractor so that the belt snugly restrains the front seat occupants The seat belt pretensioners are activated even with no passenger in the front seat This indicator comes on when the igni tion key is turned to the ACC or ON position ...

Страница 36: ...seat belt pretensioner as semblies airbag sensor or surround ing area or wiring Doing any of these may cause sudden operation of the front seat belt pretensioners or disable the system which could re sult in death or serious personal inju ry Failure to follow these instructions can result in death or serious inju ries NOTICE Do not perform any of the following changes without consulting your Toyot...

Страница 37: ...vehicle shaded in the illustration was involved in an accident that did not cause the seat belt pretensioners to operate The front seat belt pretensioner assem bly is scratched cracked or otherwise damaged The SRS Supplemental Restraint Sys tem airbags are designed to provide further protection for the driver and front passenger when added to the pri mary protection provided by the seat belts In r...

Страница 38: ...Turning the passenger airbag manual on off switch counterclockwise to the OFF position disables the passenger airbag system The indicator light on the passenger airbag manual on off switch will come on when the passen ger airbag system has been disabled See Passenger airbag manual on off switch in this chapter for detail CAUTION Make sure that the indicator light is off Do not turn off the passeng...

Страница 39: ...dition Child age 1 to 12 A child age 1 to 12 must ride in the front seat because Vehicle has no rear seat Although children ages 1 to 12 ride in the rear seat s whenever possible children ages 1 to 12 sometimes must ride in the front because no space is available in the rear seat s of vehicle or The child has a medical condition which according to the child s physician makes it necessary for the c...

Страница 40: ...hold level the SRS airbags may not deploy However this threshold velocity will be considerably higher if the vehicle strikes an object such as a parked vehicle or sign pole which can move or deform on impact or if it is involved in an underride collision e g a collision in which the nose of the vehicle underrides or goes under the bed of a truck etc It is possible with collision severity at the ma...

Страница 41: ...the system triggers the airbag inflators Then a chemical reaction in the inflators momentarily fills the air bags with non toxic gas to help restrain the forward motion of the occupants When the airbags inflate they produce a fairly loud noise and release some smoke and residue along with non toxic gas This does not indicate a fire This gas is nor mally harmless however for those who have delicate...

Страница 42: ...hen deploy during the collision To obtain maxi mum protection in an accident the driver and all passengers in the ve hicle must wear their seat belts Wearing a seat belt during an acci dent reduces the chances of death or serious injuries or being thrown out of the vehicle For instructions and precautions concerning the seat belt system see Seat belts in this chapter Improperly seated and or restr...

Страница 43: ...tch in the ON position In the event of an acci dent the force of the rapid inflation of the passenger airbag can cause death or serious injury to the child A forward facing child restraint sys tem which belongs to a passenger risk group should never be put on the right front seat with the passen ger airbag manual on off switch in the ON position because the force of a deploying airbag could cause ...

Страница 44: ...force the child may be killed or seriously injured Do not hold a child on your lap or in your arms Use a child restraint system in the rear seat For instruc tions concerning the installation of a child restraint system see Child restraint in this chapter Do not put objects or your pets on or in front of the dashboard or steering wheel pad that houses the airbag system They might restrict inflation...

Страница 45: ...lation of electronic items such as a mobile two way radio cassette tape player or compact disc player Modification of the suspension sys tem Modification of the front end struc ture Attachment of a grille guard bull bar kangaroo bar etc snowplow winches or any other equipment to the front end Repairs made on or near the front fenders front end structure con sole steering column steering wheel or d...

Страница 46: ...is chapter Operate on off switch as follows Insert key into the keyhole and turn it To turn passenger airbag on Turn the key clockwise to the ON position To turn passenger airbag off Turn the key counterclockwise to the OFF position The indicator comes on when the passen ger airbag system is off CAUTION Make sure that the indicator light is off Do not turn off the passenger air bag manual on off s...

Страница 47: ...t system which conforms to the size of the child ACCESS CAB MODELS Toyota strongly urges use of a proper child restraint system which conforms to the size of the child and is put on the rear seat Accord ing to accident statistics the child is safer when properly restrained in the rear seat than in the front seat Never put infant or child age 1 to 12 in a passenger risk group on the right front sea...

Страница 48: ...senger risk group on the right front seat with the passenger airbag manual on off switch in the ON position In the event of an accident the force of the rapid inflation of the passenger airbag can cause death or serious injury to the child If you must put infant or child age 1 to 12 in a passenger risk group on the right front seat make sure the passenger airbag manual on off switch is in the OFF ...

Страница 49: ...owing 3 types depending on the child s age and size A Infant seat B Convertible seat C Booster seat Install the child restraint system following the instructions provided by its manufac turer A Infant seat B Convertible seat C Booster seat Types of child restraint system ...

Страница 50: ...other posi tion Split bench seat Adjust the passenger s seat forward and rearward travel as well as seatback posi tion so that the child restraint system is securely restrained CAUTION Ignoring the above instructions may result in a serious injury in case of an accident CAUTION Never put a rear facing child restraint system on the front seat with the passenger airbag manual on off switch in the ON...

Страница 51: ...straint system on the front seat make sure the passenger airbag manual on off switch is in the OFF position and that the indicator light is on CAUTION Do not put a rear facing child re straint system on the rear seat if the child restraint system interferes with the front seat lock mechanism or with your proper driving posi tion This can cause severe injury to the child and front passenger in case...

Страница 52: ...ed and that the lap belt is not twisted Do not insert coins clips etc in the buckle as this may prevent you from properly latching the tab and buckle If the seat belt does not function normally it cannot protect your child from injury Contact your Toyota dealer immediately Do not use the seat until the seat belt is fixed 2 While pressing the infant seat firmly against the seat cushion and seatback...

Страница 53: ...manufac turer 3 To remove the infant seat press the buckle release button B CONVERTIBLE SEAT INSTALLATION A convertible seat is used in forward facing and rear facing position depend ing on the child s age and size When installing follow the manufacturer s instructions about the applicable child s age and size as well as directions for installing a child restraint system ...

Страница 54: ...ined CAUTION Ignoring the above instructions may result in a serious injury in case of an accident CAUTION Rear facing child restraint system Never put a rear facing child restraint system on the front seat with the passenger airbag manual on off switch in the ON position In the event of an accident the force of the rapid inflation of the passenger air bag can cause death or serious injury to the ...

Страница 55: ...ag manu al on off switch in the ON position because the force of a deploying air bag could cause death or serious in jury to the child in forward seating position CAUTION Do not put a rear facing child re straint system on the rear seat if the child restraint system interferes with the front seat lock mechanism or with your proper driving posi tion This can cause severe injury to the child and fro...

Страница 56: ...and that the lap belt is not twisted Do not insert coins clips etc in the buckle as this may prevent you from properly latching the tab and buckle If the seat belt does not function normally it cannot protect your child from injury Contact your Toyota dealer immediately Do not use the seat until the seat belt is fixed 2 While pressing the convertible seat firmly against the seat cushion and seatba...

Страница 57: ...ctions to be sure it is secure Follow all the installation instructions provided by its manufac turer 3 To remove the convertible seat press the buckle release button A INFANT SEAT INSTALLATION An infant seat is used in rear facing position only Installation with 3 point type seat belt ...

Страница 58: ...u put a rear facing child re straint system which belongs to a pas senger risk group on the right front seat turn the passenger airbag manual on off switch counterclockwise to the OFF position For details see SRS driver and front passenger airbags in this chapter The indicator comes on when the system is off CAUTION If you must put a rear facing child restraint system on the right front seat make ...

Страница 59: ...oulder belt through or around the infant seat following the instructions provided by its manufactur er and insert the tab into the buckle taking care not to twist the belt Keep the lap portion of the belt tight CAUTION After inserting the tab make sure the tab and buckle are locked and that the lap and shoulder portions of the belt are not twisted Do not insert coins clips etc in the buckle as thi...

Страница 60: ...he belt is in the lock mode before letting the belt retract 3 While pressing the infant seat firmly against the seat cushion and seatback let the shoulder belt retract as far as it will go to hold the infant seat secure ly CAUTION Push and pull the child restraint sys tem in different directions to be sure it is secure Follow all the installation instructions provided by its manufac turer ...

Страница 61: ...n depend ing on the child s age and size When installing follow the manufacturer s instruction about the applicable child s age and size as well as directions for installing a child restraint system CAUTION Rear facing child restraint system Never put a rear facing child restraint system on the right front seat with the passenger airbag manual on off switch in the ON position In the event of an ac...

Страница 62: ...d restraint system on the right front seat make sure the passenger airbag manual on off switch is in the OFF position and that the indicator light is on CAUTION Forward facing child restraint system A forward facing child restraint sys tem which belongs to a passenger risk group should never be put on the right front seat with the passen ger airbag manual on off switch in the ON position because t...

Страница 63: ...lder belt through or around the convertible seat following the instructions provided by its manufacturer and insert the tab into the buckle taking care not to twist the belt Keep the lap portion of the belt tight CAUTION After inserting the tab make sure the tab and buckle are locked and that the lap and shoulder portions of the belt are not twisted Do not insert coins clips etc in the buckle as t...

Страница 64: ...lt is in the lock mode before letting the belt retract 3 While pressing the convertible seat firmly against the seat cushion and seatback let the shoulder belt retract as far as it will go to hold the convert ible seat securely CAUTION Push and pull the child restraint sys tem in different directions to be sure it is secure Follow all the installation instructions provided by its manufac turer ...

Страница 65: ... A booster seat is used in forward fac ing position only CAUTION A forward facing child restraint sys tem which belongs to a passenger risk group should never be put on the right front seat with the passen ger airbag manual on off switch in the ON position because the force of a deploying airbag could cause death or serious injury to the child in forward seating position For details see SRS driver...

Страница 66: ... to do so could reduce the amount of protection in an accident and cause serious injuries in a col lision High positioned lap belts and loose fitting belts both could cause serious injuries due to sliding un der the lap belt during a collision or other unintended result Keep the lap belt positioned as low on hips as possible For child s safety do not place the shoulder belt under child s arm After...

Страница 67: ...nt system press the buckle release button and al low the belt to retract Follow the procedure below for a child restraint system that requires the use of a top strap Anchor bracket U S A Anchor brackets Canada Using a top strap standard cab models ...

Страница 68: ...he anchor bracket on the back panel to attach the top strap TO USE THE ANCHOR BRACKET 1 Remove the passenger head re straint 2 Lightly push down on the top sur face of the anchor bracket cover then pull it forward to remove ...

Страница 69: ...is chapter CAUTION Make sure the top strap is securely latched and check that the child re straint system is secure by pushing and pulling it in different directions 4 Replace the passenger head re straint Store any removed covers in a safe place such as the glove box Be sure to replace all covers when the anchor bracket is not in use Outside position Center position Canada only Using a top strap ...

Страница 70: ...hild restraint system that requires the use of a top strap Anchor brackets Routing devices U S A Anchor brackets Routing devices Canada Use the routing device on the rear of the seat back and the anchor bracket on the side floor to attach the top strap ...

Страница 71: ...top strap is not twisted 3 Fix the child restraint system with the seat belt Latch the hook onto the anchor bracket on the side floor and tighten the top strap For instructions to install the child re straint system see Child restraint in this chapter CAUTION Make sure the top strap is securely latched and check that the child re straint system is secure by pushing and pulling it in different dire...

Страница 72: ...lcro that attaches the anchor bracket cover and lift the cover 2 Route the top strap through the slot on top of the seat pass the strap through the seat then latch the hook onto the anchor bracket Close the cover so that the hook does not come off the anchor brack et and return the cup holder to the original position ...

Страница 73: ... it in different directions Tilt steering wheel To change the steering wheel angle hold the steering wheel pull the lock release lever toward you tilt the steer ing wheel to the desired angle and re lease the lever When the steering wheel is in a low posi tion it will spring up as you release the lock release lever CAUTION Do not adjust the steering wheel while the vehicle is moving After adjustin...

Страница 74: ...will look smaller and farther away than when seen in a flat mirror CAUTION Do not adjust the mirror while the vehicle is moving It may cause the driver to mishandle the vehicle and an accident may occur resulting in personal injuries To adjust a mirror use the switches 1 Master switch To select the mirror to be adjusted Place the switch at L left or R right 2 Control switch To move the mirror Push...

Страница 75: ... driver and pas senger side rear view mirrors must be extended and properly adjusted before driving Adjust the mirror so that you can just see the rear of your vehicle in the mir ror To reduce glare from the headlights of the vehicle behind you during night driving operate the lever on the lower edge of the mirror Daylight driving Lever at position 1 The reflection in the mirror has greater clarit...

Страница 76: ... out glare from the side Swing down the sun visor remove it from the hook and swing it to the lateral side posi tion 2 If glare comes from obliquely behind you extend the plate at the end of the visor to position 3 To block the glare from the front when the main sun visor is swung to the lateral side position 2 swing down the sub vi sor CAUTION Do not extend the plate at the end of the sun visor w...

Страница 77: ...TUNDRA 34413U 75 Vanity mirrors with light To use the vanity mirrors swing down the sun visor and open the cover The vanity light comes on when you open the cover ...

Страница 78: ...TUNDRA 34413U 76 ...

Страница 79: ...ned with the ignition turned off To turn them on again turn the key to the ON position or actuate the headlight switch If you are going to park for over one week make sure the head light switch is off NOTICE To prevent the battery from being dis charged do not leave the lights on for a long period when the engine is not running Daytime running light system on some models The headlights turn on at ...

Страница 80: ...ey must be in the ON position The lever automatically returns after you make a turn but you may have to return it by hand after you change lanes To signal a lane change move the lever up or down to the pressure point position 2 and hold it If the turn signal indicator lights green lights on the instrument panel flash faster than normal a front or rear turn signal bulb is burned out Emergency flash...

Страница 81: ...e switch on longer than necessary when the en gine is not running Instrument panel light control To adjust the brightness of the instru ment panel lights turn the knob Front fog lights To turn on the front fog lights push the switch They will come on when the headlights are on low beam ...

Страница 82: ... operate separately To turn on the light push the lens on your side To turn the light off push the lens once again The personal light switch has the following positions OFF Turns the lights off DOOR Turns the lights on when any of the doors are opened Ignition switch and step lights For easy access to the ignition switch the ignition switch light comes on when the driver s door is opened The step ...

Страница 83: ...n for about 20 seconds and then goes off When the ignition switch is in the ON position The lamp will turn off immedi ately Push the CARGO LAMP switch MANUAL OPERATION To turn on Stop the vehicle and push the CARGO LAMP switch The indicator light on the CARGO LAMP switch will illuminate to indicate the lamp is on When the ignition switch is in the ACC or LOCK position The lamp will auto matically ...

Страница 84: ...n adding washer fluid see Adding washer fluid in Chapter 7 3 In freezing weather warm the windshield with the defroster before using the washer This will help prevent the washer fluid from freezing on your windshield which can block your vision NOTICE Do not operate the wipers if the wind shield is dry It may scratch the glass To turn on the windshield wipers move the lever to the desired setting ...

Страница 85: ... the windshield with the defroster before using the washer This will help prevent the washer fluid from freezing on your windshield which can block your vision NOTICE Do not operate the wipers if the wind shield is dry It may scratch the glass ...

Страница 86: ...TUNDRA 34413U 84 ...

Страница 87: ...a good idea to keep the tank over 1 4 full This fuel gauge has a non return type needle which remains at the last indicated position when the ignition switch is turned off If the fuel level approaches E or the low fuel level warning light comes on fill the fuel tank as soon as possible On inclines or curves due to the move ment of fuel in the tank the fuel gauge needle may fluctuate or the low fue...

Страница 88: ...g severe operating conditions such as Driving up a long hill on a hot day Reducing speed or stopping after high speed driving Idling for a long period with the air conditioning on in stop and go traffic Towing a trailer NOTICE Do not remove the thermostat in the engine cooling system as this may cause the engine to overheat The thermostat is designed to con trol the flow of coolant to keep the tem...

Страница 89: ...el is too low The oil pressure gauge is not designed to indicate oil level and the oil level must be checked using the level dipstick NOTICE Do not drive the vehicle with the oil pressure below the normal range until the cause is fixed it may ruin the engine Voltmeter The voltmeter tells whether the battery is charged or discharged Check it while the engine is running the needle should always indi...

Страница 90: ... has been driven 2 Two trip meters They show two differ ent distances independently driven since the last time each trip meter was set to zero You can use one trip meter to calculate the fuel economy and the other to measure the distance on each trip All trip meter data is cancelled if the elec trical power source is disconnected 3 Trip meter reset knob It can reset the two trip meters to zero and...

Страница 91: ...ke vehicle to Toyota dealer Do this type B type A If the indicator or buzzer comes on g Fill up tank i Close all doors f Take vehicle to Toyota dealer e Stop and check n Remove key Key reminder buzzer Do this If the indicator or buzzer comes on l Stop and check m Add washer fluid o Shift the transfer mode again correctly Four wheel drive system warning buzzer k Shift front drive control lever out ...

Страница 92: ...s Seat Belt Reminder Light and Buzzer This light and buzzer remind you to buckle up the driver s seat belt Once the ignition key is turned to ON or START the reminder light flashes and buzzer sounds if the driver s seat belt is not fastened Unless the driver fastens the belt the light keeps flashing and the buzzer stops after about 4 to 8 seconds c Front Passenger s Seat Belt Re minder Light This ...

Страница 93: ...structions c There is a problem somewhere in your engine or automatic transmission electrical system If it comes on while you are driving in case c have your vehicle checked re paired by your Toyota dealer as soon as possible g Low Fuel Level Warning Light This light comes on when the fuel level in the tank becomes nearly empty Fill up the tank as soon as possible On inclines or curves due to the ...

Страница 94: ...heels will not lock CAUTION To restore the park function shift the front drive control lever out of N or the vehicle can move l Automatic Transmission Fluid Tem perature Warning Light This light warns that the automatic trans mission fluid temperature is too high If this light comes on while you are driv ing slow down and pull off the road Stop the vehicle at a safe place and put the selector leve...

Страница 95: ...ion key to ACC The SRS warning light should come on It goes off after about 6 seconds 5 Turn the ignition key to ON but do not start the engine All the service reminder indicators ex cept the open door warning light and SRS warning light should come on The ABS warning light goes off after a few seconds If any service reminder indicator or warn ing buzzer does not function as described above either...

Страница 96: ...TUNDRA 34413U 94 ...

Страница 97: ...o remove the key LOCK Engine is off and the steering wheel is locked The key can be re moved only at this position You must push in the key to turn the key from ACC to the LOCK position On vehicles with an automatic transmission the selector lever must be in the P posi tion before pushing the key When starting the engine the key may seem stuck at the LOCK position To free it first be sure the key ...

Страница 98: ... braking than that in 2 position Shift normally Overdrive switch For selecting either a three speed or four speed transmission OFF position Shifting into overdrive not possible ON position Shifting into overdrive possible O D OFF indicator light Shows the overdrive switch is in OFF position Vehicles with cruise control When the cruise control is being used even if you downshift the transmission by...

Страница 99: ...starting b Using engine braking To use engine braking you can downshift the transmission as follows Turn off the overdrive switch The O D OFF indicator light will come on and the transmission will downshift to the third gear Shift into the 2 position The trans mission will downshift to the second gear when the vehicle speed drops down to or lower than the following speed and more powerful engine b...

Страница 100: ...areful not to overrev the en gine Watch the tachometer to keep engine rpm from going into the red zone The approximate maximum al lowable speed for each position is given below for your reference Two wheel drive models 5VZ FE engine 2 115 km h 71 mph L 60 km h 37 mph 2UZ FE engine 2 120 km h 75 mph L 65 km h 40 mph Four wheel drive models 5VZ FE engine Front control lever in H2 or H4 2 110 km h 68...

Страница 101: ...CAUTION Always keep your foot on the brake pedal while stopped with the engine running This prevents the vehicle from creeping NOTICE Do not hold the vehicle on an up grade with the accelerator pedal It can cause the transmission to over heat Always use the brake pedal or parking brake g Rocking your vehicle if stuck CAUTION If your vehicle becomes stuck in snow mud sand etc then you may attempt t...

Страница 102: ...the parking brake Recommended shifting speeds The transmission is fully synchronized and upshifting or downshifting is easy For the best compromise between fuel economy and vehicle performance you should upshift or downshift at the following speeds gear km h mph 1 to 2 or 2 to 1 24 15 2 to 3 or 3 to 2 40 25 3 to 4 or 4 to 3 64 40 4 to 5 or 5 to 4 72 45 Downshift to the appropriate gear if accel er...

Страница 103: ...dal momentarily and then try again When towing a trailer in order to main tain engine braking efficiency do not use the fifth gear CAUTION Be careful when downshifting on a slippery surface Abrupt shifting could cause the vehicle to spin or skid NOTICE Make sure the vehicle is completely stopped before shifting into reverse Use the front drive control lever to se lect the following transfer modes ...

Страница 104: ...ons left out Use this for normal driving on dry hard surfaced roads This position gives greater economy the quietest ride and least wear 2 4HI high speed position four wheel drive 2WD 4HI button pushed in The 4HI high speed four wheel drive indicator light comes on when the 4HI mode is selected Use this for normal driving on wet icy or snow covered roads This position provides greater traction tha...

Страница 105: ...e B The A D D can be engaged or disen gaged by the shifting operations de scribed in c Shifting procedure You should drive in four wheel drive for at least 16 km 10 miles each month This will assure that the front drive com ponents are lubricated b A D D automatic disconnecting differential ...

Страница 106: ...ess the clutch pedal and move the front drive con trol lever To shift from L4 to H4 depress the clutch pedal and move the front drive con trol lever This can be done at any speed SHIFTING BETWEEN H2 AND H4 To shift from H2 to H4 reduce the vehicle speed to less than 80 km h 50 mph and move the front drive control lever If you have trouble shifting in cold weath er reduce the vehicle speed or stop ...

Страница 107: ...2WD mode this reminds you that the transfer mode is not securely in 2WD mode Drive straight ahead while accelerating or decelerating or drive forward or backward in a short distance SHIFTING BETWEEN 4HI AND 4LO To shift from 4HI to 4LO stop the vehicle and put the transmission into N With the brake pedal depressed push the 4LO button If the 2WD 4HI button left out push in the 2WD 4HI button to se ...

Страница 108: ...ehicle and put the transmission into N With the brake pedal depressed push the 2WD 4HI switch again to turn it off If the 4LO low speed four wheel drive indicator light flashes and the buzzer sounds when you push the 2WD 4HI but ton this reminds you that the transfer mode is not in 2WD mode Push the 2WD 4HI button in to return to 4LO mode drive forward or backward in a short distance then stop the...

Страница 109: ...ff the accelerator pedal Your cruising speed can be maintained up or down grades within the limits of engine performance although a slight speed change may occur when driving up or down the grades On steeper hills a greater speed change will occur so it is better to drive without the cruise control CAUTION To help maintain maximum control of your vehicle do not use the cruise control when driving ...

Страница 110: ... a Pulling the lever in the CANCEL direction and releasing it b Depressing the brake pedal c Depressing the clutch pedal manual transmission If the vehicle speed falls below about 40 km h 25 mph the preset speed will auto matically cancel out If the vehicle speed drops 16 km h 10 mph below the preset speed the preset speed will also automatically cancel out If the preset speed automatically cancel...

Страница 111: ...hes when using the cruise control press the CRUISE ON OFF button to turn the system off and then press it again to turn it on If any of the following conditions then oc curs there is some trouble in the cruise control system The indicator light does not come on The indicator light flashes again The indicator light goes out after it comes on If this is the case contact your Toyota dealer and have y...

Страница 112: ...TUNDRA 34413U 110 Never use the switch for normal engine starting Be sure to follow the starting procedure instructed in How to start the engine in Part 3 ...

Страница 113: ...g your audio system controls and features Car audio system operating hints Type 1 AM FM ETR radio cassette com pact disc auto changer controller Type 2 AM FM ETR radio cassette player compact disc auto changer controller Type 3 AM FM ETR radio cassette player compact disc player compact disc auto changer controller Car audio system Reference ...

Страница 114: ...f when you eject the cassette tape or com pact disc If another function was pre viously playing it will come on again SWITCHING BETWEEN FUNCTIONS Push AM FM1 2 TAPE CD or AUX if the system is already on but you want to switch from one function to anoth er TONE AND BALANCE For details about your system s tone and balance controls see the description of your own system Tone How good an audio program...

Страница 115: ... into the slot or the tape player may be damaged YOUR COMPACT DISC PLAYER When you insert a disc gently push it in with the label side up The player will automatically eject a disc if the label side is down The compact disc player will play from track 1 through the end of the disc Then it will play from track 1 again On models with the compact disc auto changer next disc will be played from track ...

Страница 116: ...TUNDRA 34413U 114 Details of specific buttons controls and features are described in the alphabetical listing that follows Using your audio system controls and features Type 1 ...

Страница 117: ... will appear on the display To stop the tape while it is fast forward ing push the fast forward button or TAPE to stop the tape while it is re winding push the reverse button or TAPE If a tape side rewinds completely the cas sette player will stop and then play that same side If a tape fast forwards com pletely the cassette player will play the other side of the tape using the auto re verse featur...

Страница 118: ...m changes to the automatic changer If the player malfunctions your audio sys tem will display one of the six following error messages If WAIT appears on the display it indi cates that the inside of the player unit may be too hot due to the very high ambi ent temperature Remove the disc or mag azine from the player and allow the player to cool down If Err 1 appears on the display it indicates the d...

Страница 119: ... the magazine Push and hold RAND until you hear a beep RAND will appear on the dis play and the player will perform all the tracks on all the discs in the magazine in random order To turn off the random fea ture push RAND again RPT Repeat Cassette Player Push RPT while the track is playing RPT will appear on the display When the track ends it will automatically be rewound and replayed This process...

Страница 120: ...e discs in the magazine Push SCAN until you hear a beep SCAN will appear on the display and the player will perform the first track of the next disc To select a disc push the SCAN again If the player has scanned all the discs it will stop scan ning SEEK Seeking Radio In the seek mode the radio finds and plays the next station up or down the station band To seek a station quickly push and re lease ...

Страница 121: ... weak the radio reduces the amount of channel separation to prev ent the weak signal from creating noise If the signal becomes extremely weak the radio switches from stereo to mono recep tion TRACK Track up down button Compact disc player By using this button you can skip up or down to a different track Push either side of the track button until the number of the track you want to listen to appear...

Страница 122: ...TUNDRA 34413U 120 Details of specific buttons controls and features are described in the alphabetical listing that follows Type 2 ...

Страница 123: ...ette was playing or fast forwarding Reverse Fast forward buttons Cassette Player Push the fast forward button to fast for ward a cassette tape FF will appear on the display Push the reverse button to rewind a tape REW will appear on the display To stop the tape while it is fast forward ing push the fast forward button or TAPE to stop the tape while it is re winding push the reverse button or TAPE ...

Страница 124: ...wing error messages If WAIT appears on the display it indi cates that the inside of the player unit may be too hot due to the very high ambi ent temperature Remove the disc or mag azine from the player and allow the player to cool down If Err 1 appears on the display it indicates the disc is dirty damaged or it was inserted up side down Clean the disc or insert it correctly If Err 2 appears on the...

Страница 125: ... the magazine Push and hold RAND until you hear a beep RAND will appear on the dis play and the player will perform all the tracks on all the discs in the magazine in random order To turn off the random fea ture push RAND again RPT Repeat Cassette Player Push RPT while the track is playing RPT will appear on the display When the track ends it will automatically be rewound and replayed This process...

Страница 126: ...e discs in the magazine Push SCAN until you hear a beep SCAN will appear on the display and the player will perform the first track of the next disc To select a disc push the SCAN again If the player has scanned all the discs it will stop scan ning SEEK Seeking Radio In the seek mode the radio finds and plays the next station up or down the station band To seek a station quickly push and re lease ...

Страница 127: ...ignal becomes extremely weak the radio switches from stereo to mono recep tion TAPE Push TAPE to switch from radio or com pact disc operation to cassette operation If the audio system is off you can turn on the cassette player by pushing TAPE In both cases a cassette must already be loaded in the player TRACK Track up down button Compact disc player By using this button you can skip up or down to ...

Страница 128: ...TUNDRA 34413U 126 Details of specific buttons controls and features are described in the alphabetical listing that follows Type 3 ...

Страница 129: ...eature After the cassette player reaches the end of a tape side it automatically reverses and begins to play the other side This is true whether the cassette was playing or fast forwarding Reverse Fast forward buttons Cassette Player Push the fast forward button to fast for ward a cassette tape FF will appear on the display Push the reverse button to rewind a tape REW will appear on the display To...

Страница 130: ...e The display will show the range from BAL L7 to BAL R7 CD Compact Disc Push CD to switch from radio or cas sette operation to compact disc operation If the audio system is off you can turn on the compact disc player by pushing CD In both cases a disc must already be loaded in the player When the audio is set into compact disc operation the display shows the track or track and disc number currentl...

Страница 131: ...ion to radio operation PWR VOL Power and Volume Push PWR VOL to turn the audio system on and off Turn PWR VOL to adjust the volume RAND Random There are two random features you can either listen to the tracks on all the com pact discs in the magazine in random or der or only listen to the tracks on a specific compact disc in random order Random playing for the tracks on a disc Quickly push and rel...

Страница 132: ... the band stay there for 5 seconds and then move to the next pre set station To select a station push SCAN again To scan all the frequencies Quickly push and release SCAN If you hear a beep you held the button too long and the radio will scan the preset sta tions The radio will find the next station up the station band stay there for 5 se conds and then scan again To select a station push SCAN aga...

Страница 133: ...laying the same side After the end of the tape is reached the player will automatically reverse sides and start playing the other side There must be at least 3 seconds of blank space between tracks for the track button to work correctly In addition the feature may not work well with some spoken word live or classical recordings ST Stereo reception display Your radio automatically changes to stereo...

Страница 134: ...TUNDRA 34413U 132 Details of specific buttons controls and features are described in the alphabetical listing that follows Type 4 ...

Страница 135: ...r side of the DISC button until the number of the disc you want to eject is displayed 2 Push and release the compact disc eject button To eject all the discs loaded in the chang er Push and hold the compact disc eject button until you hear a beep when the audio system is on The last compact disc played before pushing the button will be ejected first If a disc is left in the slot for a long time th...

Страница 136: ...the knob to suit your preference The display will show the range from MId 5 to MId 5 For high pitch tone adjustment push CONTROL MODE repeatedly until TRE appears on the display Then turn the knob to suit your preference The display will show the range from TRE 5 to TRE 5 Sound balance adjustment function This knob is also used to adjust the sound balance between the front and rear and the right a...

Страница 137: ...mode reduces tape noise by about 10 dB For best sound reproduc tion play your tapes with this button on or off according to the mode used for recording the tape Dolby noise reduction manufactured under license from Dolby Laboratories Licensing Corporation DOLBY and the double D symbol are trademarks of Dolby Laboratories Licensing Corporation FM1 2 Push FM1 2 to turn on the radio and select the FM...

Страница 138: ...random order If you hear a beep you held the button too long and the player will play all the tracks in the magazine in random order To turn off the random feature push this button again Random playing for all the tracks in the magazine Push and hold until you hear a beep will appear on the dis play and the player will perform all the tracks on all the discs in the magazine in random order To turn...

Страница 139: ...re two scan features you can ei ther scan the tracks on a specific disc or scan the first tracks of all the discs in the magazine Scanning the tracks on a disc Quickly push and release SCAN SCAN will appear on the display and the player will scan all the tracks on the disc you are listening to If you hear a beep you held the button too long and the player will scan the first track of all the discs...

Страница 140: ...rack button to work correctly In addition the feature may not work well with some spoken word live or classical recordings ST Stereo reception display Your radio automatically changes to stereo reception when a stereo broadcast is re ceived ST appears on the display If the signal becomes weak the radio reduces the amount of channel separation to prev ent the weak signal from creating noise If the ...

Страница 141: ...TUNDRA 34413U 139 Details of specific buttons controls and features are described in the alphabetical listing that follows Type 5 ...

Страница 142: ...rse radio signals have a limited range and the farther you are from a station the weaker its signal will be In addition reception conditions change constantly as your vehicle moves Here are some common reception prob lems that probably do not indicate a prob lem with your radio FM Fading and drifting stations Generally the effective range of FM is about 40 km 25 miles Once outside this range you m...

Страница 143: ...s The easiest way to clean them is by using a cleaning tape A wet type is recommended Use high quality cassettes Low quality cassette tapes can cause many problems including poor sound inconsistent playing speed and constant auto reversing They can also get stuck or tangled in the cassette player Do not use a cassette if it has been damaged or tangled or if its label is peeling off Do not leave a ...

Страница 144: ...ve the disc from the player and wait until it dries Your automatic changer or compact disc player cannot play special shaped compact discs as shown Do not use them as the changer or player could be damaged Your automatic changer or compact disc player cannot play low quality compact discs as shown Do not use them as the changer or player could be damaged ...

Страница 145: ...t disc player when you are not listening to them Store them in their plastic cases away from moisture heat and direct sunlight To clean a compact disc Wipe it with a soft lint free cloth that has been damp ened with water Wipe in a straight line from the center to the edge of the disc not in circles Dry it with another soft lint free cloth Do not use a conventional record cleaner or anti static de...

Страница 146: ...TUNDRA 34413U 144 ...

Страница 147: ...TUNDRA 34413U 145 Part 1 OPERATION OF INSTRUMENTS AND CONTROLS Chapter 1 8 Air conditioning system Controls Air flow selector settings Operating tips Instrument panel vents ...

Страница 148: ...TUNDRA 34413U 146 1 Fan Speed Selector 2 Temperature Selector 3 Air Flow Selector 4 A C Button on some models 5 Air Intake Selector Air conditioning system Controls ...

Страница 149: ...tton Vehicles with A C button Turning the air flow selector to windshield position turns on the defroster to clear the front view more quickly Air intake selector The air intake selector button is used to switch the air intake FRESH mode that draws outside air into the system and RE CIRCULATED mode that recirculates the air inside vehicle To turn the air source to RECIRCULATED mode press the butto...

Страница 150: ...4413U 148 If the A C button indicator flashes there is a problem in the air conditioning system and the air conditioning automatically shuts off If this happens take your ve hicle to a Toyota dealer for service ...

Страница 151: ...The windshield could fog up because of the difference in air temperature on the inside and outside of the windshield Keep the area under the front seats clear to allow air to circulate through out the vehicle On cold days move the fan speed to HI for a minute to help clear the in take ducts of snow or moisture This can reduce the amount of fogging on the windows When driving on dusty roads close a...

Страница 152: ...et controls to Fan speed Any setting except OFF Temperature Towards COLD blue zone Air intake FRESH outside air Air flow PANEL Air conditioning ON For quick cooling move the air intake selector to recirculate for a few min utes Ventilation For best results set controls to Fan speed Any setting except OFF Temperature Towards COLD blue zone Air intake FRESH outside air Air flow PANEL Air conditionin...

Страница 153: ... turns on the defroste to clear the front view more quickly Vehicles with A C button Press the A C button for dehumidified heating or cooling This setting clears the front view more quickly To heat the vehicle interior while de frosting the windshield choose floor windshield air flow Instrument panel vents Side vents Lower vent If air flow control is not satisfactory check the instrument panel ven...

Страница 154: ...TUNDRA 34413U 152 ...

Страница 155: ...ton If the electrical power source has been disconnected from the clock the time dis play will automatically be set to 1 00 one o clock When the instrument panel lights are turned on the brightness of the time in dication will be reduced Cigarette lighter and ashtray CIGARETTE LIGHTER To use the cigarette lighter press it in When it becomes heated it automatical ly pops out ready for use If the en...

Страница 156: ...after using Power outlets The power outlets are designed for power supply for car accessories The key must be in the ACC or ON position for the power outlets to be used NOTICE To prevent the fuse from being blown do not use the electricity over the total vehicle capacity of 12V 120W To prevent the battery from being discharged do not use the power outlets longer than necessary when the engine is n...

Страница 157: ... reduce the chance of injury in case of an accident or a sudden stop always keep the glove box door closed while driving Garage door opener box The box is designed to store a garage door opener transmitter Open the cover and remove the Velcro square Remove the paper strip covering the adhe sive on back side of square and adhere the square to back side of the transmitter near the center ...

Страница 158: ...dhesion of the Velcro Place the transmitter with Velcro square facing inside of box into the box Make sure the transmitter button is located above button pins Remove spacers from the center panel Place the largest spacer on the pin that would be below transmitter button when the cover is closed Close the cover ...

Страница 159: ... on the cor rect pin Attach another spacer to the top of original spacer Check operation If re quired continue to add spacers until contact is achieved If the transmitter is clattering during driv ing fill in a piece of felt or pad to prevent the transmitter from clattering CAUTION To reduce the chance of injury in case of an accident or a sudden stop always keep the garage door opener box closed ...

Страница 160: ... smoothly Auxiliary boxes To use the auxiliary boxes open the lids as shown in the following illustra tions CAUTION To reduce the chance of injury in case of an accident or a sudden stop always keep the auxiliary box closed while driving Type A only As this holder is de signed for holding a light object such as an eyeglass do not place any heavy objects in it Heavy ob jects may cause the holder to...

Страница 161: ... only when the armrest is down Type B auxiliary box is equipped with a coin holder and cassette tape holder 1 Coin holder To use it push coins down into the holder The coin hold er is detachable 2 Cassette tape holder The plate for the cassette tape holder is detach able ...

Страница 162: ...and cassette tape com pact disc holder 1 Coin holder To use it push coins down into the holder 2 Cassette tape compact disc holder To use it remove the upper tray The plates for the cassette tape com pact disc are detachable Type D under the rear seat only when the bottom cushion is up ...

Страница 163: ...he vehicle during sudden braking or in an accident To reduce the chance of injury in case of an accident or a sudden stop while driving keep the cup holder closed when it is not in use NOTICE Type A only As this holder is de signed for holding soft cups only do not place too heavy a cup drink can or bottle in it Type A instrument panel To fold down the armrest with the cup holder To return the arm...

Страница 164: ...TUNDRA 34413U 162 Type C console Type C cup holders are equipped with a detachable adapter for each holder When you have removed the adapter a bigger cup can be held in the holder Type D rear seat ...

Страница 165: ... hole then it is designed for use with a locking clip Fix the floor mat with locking clip into the hole in the floor carpet CAUTION Make sure the floor mat is properly placed on the floor carpet If the floor mat slips and interferes with the movement of the pedals during driv ing it may cause an accident ...

Страница 166: ...TUNDRA 34413U 164 ...

Страница 167: ...s one of the class of ve hicles which have higher ground clear ance and narrower tread in relation to the height of their center of gravity to make them capable of performing in a wide variety of off road applications Specific design characteristics give it a higher center of gravity than ordinary cars An advantage of the higher ground clearance is a better view of the road allowing you to anticip...

Страница 168: ... or any similar off road ve hicle can tip over sideways much more easily than forward or back ward When driving off road or in rugged terrain do not drive at excessive speeds jump the vehicle or strike objects etc This may cause loss of control or vehicle rollover You are also risking expensive damage to your vehicle s suspension and chas sis Break in period Drive gently and avoid high speeds Your...

Страница 169: ... you hear steady knocking while holding a steady speed on level roads consult your Toyota dealer However now and then you may notice light knocking for a short time while accel erating or driving up hills This is no need of concern GASOLINES CONTAINING DETERGENT ADDITIVES Toyota recommends use of gasolines that contain detergent additives to avoid build up of engine deposits For further details as...

Страница 170: ...metha nol with cosolvents and corrosion inhibi tors for methanol GASOLINES QUALITY In a very few cases you may experience driveability problems caused by the partic ular gasoline that you are using If you continue to have unacceptable driveability try changing gasoline brands If that does not rectify your problem then consult your Toyota dealer NOTICE Do not use gasohol other than stated above It ...

Страница 171: ...device installed in the exhaust system The purpose is to reduce pollutants in the exhaust gas CAUTION Keep people and combustible mate rials away from the exhaust pipe while the engine is running The exhaust gas is very hot Do not drive idle or park your ve hicle over anything that might burn easily such as grass leaves paper or rags ...

Страница 172: ...r knows your vehicle and its three way catalytic converter sys tem best To ensure that the three way cata lytic converter and the entire emis sion control system operate proper ly your vehicle must receive the periodic inspections required by the Toyota Maintenance Schedule For scheduled maintenance information refer to the separate Scheduled Maintenance Guide or Owner s Manual Supplement Engine e...

Страница 173: ...ylinder wall when a pis ton moves downwards in the cylinder High negative pressure generated when the vehicle is decelerating sucks some of this oil into the combustion chamber This oil as well as some part of the oil film left on the cylinder wall is burned by the high temperature combustion gases during the combustion process Oil is also used to lubricate the stems of the intake valves Some of t...

Страница 174: ... the engine oil level in Chapter 7 2 Your engine is fitted with twin ground electrode spark plugs NOTICE Use only twin ground electrode spark plugs for your engine performance Brake system TANDEM MASTER CYLINDER BRAKE SYSTEM The tandem master cylinder brake system is a hydraulic system with two separate sub systems If either sub system should fail the other will still work However the pedal will b...

Страница 175: ...in action you may feel the brake pedal pulsating and hear a noise In this situation to let the anti lock brake system work for you just hold the brake pedal down more firmly Do not pump the brake in a panic stop Pump ing the brake pedal makes the stopping distance longer The brake pedal pulsation caused by the anti lock brake system may indicate haz ardous road surface conditions Although the anti...

Страница 176: ...ction somewhere in the parts monitored by the warning light system Contact your Toyota dealer as soon as possible to service the vehicle The light does not come on as de scribed above or remains on The light comes on while driving Even if the anti lock brake system should fail the brake system will still operate conventionally However when the ABS warning light is on and the brake system warning l...

Страница 177: ...bal ance For better fuel economy do not carry unneeded weight CAUTION To prevent luggage or packages from sliding forward during braking do not stack anything behind the front seats higher than the seat backs access cab models Keep luggage or packages low as close to the floor as possible Never allow anyone to ride in the rear deck It is not designed for passengers They should ride in their seats ...

Страница 178: ...he vehicle with anyone on the rear step bumper The vehicle identification number VIN is the legal identifier for your vehicle This number is on the left top of the instrument panel and can be seen through the windshield from outside This is the primary identification number for your Toyota It is used in registering the ownership of your vehicle Standard cab models Access cab models Your Toyota s i...

Страница 179: ...TUNDRA 34413U 177 The vehicle identification number VIN is also on the Certification Label Engine number 5VZ FE engine 2UZ FE engine The engine number is stamped on the engine block as shown ...

Страница 180: ... resulting in loss of control Types of tires Determine what kind of tires your ve hicle is originally equipped with 1 Summer tires Summer tires are high speed capability tires best suited to highway driving under dry conditions Since summer tires do not have the same traction performance as snow tires sum mer tires are inadequate for driving on snow covered or icy roads For driving on snow covered...

Страница 181: ...ll season tires on your vehicle as this can cause dangerous handling charac teristics resulting in loss of con trol Do not use tires other than the manufacturer s designated tires and never mix tires or wheels of the sizes different from the originals ...

Страница 182: ...TUNDRA 34413U 180 ...

Страница 183: ...the parking brake firmly 2 Turn off unnecessary lights and acces sories 3 Manual transmission Press the clutch pedal to the floor and shift the trans mission into neutral Hold the clutch pedal to the floor until the engine is started A starter safety device will pre vent the starter from operating if the clutch pedal is not fully depressed Automatic transmission Put the se lector lever in P If you...

Страница 184: ...ce a cold engine If the engine becomes difficult to start or stalls frequently have the engine checked immediately Always slow down in gusty crosswinds This will allow you much better control Drive slowly onto curbs and if pos sible at a right angle Avoid driving onto high sharp edged objects and other road hazards Failure to do so can lead to severe tire damage result ing in tire bursts When park...

Страница 185: ...r steep hill reduce your speed and downshift Remember if you ride the brakes excessively they may overheat and not work properly Be careful when accelerating up shifting downshifting or braking on a slippery surface Sudden accelera tion or engine braking could cause the vehicle to spin or skid Do not drive in excess of the speed limit Even if the legal speed limit permits it do not drive over 140 ...

Страница 186: ...laces Do not grip the steering wheel spokes when driving off road A bad bump could jerk the wheel and injure your hands Keep both hands and especially your thumbs on the outside of the rim Always check your brakes for effec tiveness immediately after driving in sand mud water or snow After driving through tall grass mud rock sand rivers etc check that there is no grass bush paper rags stone sand e...

Страница 187: ...tion for better coolant performance Check the condition of the battery and cables Cold temperatures reduce the capacity of any battery so it must be in top shape to provide enough power for winter start ing Chapter 7 3 tells you how to visually inspect the battery Your Toyota dealer and most service stations will be pleased to check the level of charge Make sure the engine oil viscosity is suitabl...

Страница 188: ...correct equipment and cautious driving habits For your safe ty and the safety of others you must not overload your vehicle or trailer Ask your local Toyota dealer for further details be fore towing We recommend you use a weight distribut ing hitch when towing to keep your ve hicle level with the ground NOTICE When towing a trailer be sure to con sult your Toyota dealer for further in formation on ...

Страница 189: ...nada 5VZ FE engine Two wheel drive models 2199 kg 4850 lb Four wheel drive models 2245 kg 4950 lb 2UZ FE engine Two wheel drive models 3265 kg 7200 lb Four wheel drive models 3220 kg 7100 lb If towing a trailer and cargo weigh ing over 907 kg 2000 lb it is necessary to use a sway control device with sufficient capacity The combination of the gross trailer weight added to the total weight of the ve...

Страница 190: ...rating set by the trailer hitch manufacturer can cause an accident resulting in seri ous personal injuries The gross vehicle weight must not exceed the Gross Vehicle Weight Rating GVWR indicated on the Certification Label The gross ve hicle weight is the sum of weights of the unloaded vehicle driver pas sengers luggage hitch and trailer tongue load It also includes the weight of any special equipm...

Страница 191: ...g 742 lb Automatic transmission SR5 grade 333 kg 735 lb Limited grade 322 kg 712 lb Four wheel drive models Manual transmission 340 kg 750 lb Automatic transmission SR5 grade 336 kg 742 lb Limited grade 329 kg 727 lb 2UZ FE engine Two wheel drive models 489 kg 1080 lb Four wheel drive models SR5 grade 483 kg 1065 lb Limited grade 476 kg 1050 lb Standard cab models for Canada 5VZ FE engine Two whee...

Страница 192: ...b Limited grade 317 kg 700 lb Standard cab models for Canada 5VZ FE engine Two wheel drive models Manual transmission 235 kg 520 lb Automatic transmission 233 kg 515 lb Four wheel drive models Manual transmission 238 kg 525 lb Automatic transmission 235 kg 520 lb Access cab models for Canada 5VZ FE engine Two wheel drive models 219 kg 485 lb Four wheel drive models 224 kg 495 lb 2UZ FE engine Two ...

Страница 193: ...ecommends removing the trail er hitch whenever you are not towing a trailer to reduce the possibility of additional damage caused by the hitch if your vehicle is struck from behind After removing the hitch seal any mounting holes in the vehicle body to prevent entry of pollutants such as ex haust fumes dirt water etc NOTICE Do not use axle mounted hitches as they can cause damage to the axle housi...

Страница 194: ... trailer ball load rating should be printed on the top of the ball 3 When mounted in the ball mount the threaded ball shank must protrude be yond the bottom of the lock washer and nut at least 2 threads The trailer ball shank must be matched to the ball mount hole diameter size BUMPER TOWING The rear bumper of your vehicle is equipped with a hole to install a trailer ball The maximum gross trailer...

Страница 195: ...m dropping to the ground in case it becomes damaged or sepa rated For correct safety chain proce dures follow the hitch or trailer manufacturer s recommendations CAUTION If the total trailer weight exceeds 453 kg 1000 lb trailer brakes are required Never tap into your vehicle s hy draulic system as it would lower its braking effectiveness Never tow a trailer without using a safety chain securely a...

Страница 196: ...e information in the Sched uled Maintenance Guide or Owner s Manual Supplement Retighten all fixing bolts of the towing ball and bracket after approximately 1000 km 600 miles of trailer driving PRE TOWING SAFETY CHECK Check that your vehicle remains level when a loaded or unloaded trailer is hitched Do not drive if the vehicle has an abnormal nose up or nose down condition and check for improper t...

Страница 197: ...affect handling of your vehicle and trailer causing sway Pay attention to the rear from time to time to pre pare yourself for being passed by large trucks or buses which may cause your vehicle and trailer to sway If swaying happens firmly grip the steering wheel and reduce speed immediately but gradually Never increase speed Steer straight ahead If you make no extreme correction with the steering ...

Страница 198: ...o not make sudden down shifts Avoid holding the brake pedal down too long or too frequently This could cause the brakes to overheat and result in reduced braking effi ciency Getting more kilometers mileage from a liter gallon of fuel is easy just take it easy It will help make your vehicle last longer too Here are some specific tips on how to save money on both fuel and repairs Keep your tires inf...

Страница 199: ...proper alignment Avoid hitting the curb and slow down on rough roads Improper alignment not only causes faster tire wear but also puts an extra load on the engine which in turn wastes fuel Keep the bottom of your vehicle free from mud etc This not only lessens weight but also helps prevent corro sion Keep your vehicle tuned up and in top shape A dirty air cleaner improp er valve clearance dirty pl...

Страница 200: ...TUNDRA 34413U 198 ...

Страница 201: ...starter is cranked the battery is discharged You may try jump start ing See c Jump starting for further instructions If the light is O K but the engine still will not start it needs adjustment or repair Call a Toyota dealer or qualified repair shop NOTICE Do not pull or push start the ve hicle It may damage the vehicle or cause a collision when the engine starts Also the three way catalytic conver...

Страница 202: ...d burns electrical burns or damaged electronic components these instructions must be followed precisely If you are unsure about how to follow this procedure we strongly recommend that you seek the help of a competent me chanic or towing service CAUTION Batteries contain sulfuric acid which is poisonous and corrosive Wear protective safety glasses when jump starting and avoid spilling acid on your ...

Страница 203: ...y depressed Discharged battery Booster battery Positive terminal mark Jumper cable Positive terminal mark 4 Make the cable connections in the or der a b c d a Connect the clamp of the positive red jumper cable to the positive terminal on the discharged battery b Connect the clamp at the other end of the positive red jumper cable to the positive terminal on the booster battery Jumper cable Negative...

Страница 204: ...exact reverse order the negative cable and then the positive cable 7 Carefully dispose of the battery cover cloths they may now contain sulfuric acid 8 If removed replace all the battery vent plugs If the cause of your battery discharging is not apparent for example lights left on you should have it checked If your engine stalls while driving 1 Reduce your speed gradually keeping a straight line M...

Страница 205: ...adiator hoses and under the vehicle However note that water draining from the air conditioning is normal if it has been used CAUTION When the engine is running keep hands and clothing away from the moving fan and engine drive belts 4 If the engine drive belt is broken or the coolant is leaking stop the engine im mediately Call a Toyota dealer for as sistance 5 If the engine drive belt is O K and t...

Страница 206: ...ay occur Do not start or run the engine while your vehicle is supported by the jack Stop the vehicle on a level firm ground firmly set the parking brake and put the transmission in P automatic or reverse manual Block the wheel diagonally opposite to the one being changed if neces sary Make sure to set the jack properly in the jack point Raising the ve hicle with jack improperly posi tioned will da...

Страница 207: ...s firmly secured to prevent it flying forward during a collision or sudden braking To remove the spare tire 1 Insert the end of the jack handle into the lowering screw and turn it counter clockwise 2 After the tire is lowered completely to the ground remove the holding brack et When storing the spare tire put it in place with the outer side of the wheel facing up Then secure the tire taking care t...

Страница 208: ...by hand To remove Turn the joint in direction 1 until the jack is free To store Turn the joint in direction 2 until the jack is firmly secured to prevent it flying forward during a collision or sudden braking To remove the spare tire 1 Put a jack handle jack handle exten sion and jack handle end together as shown in the illustration 1 Jack handle end 2 Jack handle extension 3 Jack handle Required ...

Страница 209: ... tire put it in place with the outer side of the wheel facing up Then secure the tire taking care that the tire goes straight up without catching on any other part to prevent it from flying forward during a collision or sudden brak ing Blocking the wheel 2 Block the wheel diagonally opposite the flat tire to keep the vehicle from rolling when it is jacked up When blocking the wheel place a wheel b...

Страница 210: ...s Always loosen the wheel nuts before rais ing the vehicle The nuts turn counterclockwise to loosen To get maximum leverage fit the wrench to the nut so that the handle is on the right side as shown above Grab the wrench near the end of the handle and pull up on the handle Be careful that the wrench does not slip off the nut Do not remove the nuts yet just unscrew them about one half turn Position...

Страница 211: ...n when removing the flat tire Standard cab models To raise the ve hicle insert the jack handle into the jack it is a loose fit and turn it clockwise As the jack touches the vehicle and begins to lift double check that it is properly positioned Access cab models To raise the vehicle insert the jack handle extension into the jack it is a loose fit and turn it clockwise with the handle making sure th...

Страница 212: ... wheels remove any cor rosion on the mounting surfaces with a wire brush or such Installation of wheels without good metal to metal contact at the mounting surface can cause wheel nuts to loosen and eventually cause a wheel to come off while driving Therefore after the first 1600 km 1000 miles check to see that the wheel nuts are tight Reinstalling wheel nuts 8 Reinstall all the wheel nuts finger ...

Страница 213: ...mmer pipe or your foot Make sure the wrench is securely engaged over the nut Tighten each nut a little at a time in the order shown Repeat the process until all the nuts are tight CAUTION When lowering the vehicle make sure all portions of your body and all oth er persons around will not be injured as the vehicle is lowered to the ground Reinstalling wheel ornament 10 Reinstall the wheel ornament ...

Страница 214: ...le 12 Restow all the tools jack and flat tire securely As soon after changing wheels as pos sible tighten the wheel nuts to the torque specified in Part 8 with a torque wrench and have a technician repair the flat tire CAUTION Before driving make sure all the tools jack and flat tire are securely in place in their storage location to reduce the possibility of personal in jury during a collision or...

Страница 215: ...ety chain system for all towing and abide by the state provincial and local laws The wheels and axle on the ground must be in good condition If they are damaged use a towing dolly Two wheel drive models a Towing with wheel lift type truck From front Manual transmission We recommend using a towing dolly under the rear wheels If you do not use a tow ing dolly release the parking brake and put the tr...

Страница 216: ...ay cause serious damage to the transmission From rear We recommend using a tow ing dolly under the front wheels If you do not use a towing dolly place the ignition key in the ACC position put the trans mission in neutral and set the transfer in H2 lever type or 2WD button type mode NOTICE Do not tow with the key removed or in the LOCK position when towing from the rear without a towing dolly The s...

Страница 217: ...ll be in good condition CAUTION Use extreme caution when towing the vehicle Avoid sudden starts or errat ic driving maneuvers which would place excessive stress on the emer gency towing eyelet and towing cable or chain The eyelet and towing cable or chain may break and cause serious injury or damage NOTICE Use only a cable or chain specifically intended for use in towing vehicles Securely fasten t...

Страница 218: ...N Use extreme caution when towing the vehicle Avoid sudden starts or errat ic driving maneuvers which would place excessive stress on the emer gency towing hook and towing cable or chain The hook and towing cable or chain may break and cause serious injury or damage NOTICE Use only a cable or chain specifically intended for use in towing vehicles Securely fasten the cable or chain to the towing ho...

Страница 219: ... the hook and the towing cable or chain may break causing serious injury or damage If the towing vehicle can hardly move do not forcibly continue the towing Contact your Toyota dealer or a commercial tow truck service for assistance Tow the vehicle as straight ahead as possible Keep away from the vehicle during towing The following methods are effective to use when your vehicle is stuck in the mud...

Страница 220: ...Keys in Chapter 1 2 If your keys are locked in the vehicle and you cannot get a duplicate many Toyota dealers can still open the door for you using their special tools If you must break a window to get in we suggest breaking the smallest side window be cause it is the least expensive to replace Be extremely cautious to avoid cuts from the glass ...

Страница 221: ...es ence of salt in the air near the sea coast or in areas of industrial pollution High humidity accelerates corrosion es pecially when temperatures range just above the freezing point Wetness or dampness to certain parts of your vehicle for an extended period of time may cause corrosion even though other parts of the vehicle may be dry High temperatures will cause corrosion to those components of ...

Страница 222: ...els If you drive on salted or gravel roads mud shields help protect your vehicle Full size shields which come as near to the ground as possible are the best We recommend that the fittings and the area where the shields are installed be treated to resist corrosion Your Toyota dealer will be happy to assist in supplying and installing the shields if they are recommended for your area Keep your vehic...

Страница 223: ... each section right after you wash it 4 To prevent water spots dry the vehicle using a clean soft cotton towel Do not rub or press hard you might scratch the paint Waxing your Toyota Polishing and waxing is recommended to maintain the original beauty of your Toyota s finish Once a month or if the vehicle does not repel water well apply wax 1 Always wash and dry the vehicle be fore you begin waxing...

Страница 224: ...s Begin by vacuuming thoroughly to remove as much dirt as possible Several types of foam cleaners are available some are in aerosol cans and others are powders or liquids which you mix with water to pro duce a foam To shampoo the carpets use a sponge or brush to apply the foam Rub in overlapping circles Do not apply water the best results are obtained by keeping the carpet as dry as possible Read ...

Страница 225: ...ent apply a cleaner that does not contain an organic solvent Never use organic substances such as benzine alcohol or gasoline or alkaline or acid solutions for clean ing the leather as these could cause discoloring Use of a nylon brush or synthetic fiber cloth etc may scratch the fine grained surface of the leather Mildew may develop on soiled leath er upholstery Be especially careful to avoid oil...

Страница 226: ...TUNDRA 34413U 224 ...

Страница 227: ...ranty information General maintenance General maintenance items are those day to day care practices that are important to your vehicle for proper operation It is the owner s responsibility to ensure that the general maintenance items are performed regularly These checks or inspections can be done either by yourself or a qualified technician or if you prefer your Toyota dealer will be pleased to do...

Страница 228: ...ormed on your Toyota What about do it yourself maintenance Many of the maintenance items are easy to do yourself if you have a little mechani cal ability and a few basic automotive tools Simple instructions for how to per form them are presented in Part 7 If you are a skilled do it yourself mechan ic the Toyota service manuals are recom mended Please be aware that do it your self maintenance can a...

Страница 229: ...m Service reminder indicators and warning buzzers Check that all service reminder indicators and warning buzzers function properly Steering wheel Be alert for changes in steering condition such as hard steering or strange noise Seats Check that all seat controls such as seat adjusters seatback recliner etc operate smoothly and that all latches lock securely in any position Check that the head re s...

Страница 230: ...bat tery cells is between upper and lower lev el lines on the case Add only distilled water when replenishing See Chapter 7 3 for additional information Brake fluid level Make sure the brake fluid level is correct See Chapter 7 2 for additional information Engine oil level Check the level on the dipstick with the engine turned off and the vehicle parked on a level spot See Chapter 7 2 for addi tio...

Страница 231: ...excessive tire squeal when cornering uneven tire wear Vehicle pulls to one side when driving straight on a level road Strange noises related to suspension movement Loss of brake effectiveness spongy feeling brake or clutch pedal pedal al most touches floor vehicle pulls to one side when braking Engine coolant temperature continually higher than normal Engine continually runs hot oil pres sure gaug...

Страница 232: ...TUNDRA 34413U 230 ...

Страница 233: ...ase mm in 5405 212 8 1 5525 217 5 2 5525 217 5 1910 75 2 1940 76 4 3 2015 79 3 4 1800 70 9 6 1805 71 1 7 1810 71 3 8 1815 71 5 9 3260 128 3 1680 66 1 1648 64 9 1648 64 9 1680 66 1 3260 128 3 1800 70 9 1910 75 2 1 Without rear bumper 2 With rear bumper 3 With wheel arch moulding 4 With over fender 5 Unladen vehicle 6 With 2UZ FE engine and without P265 tires 7 With 5VZ FE engine and without P265 ti...

Страница 234: ...830 72 0 8 1835 72 2 9 1815 71 5 1910 75 2 1940 76 4 3 1 Without rear bumper 2 With rear bumper 3 With wheel arch moulding 4 With over fender 5 Unladen vehicle 6 With 2UZ FE engine and without P265 tires 7 With 5VZ FE engine and without P265 tires Front tread mm in Rear tread mm in Wheelbase mm in 3260 128 3 1675 65 9 1648 64 9 1648 64 9 1675 65 9 3260 128 3 8 With 2UZ FE engine and with P265 tire...

Страница 235: ...odels Automatic transmission SR5 grade 879 1938 Access cab 5VZ FE engine Two wheel drive models Manual transmission SR5 grade 731 1612 Automatic transmission SR5 grade 710 1567 Limited grade 653 1441 Four wheel drive models Manual transmission SR5 grade 762 1680 Automatic transmission SR5 grade 736 1624 Limited grade 679 1499 2UZ FE engine Two wheel drive models Automatic transmission SR5 grade 87...

Страница 236: ...ard grade 653 1440 Automatic transmission Standard grade 633 1396 Access cab 5VZ FE engine Two wheel drive models Automatic transmission SR5 grade 700 1545 Four wheel drive models Manual transmission SR5 grade 746 1646 Automatic transmission SR5 grade 726 1602 2UZ FE engine Two wheel drive models Automatic transmission SR5 grade 862 1902 Four wheel drive models Automatic transmission SR5 grade 684...

Страница 237: ...4 6 Fuel Fuel type Unleaded gasoline Octane Rating 87 Research Octane Number 91 or higher Fuel tank capacity L gal Imp gal 100 26 4 22 0 Service specifications ENGINE Valve clearance engine cold mm in 5VZ FE engine Intake 0 13 0 23 0 006 0 009 Exhaust 0 27 0 37 0 011 0 014 2UZ FE engine Intake 0 15 0 25 0 006 0 010 Exhaust 0 25 0 35 0 010 0 014 Spark plug type 5VZ FE engine DENSO K16TR11 NGK BKR5E...

Страница 238: ...ission 10 0 10 6 8 8 With automatic transmission 5VZ FE engine 9 9 10 5 8 7 2UZ FE engine 11 6 12 3 10 2 Coolant type TOYOTA Long Life Coolant or equiva lent With ethylene glycol type coolant for a proper corrosion protection of aluminum components Do not use alcohol type antifreeze or plain water alone BATTERY Open voltage at 20 C 68 F 12 6 12 8 V Fully charged 12 2 12 4 V Half charged 11 8 12 0 ...

Страница 239: ...W or 80W 90 CHASSIS LUBRICATION Propeller shafts Spiders and slide yokes Lithium base chassis grease NLGI No 2 Double cardan joint Molybdenum disulfide lithium base chassis grease NLGI No 2 BRAKES Minimum pedal clearance when depressed with the pressure of 490 N 50 kgf 110 lbf with the engine running mm in 95 3 7 Pedal freeplay mm in 1 6 0 04 0 24 Pad wear limit mm in 1 0 0 04 Lining wear limit mm...

Страница 240: ...ssure kPa kgf cm2 or bar psi Wheel size Tire size Front Rear Wheel size P245 70R16 180 1 8 26 240 2 4 35 16 7JJ Four wheel drive models Tire size Tire pressure kPa kgf cm2 or bar psi Wheel size Tire size Front Rear Wheel size P245 70R16 180 1 8 26 240 2 4 35 16 7JJ J P265 70R16 180 1 8 26 200 2 0 29 16 7JJ J ...

Страница 241: ... 26 240 2 4 35 16 7JJ J P265 70R16 180 1 8 26 200 2 0 29 16 7JJ J Four wheel drive models Tire size Tire pressure kPa kgf cm2 or bar psi Wheel size Tire size Front Rear Wheel size P245 70R16 180 1 8 26 240 2 4 35 16 7JJ J P265 70R16 180 1 8 26 200 2 0 29 16 7JJ J P265 70R16 Off road package 180 1 8 26 200 2 0 29 16 7JJ Wheel nut torque N m kgf m ft lbf 110 11 5 83 2 ...

Страница 242: ...njection system sequential multiport fuel injec tion system emission control system fuel pump and all components in EFI NO 2 fuse 2 ETCS 15 A Multiport fuel injection system sequential multiport fuel injec tion system and electronic throttle con trol system 3 DOME 15 A Interior light personal lights vanity light and courtesy lights 4 OBD 7 5 A On board diagnosis sys tem ...

Страница 243: ...ontrol system 21 4WD 20 A Four wheel drive control system and A D D control system 22 ACC 15 A Cigarette lighter audio sys tem SRS airbag system and power rear view mirrors 23 GAUGE 10 A Gauges and meters back up lights starting system day time running light system and air condi tioning system 24 IGN 5 A SRS airbag system multiport fuel injection system sequential multi port fuel injection system ...

Страница 244: ...TUNDRA 34413U 272 Fuse type C 39 ALT 120 A All components in AM1 ALT S HTR FR FOG PWR OUTLET 1 and PWR OUTLET 2 fuses ...

Страница 245: ...A Inc Toll free 1 800 331 4331 If NHTSA receives similar com plaints it may open an investiga tion and if it finds that a safety defect exists in a group of ve hicles it may order a recall and remedy campaign However NHTSA cannot become involved in individual problems between you your dealer or Toyota Motor Sales U S A Inc To contact NHTSA you may ei ther call the Auto Safety Hotline toll free at ...

Страница 246: ... The traction grades from highest to lowest are AA A B and C and they represent the tire s ability to stop on wet pavement as mea sured under controlled conditions on spe cified government test surfaces of asphalt and concrete A tire marked C may have poor traction performance Warning The traction grade assigned to this tire is based on braking straight ahead traction tests and does not include co...

Страница 247: ...ion Center of gravity location Recommended location for cargo center of gravity for cargo weight rating Rear end of truck bed The figures given in the illustration indi cate the recommended center of gravity zone A 1190 mm 46 9 in B 1062 mm 41 8 in CAUTION If a load is too far back it can cause dangerous handling If it is too far forward the front axle may be over loaded Camper center of gravity R...

Страница 248: ...k s recommended center of gravity zone when installed CAUTION Be careful overloading can cause dangerous braking and handling prob lems and can damage your vehicle and its tires Gross axle weight rating Front GAWR Rear GAWR Secure loose items to prevent weight shifts that could affect the balance of your vehicle When the truck camper is loaded drive to a scale and weigh on the front and on the rea...

Страница 249: ... kg 3960 lb V8 SR5 grade 1705 kg 3760 lb Limited grade 1796 kg 3960 lb GVWR Two wheel drive models Standard cab models 2494 kg 5500 lb Access cab models V6 2585 kg 5700 lb V8 2812 kg 6200 lb Four wheel drive models Standard cab models V6 2494 kg 5500 lb V8 2812 kg 6200 lb Access cab models V6 2721 kg 6000 lb V8 2744 kg 6050 lb If weight ratings are exceeded move or remove items to bring all weight...

Страница 250: ...TUNDRA 34413U 278 ...

Отзывы: