background image

CELICA


U

96

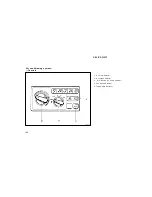
SEEK (Seeking)
Radio

In the seek mode, the radio finds and

plays the next station up or down the

station band.
To seek a station, push and hold the “

or “

” side of “SEEK” until you hear a

beep. Do this again to find another sta-
tion.

Cassette Player

By using this button, you can skip up or

down to a different track.
You can skip up to nine tracks at a time.
Push the up or down side of the button.
“FF 1” or “REW 1” will appear on the

display.
Next, push either side of the track button
until the number on the display reaches

the number of tracks you want to skip. If

you push the button ten times, the skip
feature will be turned off.

When counting the number of tracks you

want to rewind, remember to count the

current track as well. For example, if you
want to rewind to a song that is two be-

fore the song you are listening to, push

on the down side of the button until “REW
3” appears on the display.
If you have pushed the track button more

than you wanted to, push the other side
of the button. The track number will be

reduced.
The track number you select is not valid

if it is higher than the number of tracks

remaining on the current cassette side.

D

After the beginning of the tape is

reached, the player will automatically

start playing the same side.

D

After the end of the tape is reached,

the player will automatically reverse
sides and start playing the other side.

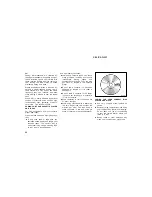
There must be at least 3 seconds of blank
space between tracks for the track button

to work correctly. In addition, the feature

may not work well with some spoken
word, live, or classical recordings.

SKIP

The skip feature allows you to fast for-

ward past long stretches of blank tape.
This is especially useful at the end of

cassettes.
Push “SKIP”. “SKIP” will appear on the

display. The cassette player will keep

track of how much blank space it plays.
Any time it has played about 10 seconds

of blank tape, it will automatically fast

forward to the next track and begin to
play.
Push the button a second time to turn off

the skip feature.

ST (Stereo reception) display

Your radio automatically changes to stereo
reception when a stereo broadcast is re-

ceived. “ST” appears on the display. If the
signal becomes weak, the radio reduces

the amount of channel separation to prev-

ent the weak signal from creating noise.
If the signal becomes extremely weak, the

radio switches from stereo to mono recep-

tion.

Содержание 1998 Celica

Страница 1: ...ICA U 1 Part 1 OPERATION OF INSTRUMENTS AND CONTROLS Chapter 1 1 Overview of instruments and controls D Instrument panel overview D Instrument cluster overview D Indicator symbols on the instrument pa...

Страница 2: ...on roof switches and interior lights 6 Glovebox 7 Power door lock switches 8 Power window switches 9 Ashtray 10 Cup holder 11 Parking brake lever 12 Manual transmission gear shift lever or automatic t...

Страница 3: ...ir conditioning controls 9 Rear window defogger switch 10 Coupe and liftback Power rear view mirror control switch without power windows Convertible Convertible top control switch and quarter window c...

Страница 4: ...U 4 Instrument cluster overview 1 Service reminder indicators and indica tor lights 2 Tachometer 3 Odometer 4 Engine coolant temperature gauge 5 Fuel gauge 6 Trip meter 7 Trip meter reset knob 8 Speed...

Страница 5: ...icator light Overdrive off indicator light SRS airbag warning light 1 Turn signal indicator lights Anti lock brake system warning light 1 Seat belt reminder light 1 Open door warning light 1 1 For det...

Страница 6: ...CELICA U 6...

Страница 7: ...uggage compartment when you have your vehicle parked leave the sub key with the attendant Since the side doors trunk lid and back door can be locked without a key you should always carry a spare maste...

Страница 8: ...river s door and twice in suc cession will unlock both side doors simul taneously LOCKING AND UNLOCKING WITH IN SIDE LOCK KNOB Move the lock knob To lock Push the knob forward To unlock Pull the knob...

Страница 9: ...in a serious injury When anyone closes the power windows be sure that they operate the windows safe ly D When small children are in the ve hicle never let them use the power window switches without s...

Страница 10: ...itch on the passenger s door The driver s door also has a switch that controls the passenger s window The window moves as long as you hold the switch To open Pull down the switch To close Push up the...

Страница 11: ...lose the trunk lid lower it and press down on it To close the back door lower it hardly After closing the trunk lid or back door try pulling it up to make sure it is secure ly closed and make sure tha...

Страница 12: ...ertible Push down the security lock levers to lock the rear seatbacks After locking the rear seatbacks try fold ing them down to make sure they are securely locked otherwise someone could get into the...

Страница 13: ...on the auxiliary catch lever and lift the hood 3 Hold the hood open by inserting the support rod into the slot Before closing the hood check to see that you have not forgotten any tools rags etc and r...

Страница 14: ...y before removing it After removing the cap hang it on the cap hanger It is not unusual to hear a slight swoosh when the cap is opened When installing turn the cap clockwise till you hear a click If t...

Страница 15: ...the switch and then push it again to close it com pletely Tilting operation To tilt up Push the switch on the UP side To lower Push the switch on the opposite side of the UP side You may stop the moon...

Страница 16: ...s between the rear seatback and the convertible top storage area when raising or lowering the con vertible top Even small items may interfere with convertible top opera tion and can cause damage z Do...

Страница 17: ...l switch is not in the MANUAL position See If the convertible top does not raise or lower in Part 4 2 Push and hold the convertible top control switch on the OPEN side until the convertible top is com...

Страница 18: ...ones on the quarter trim 5 Attach the fastener tape on the top boot to that on the rear seatback Raising the convertible top REMOVING THE TOP BOOT 1 Push the top boot backward to sepa rate its fasten...

Страница 19: ...ot in the plastic bag and store it in the trunk RAISING THE CONVERTIBLE TOP The ignition switch must be in the ON position to operate the convertible top 4 Lower the sun visors Check that all the side...

Страница 20: ...forward till they are hooked Visually check that the latch handles are fully seated in the strikers Also pull on the convertible top side rails to make sure the top is securely hooked 6 Raise all the...

Страница 21: ...D During driving do not allow pas sengers to stand up or move around between seats Severe inju ries can occur in the event of emer gency braking or a collision Adjust the driver s seat so that the fo...

Страница 22: ...an back to the desired angle and release the lever CAUTION To reduce the risk of sliding under the lap belt during a collision avoid reclining the seatback any more than needed The seat belts provide...

Страница 23: ...The seat will slide forward 2 Move the seat to the front most posi tion After passengers are in lift up the seat back and return the seat until it locks CAUTION D After putting back the seat try push...

Страница 24: ...D Make sure the seat belts are not twisted or caught in the seatback and are arranged in their proper position for ready use D Make sure the seatback is securely locked by pushing forward and rear war...

Страница 25: ...y If an accident occurs and the seat belts are not worn properly the force of the rapid infla tion of the airbag may cause death or serious injury to the child Do not allow the child to stand up or kn...

Страница 26: ...n Part 5 D Replace the belt assembly includ ing bolts if it has been used in a severe impact The entire assembly should be replaced even if damage is not obvious D Front passenger s seat only Re place...

Страница 27: ...clips etc in the buckle as this may prevent you from properly latching the tab and buckle D If the seat belt does not function normally immediately contact your Toyota dealer Do not use the seat until...

Страница 28: ...red length for the extender Bring the heaviest coat you expect to wear for prop er measurement and selection of length Additional ordering information is available at your Toyota dealer CAUTION When u...

Страница 29: ...may prevent you from properly latching the tab and buckle D If the seat belt does not function normally immediately contact your Toyota dealer Do not use the seat until the seat belt is fixed It cann...

Страница 30: ...ng light system monitors the airbag sensor assembly in flators warning light interconnecting wir ing and power sources For details see Service remainder indicators and warning buzzers in chapter 1 5 T...

Страница 31: ...the safety of all occupants be sure to always wear seat belts Collision from the rear Vehicle roll over Collision from the side The SRS airbags are not designed to inflate if the vehicle is subjected...

Страница 32: ...ag system is designed only as a supplement to the prima ry protection of the driver side and front passenger side seat belt sys tems The front seat occupants can be killed or seriously injured by an i...

Страница 33: ...child Move seat fully back D A forward facing child restraint sys tem should be allowed to put on the front seat only when it is un avoidable Always move the seat as far back as possible because the...

Страница 34: ...ce the child may be killed or seriously injured D Do not hold a child on your lap or in your arms Use a child restraint system in the rear seat For instruc tions concerning the installation of a child...

Страница 35: ...items such as a mobile two way radio cassette tape player or compact disc player z Modification of the suspension sys tem z Modification of the front end struc ture z Attachment of a grille guard bul...

Страница 36: ...lt See Seat belts for details CAUTION D For effective protection in automo bile accidents and sudden stops children must be properly re strained using a seat belt or child restraint system depending o...

Страница 37: ...size for the child for the restraint system Install the child restraint system correctly following the instructions provided by its manufacturer of the system General di rections also provided under t...

Страница 38: ...ystem To install an anchor bracket use an 8 mm 30 mm 1 25 mm coarse thread met ric bolt and a 15 mm 0 6 in spacer Note that the bolts accompanying many child restraint systems are not metric You can d...

Страница 39: ...CELICA U 39 A Infant seat B Child seat C Junior seat A INFANT SEAT INSTALLATION An infant seat is used in rear facing only Installation with 3 point type seat belt...

Страница 40: ...ld re straint system on the rear seat if it interferes with the lock mechanism of the front seats This can cause severe injury to the child and front passenger in case of sudden brak ing or a collisio...

Страница 41: ...ot protect your child from injury Contact your Toyota dealer immediately Do not use the seat until the seat belt is fixed 2 Fully extend the shoulder belt to put it in the lock mode When the belt is t...

Страница 42: ...e button and allow the belt to retract completely The belt will move freely again and be ready to work for an adult or older child passenger B CONVERTIBLE SEAT INSTALLATION A convertible seat is used...

Страница 43: ...raint sys tem should be allowed to put on the front seat only when it is un avoidable Always move the seat as far back as possible because the force of a deploying airbag could cause death or serious...

Страница 44: ...rtions of the belt is not twisted D Do not insert coins clips etc in the buckle as this may prevent you from properly latching the tab and buckle D If the seat belt does not function normally it canno...

Страница 45: ...securely CAUTION Push and pull the child restraint sys tem in different directions to be sure it is secure Follow all the installation instructions provided by its manufac turer 4 To remove the conver...

Страница 46: ...he force of a deploying airbag could cause death or serious injury to the child 1 Sit the child on a booster seat Run the lap and shoulder belt through or around the booster seat and child fol lowing...

Страница 47: ...Keep the lap belt as low on your hip bone as possible D For child s safety do not place the shoulder belt under child s arm D After inserting the tab make sure the tab and buckle are locked and that t...

Страница 48: ...n Coupe On the filler panel behind the rear seat a Using the illustration as a guide run your fingers across the trim of the filler panel itself to locate the position of the holes underneath b Make a...

Страница 49: ...a Using the illustration as a guide uncov er the anchor by rolling back the carpet on the luggage compartment floor The anchor hole is sealed b Remove the seal of the anchor c Insert a 15 mm 0 6 in sp...

Страница 50: ...ly with Canada Motor Vehicle Safety Standards vehicles sold in Canada are provided with a bracket set in the glovebox Tilt steering wheel To change the steering wheel angle hold the steering wheel pul...

Страница 51: ...smaller and farther away than when seen in a flat mirror Power rear view mirror control With power windows Without power windows To adjust a mirror use the switches 1 Master switch To select the mirro...

Страница 52: ...of your vehicle in the mir ror To reduce glare from the headlights of the vehicle behind you during night driving operate the lever on the lower edge of the mirror Daylight driving Lever at position...

Страница 53: ...ights automatically turn off when the driver s door is opened with the ignition key turned off To turn them on again turn the key to the ON position or actuate the headlight switch If you are going to...

Страница 54: ...ust be in the ON position The lever automatically returns after you make a turn but you may have to return it by hand after you change lanes To signal a lane change move the lever up or down to the pr...

Страница 55: ...cessary when the en gine is not running Instrument panel light control To adjust the brightness of the instru ment panel lights turn the knob Front fog lights To turn on the front fog lights twist the...

Страница 56: ...arately with each outer switch To turn on the light push the switch on your side To turn the light off push the switch once again The center switch has the following posi tions DOOR Turn both lights o...

Страница 57: ...ing the back door will turn the light off Windshield wipers and washer To turn on the windshield wipers move the lever to the desired setting The key must be in the ON position Lever position Speed se...

Страница 58: ...TICE Do not operate the wipers if the wind shield is dry It may scratch the glass Rear window wiper and washer To turn on the rear window wiper twist the lever knob upward The key must be in the ON po...

Страница 59: ...shut off af ter the defogger has operated about 15 minutes Make sure you turn the defogger off when the window is clear Leaving the defogger on for a long time could cause the battery to discharge esp...

Страница 60: ...CELICA U 60...

Страница 61: ...1 4 full This fuel gauge has a non return type needle which remains at the last indicated position when the ignition switch is turned off If the fuel level approaches E or the low fuel level warning...

Страница 62: ...hermostat in the engine cooling system as this may cause the engine to overheat The thermostat is designed to con trol the flow of coolant to keep the temperature of the engine within the specified op...

Страница 63: ...er to zero To reset the trip meter push the knob If the indicator or buzzer comes on Do this a type A If parking brake is off type B stop and check b Fasten seat belts Indicator and buzzer c Stop and...

Страница 64: ...T the reminder light and buzzer come on if the driver s seat belt is not fastened Unless the driver fastens the belt the light stays on and the buzzer sounds for about 4 to 8 seconds c Discharge Warni...

Страница 65: ...assisting brake performance so that the wheels can look up during sudden braking or braking on slippery road surfaces h Open Door Warning Light This light remains on until both side doors and back do...

Страница 66: ...r warning light and SRS air bag warning light should come on The ABS warning light goes off after a few seconds If any service reminder indicator or warn ing buzzer does not function as described abov...

Страница 67: ...gine is off and the steering wheel is locked The key can be re moved only at this position You must push in the key to turn the key from ACC to the LOCK position On vehicles with an automatic transmis...

Страница 68: ...ft while holding the lock release button in Shift normally Overdrive switch For selecting either a three speed or four speed transmis sion ON position Shifting into overdrive pos sible OFF position Sh...

Страница 69: ...off the overdrive switch The O D OFF indicator light will come on and the transmission will downshift to the third gear D Shift into the 2 position The trans mission will downshift to the second gear...

Страница 70: ...parking brake lever up fully to securely apply the parking brake 3 With the brake pedal pressed down shift the selector lever to the P posi tion CAUTION While the vehicle is moving never attempt to m...

Страница 71: ...els z If your vehicle remains stuck after rocking the vehicle several times consider other ways such as tow ing h If you cannot shift the selector le ver out of P position If you cannot shift the sele...

Страница 72: ...eration may be nec essary Make sure you observe the follow ing maximum allowable speeds in each gear gear km h mph 1 51 32 2 85 53 3 126 78 4 162 101 NOTICE Do not downshift if you are going faster th...

Страница 73: ...lthough a slight speed change may occur when driving up or down the grades On steeper hills a greater speed change will occur so it is better to drive without the cruise control CAUTION D To help main...

Страница 74: ...ulling the lever in the CANCEL di rection and releasing it b Depressing the brake pedal c Depressing the clutch pedal manual transmission If the vehicle speed falls below about 40 km h 25 mph the pres...

Страница 75: ...the lever up in the RES ACC direction will restore the speed set prior to cancellation However once the vehicle speed falls be low about 40 km h 25 mph the preset speed will not be resumed CRUISE CON...

Страница 76: ...CELICA U 76...

Страница 77: ...res D Car audio system operating hints Air conditionig system D Controls D Air flow selector setting D Operating tips D Instrument panel vents Type 1 AM F M ETR radio cassette player compact disc auto...

Страница 78: ...tails about your system s tone and balance controls see the description of your own system Tone How good an audio program sounds to you is largely determined by the mix of the treble midrange and bass...

Страница 79: ...k 1 through the end of the disc Then it will play from track 1 again NOTICE Never try to disassemble or oil any part of the compact disc player Do not insert anything except a compact disc into the sl...

Страница 80: ...CELICA U 80 Details of specific buttons controls and features are described in the alphabetical listing that follows Using your audio system controls and features Type 1...

Страница 81: ...rd button or TAPE to stop the tape while it is re winding push the reverse button or TAPE If a tape side rewinds completely the cas sette player will stop and then play that same side If a tape fast f...

Страница 82: ...system changes between single disc play er and automatic changer Your audio system shows six different dis play if the player malfunctions If WAIT appears on the display it indi cates inside the play...

Страница 83: ...e tape The display indicates which side is currently selected indi cates top side indicates bottom side Auto reverse feature After the cassette player reaches the end of a tape side it automatically r...

Страница 84: ...s The radio will find the next station up the station band stay there for a few seconds and then scan again To select a station push SCAN a second time To scan the preset stations Push and hold SCAN u...

Страница 85: ...player By using this button you can skip up or down to a different track Push either side of the track button until the number of the track you want to listen to appears on the display If you want to...

Страница 86: ...CELICA U 86 Type 2 Details of specific buttons controls and features are described in the alphabetical listing that follows...

Страница 87: ...When you release the button the compact disc player will resume playing AM F M Push AM F M to switch between the AM and FM bands AM FM1 or FM2 will appear on the display These systems al low you to se...

Страница 88: ...tic changer Your audio system shows six different dis play if the player malfunctions If WAIT appears on the display it indi cates inside the player unit may be too hot due to the very high ambient te...

Страница 89: ...hear a beep you held the button too long and the player will repeat the whole disc When the track ends it will automatically be replayed This pro cess will be continued until you push the button agai...

Страница 90: ...reception display Your radio automatically changes to stereo reception when a stereo broadcast is re ceived ST appears on the display If the signal becomes weak the radio reduces the amount of channe...

Страница 91: ...CELICA U 91 Type 3 Details of specific buttons controls and features are described in the alphabetical listing that follows...

Страница 92: ...TAPE to stop the tape while it is re winding push the reverse button or TAPE If a tape side rewinds completely the cas sette player will stop and then play that same side If a tape fast forwards com p...

Страница 93: ...lay shows the track or track and disc number currently being played Each time you push CD the system changes between built in single disc player and automatic changer Your audio system shows six diffe...

Страница 94: ...forwarding PWR VOL Power Volume Push PWR VOL to turn the audio system on and off Turn PWR VOL to adjust the volume RAND Random There are two random features you can either listen to the tracks on all...

Страница 95: ...sta tions The radio will find the next station up the station band stay there for a few seconds and then scan again To select a station push SCAN a second time To scan the preset stations Push and ho...

Страница 96: ...er than the number of tracks remaining on the current cassette side D After the beginning of the tape is reached the player will automatically start playing the same side D After the end of the tape i...

Страница 97: ...tside the vehicle For example nearby buildings and terrain can interfere with FM reception Power lines or telephone wires can interfere with AM signals And of course radio signals have a limited range...

Страница 98: ...st way to clean them is by using a cleaning tape A wet type is recommended Use high quality cassettes D Low quality cassette tapes can cause many problems including poor sound inconsistent playing spe...

Страница 99: ...ic cases away from moisture heat and direct sunlight To clean a compact disc Wipe it with a soft lint free cloth that has been damp ened with water Wipe in a straight line from the center to the edge...

Страница 100: ...CELICA U 100 1 Air Flow Selector 2 Air Intake Selector 3 A C Button on some models 4 Fan Speed Selector 5 Temperature Selector Air conditioning system Controls...

Страница 101: ...th the floor vents and the instrument panel vents 3 Floor Air flows mainly from the floor vents 4 Floor Windshield Air flows mainly from the floor vents and windshield vents 5 Windshield Air flows mai...

Страница 102: ...icle 2 Fresh Draws outside air into the sys tem A C button To turn on the air conditioning press the A C button The A C button indicator will come on To turn the air conditioning off press the button...

Страница 103: ...grilles in front of the windshield are not blocked by leaves or snow for example D On humid days do not blow cold air on the windshield The windshield could fog up because of the difference in air tem...

Страница 104: ...ulate for a few min utes Ventilation For best results set controls to Fan speed Any setting except OFF Temperature Towards COLD blue zone Air intake FRESH outside air Air flow PANEL Air conditioning O...

Страница 105: ...ton indicator comes on regardless of whether or not the A C button is pressed in This is to clean up the front view more quickly When the A C button is not pressed in pressing another air flow button...

Страница 106: ...CELICA U 106...

Страница 107: ...ton To reset the minutes Push the M button If quick adjustment to a full hour is de sired push the 00 button For example if the 00 button is de pressed when the time is between 1 01 1 29 the time will...

Страница 108: ...ay to pre vent other cigarette butts from catching fire After using the ashtray close the ashtray cover completely To remove the ashtray open the ashtray cover and pull it out CAUTION To reduce the ch...

Страница 109: ...s or drink cans securely in its holes To use the cup holder pull it out When the cup holder is pulled out to the first click you can also use the ashtray CAUTION D Do not place anything else on the cu...

Страница 110: ...retain ers Floor mat Use a floor mat of the correct size If the floor carpet and floor mat have a hole then it is designed for use with a locking clip Fix the floor mat with locking clip into the hole...

Страница 111: ...s D Try to avoid hard stops during the first 300 km 200 miles D Do not drive slowly with the transmis sion in a high gear D Do not drive for a long time at any single speed either fast or slow D Do no...

Страница 112: ...NTAINING MTBE Gasolines that contain MTBE Methyl Tertiary Butyl Ether are available in the market If you use a gasoline mixed with MTBE make certain that it does not contain more than 15 of MTBE If th...

Страница 113: ...e vehicle registration laws Second confirm the availability of the cor rect fuel unleaded and minimum octane number Three way catalytic converters The three way catalytic converter is an emission cont...

Страница 114: ...er knows your vehicle and its three way catalytic converter system best z To ensure that the three way cata lytic converter and the entire emis sion control system operate proper ly your vehicle must...

Страница 115: ...linder wall is burned by the high temperature combustion gases during the combustion process D Oil is also used to lubricate the stems of the intake valves Some of this oil is sucked into the combusti...

Страница 116: ...sist the brakes If the engine should quit while you are driving you can bring the vehicle to a stop with normal pedal pressure There is enough reserve vacuum for one or two stops but no more CAUTION D...

Страница 117: ...the laws of physics that act on your ve hicle D Braking capability is dependent on tire friction with the road surface D Even though the anti lock brake sys tem is operating a driver cannot main tain...

Страница 118: ...assisting brake performance so that the wheels can lock up during sudden braking or braking on slippery road surfaces Have your vehicle checked by your Toyota dealer as soon as pos sible DRUM IN DISC...

Страница 119: ...ise they are much more likely to suffer seri ous bodily injury in the event of sudden braking or a collision D Do not place anything on the filler panel behind the rear seatback or luggage cover Such...

Страница 120: ...to reduce the incidence of vehicle thefts by facilitat ing the tracing and recovery of parts from stolen vehicles The label is designed so that once it is applied to a surface any attempt to remove i...

Страница 121: ...ecom mend using snow tires If installing snow tires be sure to replace all four tires 2 All season tires All season tires are designed to provide better traction in snow and to be adequate for driving...

Страница 122: ...CELICA U 122...

Страница 123: ...firmly 2 Turn off unnecessary lights and acces sories 3 Manual transmission Press the clutch pedal to the floor and shift the trans mission into neutral Hold the clutch pedal to the floor until the en...

Страница 124: ...ld engine z If the engine becomes difficult to start or stalls frequently have the engine checked immediately D Always slow down in gusty crosswinds This will allow you much better control D Drive slo...

Страница 125: ...eed capability tires or not before driving at such speeds D Do not continue normal driving when the brakes are wet If they are wet your vehicle will require a lon ger stopping distance and it may pull...

Страница 126: ...mend you carry some emer gency equipment Some of the things you might put in the vehicle are tire chains window scraper bag of sand or salt flares small shovel jumper cables etc Trailer towing Your ve...

Страница 127: ...or rear axle resulting from distribution of the gross vehicle weight on both axles must not exceed the Gross Axle Weight Rating GAWR listed on the Certification Label D The trailer cargo load should...

Страница 128: ...ION D If the total trailer weight exceeds 453 kg 1000 lb trailer brakes are required D Never tap into your vehicle s hy draulic system as it would lower its braking effectiveness D Never tow a trailer...

Страница 129: ...ing a trail er practice turning stopping and back ing with a trailer in an area away from traffic until you learn the feel D Backing with a trailer is difficult and requires practice Grip the bottom o...

Страница 130: ...4 of this manual D Always place wheel blocks under both the vehicle and trailer wheels when parking Apply the parking brake firmly Put the transmission in P automatic or in first or reverse manual Av...

Страница 131: ...raffic it is better to turn off the engine and start again later D Avoid engine lug or overrevving Use a gear position suitable for the road on which you are travelling D Avoid continuous speeding up...

Страница 132: ...omy For longer life of all parts and lower operating costs keep all maintenance work on schedule and if you often drive under severe condi tions see that your vehicle receives more frequent maintenanc...

Страница 133: ...ior light 3 If the light is out dim or goes out when the starter is cranked the battery is discharged You may try jump start ing See c Jump starting for further instructions If the light is O K but th...

Страница 134: ...the help of a competent me chanic or towing service CAUTION D Batteries contain sulfuric acid which is poisonous and corrosive Wear protective safety glasses when jump starting and avoid spilling aci...

Страница 135: ...sitive red jumper cable to the positive terminal on the discharged battery b Connect the clamp at the other end of the positive red jumper cable to the positive terminal on the booster battery Jumper...

Страница 136: ...ve cable and then the positive cable 7 Carefully dispose of the battery cover cloths they may now contain sulfuric acid 8 If removed replace all the battery vent plugs If the cause of your battery dis...

Страница 137: ...steam Escaping steam or coolant is a sign of very high pressure 3 Look for obvious coolant leaks from the radiator hoses and under the vehicle However note that water draining from the air conditioni...

Страница 138: ...is supported by the jack D Stop the vehicle on a level firm ground firmly set the parking brake and put the transmission in P automatic or reverse manual Block the wheel diagonally opposite to the on...

Страница 139: ...es if necessary It has tread life of up to 4800 km 3000 miles depending on road conditions and your driving habits When tread wear indicators appear on the tire replace the tire See also the tire sect...

Страница 140: ...ut wrench U S A To prepare yourself for an emergency you should familiarize yourself with the use of the jack each of the tools and their stor age locations Turn the jack joint by hand To remove Turn...

Страница 141: ...m flying forward during a collision or sudden braking Blocking the wheel 2 Block the wheel diagonally opposite the flat tire to keep the vehicle from rolling when it is jacked up When blocking the whe...

Страница 142: ...ositioning the jack 5 Position the jack at the correct jack point as shown Make sure the jack is positioned on a level and solid place Raising your vehicle 6 After making sure that no one is in the ve...

Страница 143: ...els remove any cor rosion on the mounting surfaces with a wire brush or such Installation of wheels without good metal to metal contact at the mounting surface can cause wheel nuts to loosen and event...

Страница 144: ...the nut Tighten each nut a little at a time in the order shown Repeat the process until all the nuts are tight CAUTION When lowering the vehicle make sure all portions of your body and all oth er pers...

Страница 145: ...From front From rear b Using flat bed truck If towing is necessary we recommend you to have it done by your Toyota dealer or a commercial tow truck ser vice In consultation with them have your vehicle...

Страница 146: ...CC position and put the transmission in neutral NOTICE Do not tow with the key removed or in the LOCK position when towing from the rear without a towing dolly The steering lock mechanism is not stron...

Страница 147: ...brakes must all be in good condition CAUTION Use extreme caution when towing ve hicles Avoid sudden starts or erratic driving maneuvers which would place excessive stress on the emergency towing hook...

Страница 148: ...ne For your safety keep the brake pedal depressed Be sure to have the system checked by your Toyota dealer as soon as possible If the power mechanism for the convert ible top should become inoperative...

Страница 149: ...to the front seat grasp the handle which is under the convert ible top and pull the top fully for ward 5 While holding the convertible top against the windshield frame push the latch handles fully fo...

Страница 150: ...er windows and sun vi sors LOWERING THE CONVERTIBLE TOP MANUALLY 1 Open the trunk and remove the cov er from the front trim Push the manual control switch on the MANUAL side 2 Lower all the side windo...

Страница 151: ...ition attach the cover and close the trunk If you lose your keys Many Toyota dealers can make a new key if you can give them the key num ber See the suggestion given in Keys in Chapter 1 2 If your key...

Страница 152: ...CELICA U 152...

Страница 153: ...ence of salt in the air near the sea coast or in areas of industrial pollution D High humidity accelerates corrosion es pecially when temperatures range just above the freezing point D Wetness or dam...

Страница 154: ...you drive on salted or gravel roads mud shields help protect your vehicle Full size shields which come as near to the ground as possible are the best We recommend that the fittings and the area where...

Страница 155: ...s instructions Use a soft cotton mitt and keep it wet by dipping it frequently into the wash water Do not rub hard let the soap and water remove the dirt Aluminum wheels Use only a mild soap or neutra...

Страница 156: ...tions and precautions Be sure to polish and wax the chrome trim as well as the paint 3 Wax the vehicle again when water does not bead but remains on the sur face in large patches NOTICE Always remove...

Страница 157: ...hampoo to clean the carpets Begin by vacuuming thoroughly to remove as much dirt as possible Several types of foam cleaners are available some are in aerosol cans and others are powders or liquids whi...

Страница 158: ...ti lated shaded area NOTICE z If a stain should fail to come out with a neutral detergent apply a cleaner that does not contain an organic solvent z Never use organic substances such as benzine alcoho...

Страница 159: ...ion It is the owner s responsibility to insure that the general maintenance items are performed regularly These checks or inspections can be done either by yourself or a qualified technician or if you...

Страница 160: ...nd a few basic automotive tools Simple instructions for how to per form them are presented in Part 7 If you are a skilled do it yourself mechan ic the Toyota service manuals are recom mended Please be...

Страница 161: ...ction properly Steering wheel Be alert for changes in steering condition such as hard steering or strange noise Seats Check that all front seat controls such as seat adjusters seatback recliner etc op...

Страница 162: ...the HOT or COLD range depending on the fluid temperature See Chapter 7 2 for additional information Exhaust system If you notice any change in the sound of the exhaust or smell exhaust fumes have the...

Страница 163: ...e clues take your vehicle to your Toyota dealer as soon as possible It probably needs adjustment or repair CAUTION Do not continue driving with the ve hicle unchecked It could result in se rious vehic...

Страница 164: ...CELICA U 164...

Страница 165: ...CELICA U 165 Part 7 DO IT YOURSELF MAINTENANCE Chapter 7 1 Introduction D Engine compartment overview D Fuse locations D Do it yourself service precautions D Parts and tools...

Страница 166: ...view 1 Power steering fluid reservoir 2 Engine oil filler cap 3 Brake fluid reservoir 4 Fuse blocks 5 Battery 6 Engine coolant reservoir 7 Electric cooling fans 8 Engine oil level dipstick 9 Windshiel...

Страница 167: ...CELICA U 167 Fuse locations Spare fuses Canada only...

Страница 168: ...he engine is hot do not remove the radiator cap or loosen the drain plugs to prevent burning yourself D Do not smoke cause sparks or al low open flames around fuel or the battery Their fumes are flamm...

Страница 169: ...h the air cleaner filter removed or excessive engine wear could result Also backfiring could cause a fire in the engine compartment z Be careful not to scratch the glass surface with the wiper frame z...

Страница 170: ...ase D Conventional wrench for terminal clamp bolts Checking and replacing fuses Parts if replacement is necessary D Fuse with same amperage rating as original Tools D Screwdriver for passenger s side...

Страница 171: ...the engine 2 Pull out the dipstick and wipe it clean with a rag 3 Reinsert the dipstick push it in as far as it will go or the reading will not be correct 4 Pull the dipstick out and look at the oil...

Страница 172: ...fication mark Oil identification marks Either or both API registered marks are added to some oil containers to help you select the oil you should use The API Service Symbol is located any where on the...

Страница 173: ...s hot Coolant type selection Your coolant must contain ethylene glycol antifreeze In addition to preventing freez ing and subsequent damage to the engine this will also prevent corrosion Further suppl...

Страница 174: ...uid DEXRONRII or III If the vehicle has been driven around 80 km h 50 mph for 20 minutes a little more in frigid temperatures the fluid is hot 60 C 80 C or 140 F 175 F You may also check the level whe...

Страница 175: ...ta dealer The following instructions for checking tire pressure should be observed D The pressure should be checked only when the tires are cold If your ve hicle has been packed for at least 3 hours a...

Страница 176: ...en if damage is not obvious Tires deteriorate with age even if they have never or seldom been used This also applies to the spare tire and tires stored for future use REPLACING YOUR TIRES When replaci...

Страница 177: ...USE SNOW TIRES OR CHAINS Snow tires or chains are recommended when driving on snow or ice On wet or dry roads conventional tires provide better traction than snow tires SNOW TIRE SELECTION If you nee...

Страница 178: ...wer D Drive carefully avoiding bumps holes and sharp turns which may cause the vehicle to bounce D Avoid sharp turns or locked wheel braking as use of chains may ad versely affect vehicle handling NOT...

Страница 179: ...After driving your vehicle the first 1600 km 1000 miles check that the wheel nuts are tight D If you have rotated repaired or changed your tires check that the wheel nuts are still tight after drivin...

Страница 180: ...CELICA U 180...

Страница 181: ...battery D Keep children away from the bat tery EMERGENCY MEASURES D If electrolyte gets in your eyes flush your eyes with clean water immediately and get immediate medical attention If possible con ti...

Страница 182: ...ng may damage the battery case NOTICE z Be sure the engine and all accesso ries are off before performing main tenance z When checking the battery remove the ground cable from the negative terminal ma...

Страница 183: ...causing personal injuries NOTICE Never recharge the battery while the engine is running Also be sure all accessories are turned off Checking and replacing fuses Type A Type B Type C Good Good Good Bl...

Страница 184: ...turn the substitute to its original clip It is a good idea to purchase a set of spare fuses and keep them in your ve hicle for emergencies If the new fuse immediately blows out there is a problem with...

Страница 185: ...D Fill up the fuel tank D Bounce the vehicle several times A passenger should sit on the driver s seat while checking the headlight aims Front Acceptable range Buble Vertical movement gauges The bubbl...

Страница 186: ...beam 9006 55 A Headlights high beam 9005 65 B Front fog light 55 C Light bulbs Bulb No W Type Parking and front turn signal lights 1157 27 8 C Front side marker lights 194 3 8 D Rear side marker stop...

Страница 187: ...ing the lock release If the connector is tight wiggle it 2 Turn the bulb and remove it 3 Install a new bulb and the connector into the mounting hole Aiming is not necessary after replacing the bulb Wh...

Страница 188: ...CELICA U 188 Front fog lights 1 Loosen the retainer screw and take out the beam unit 2 Turn the cover counterclockwise and remove it 3 Disconnect the cords...

Страница 189: ...all the bulb align the cutouts of the bulb with the protrusions of the mounting hole 5 Connect the cords install the cover and turn it clockwise so that two triangle marks are aligned Plug the connect...

Страница 190: ...CELICA U 190 Front side marker lights Use a Phillips head screwdriver...

Страница 191: ...LICA U 191 a Rear turn signal light b Rear side marker stop and tail light c Stop and tail light d Back up light Rear side marker rear turn signal stop and tail and back up lights coupe and convertibl...

Страница 192: ...CELICA U 192 a Rear side marker light b Rear turn signal light c Stop and tail light d Back up light Rear side marker rear turn signal stop and tail and back up lights liftback...

Страница 193: ...CELICA U 193 License plate lights Use a Phillips head screw driver High mounted stoplight coupe...

Страница 194: ...CELICA U 194 High mounted stoplight liftback...

Страница 195: ...CELICA U 195 Part 8 SPECIFICATIONS D Dimensions and weight D Engine D Fuel D Service specifications D Tires D Fuses...

Страница 196: ...width mm in 1750 68 9 1750 68 9 1750 68 9 Overall height mm in 1310 51 6 1305 51 4 1325 52 2 Wheelbase mm in 2540 100 0 2540 100 0 2540 100 0 Front tread mm in 1515 59 6 1515 59 6 1515 59 6 Rear tread...

Страница 197: ...NGINE Valve clearance engine cold mm in Intake 0 19 0 29 0 007 0 011 Exhaust 0 28 0 38 0 011 0 015 Spark plug type DENSO PK20R11 NGK BKR6EP 11 Spark plug gap mm in 1 1 0 043 Drive belt tension measure...

Страница 198: ...f ter the key is removed with all the lights turned off Charging rates 5 A max CLUTCH Pedal freeplay mm in 5 15 0 2 0 6 Fluid type SAE J1703 or FMVSS No 116 DOT 3 MANUAL TRANSAXLE Oil capacity L qt Im...

Страница 199: ...omatic transmission fluid DEXRON II or III Tires Tire size Spare tire U S A T125 70D16 Canada 205 55R15 87V P205 55R15 87V Except spare tire 205 55R15 87V P205 55R15 87V Tire pressure kPa kgf cm2 or b...

Страница 200: ...personal lights luggage compartment light trunk light door courtesy lights clock 7 HEAD LH 15 A Left hand headlight 8 HEAD RH 15 A Right hand headlight Instrument panel 9 SPARE Spare fuse 10 SPARE Sp...

Страница 201: ...ar window wiper and washer 28 MIR HTR 10 A Multiport fuel injection system sequential multiport fuel injec tion system 29 TURN 10 A Turn signal lights emer gency flashers 30 TAIL 15 A Tail lights park...

Страница 202: ...CELICA U 202...

Страница 203: ...00 331 4331 If NHTSA receives similar com plaints it may open an investiga tion and if it finds that a safety de fect exists in a group of vehicles it may order a recall and remedy campaign However NH...

Страница 204: ...The traction grades from highest to lowest are A B and C and they represent the tire s ability to stop on wet pavement as measured under con trolled conditions on specified government test surfaces of...

Отзывы: