


6
USER ADJUSTABLE CONTROLS
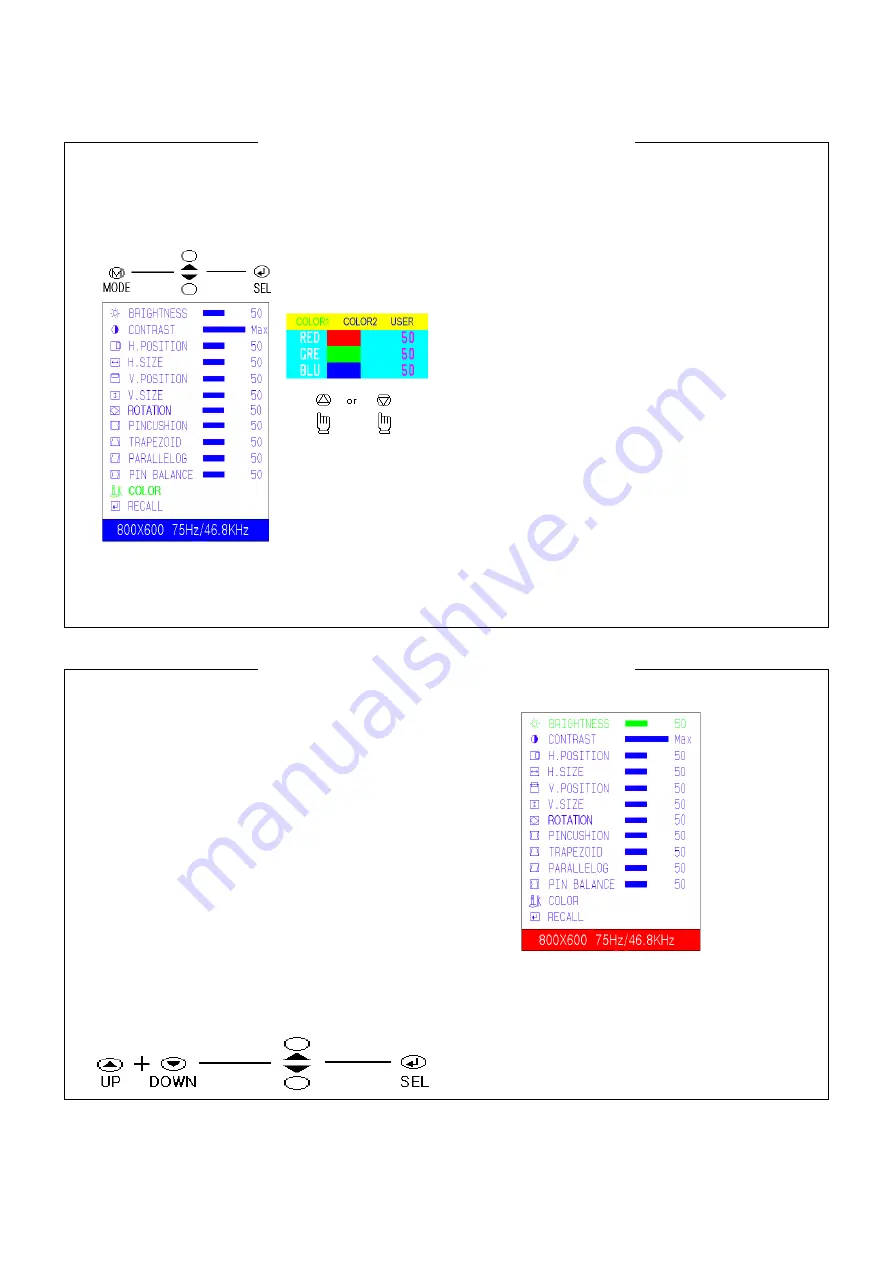
K. COLOR ADJUSTMENT
Press the “MODE” key then Main-Menu OSD come out
as below figure.
1) Search “COLOR” sub-menu using “UP/DOWN” key on
the Main-Menu OSD.
2) Select the “COLOR” by pressing “SEL” key, then
the color Sub-Menu OSD comes out as below
figure
.
3) Search “USER” using “UP/DOWN” key (“COLOR1”
and “COLOR2” is adjusted in factory by auto-
alignment machine)
4) Press “SEL” key to adjust “RED”,”GREEN” and
“BLUE”, The each “RED”,”GREEN” and “BLUE” is
selected by pressing the “SEL” key and selected
item changes OSD color from white to it’s own
color as character (ex: “RED” goes to red color)
5) Adjust “RED”,”GREEN” or “BLUE” using
“UP/DOWN” key.
6) Press “MODE” key to finish the color adjustment
then the OSD goes back to Main-Menu.
7) Press the “MODE” key again to finish the
adjustment then the OSD disappear.
L. RECALL
When press the “RECALL” key, all user’s adjustment
value are erased and covered by factory
adjustment value.
At first stage without any user’s adjustment, The
monitor set-upped by factory adjustment value.
Factory control (On Screen Display)
This monitor has two-adjustment mode.
One is for user’s own adjust and other is for factory
adjustment only.
But sometimes it needs to adjust at factory adjustment
mode for repair or development person.
Adjustment at the factory adjustment mode needs
more careful compare to user adjustment mode.
Because after finish the adjustment at factory mode, If
there are some mistake, can not recover to before
adjustment at the user mode, If there are mistake at
the user mode, can recover using “RECALL” function
(refer to “L. RECALL”).
A. Factory mode entering.
Press the “UP” and “DOWN” key simultaneously until
OSD comes out as below.
The OSD of factory mode is same format with user
mode except color of bottom line. (User mode is blue;
factory mode is red as below)
B. Exit and save
1) After finish the adjustment; search “RECALL”
using “UP/DOWN” key.
2) Press “SEL” key until OSD disappear then the
adjusted value saved and exit from the factory
mode.
Содержание MTG-02XT/XN Series
Страница 8: ...8 BLOCK DIAGRAM...
Страница 11: ...11 SERVICE NOTICS...
Страница 12: ...12 INTEGRATED CIRCUIT DIAGRAM IC201 u COM KS88C6348...
Страница 13: ...13 INTEGRATED CIRCUIT DIAGRAM IC501 IC HORIZONTAL VERTICAL OSC TDA9109A IC401 IC VERTICAL OUTPUT KA2142...
Страница 14: ...14 INTEGRATED CIRCUIT DIAGRAM IC801 IC VIDEO PRE AMP KA2500B IC802 IC VIDEO MAIN AMP LM2407...
Страница 15: ...15 INTEGRATED CIRCUIT DIAGRAM IC803 IC ON SCREEN DISPLAY S5D2508A IC101 IC SWITCHING REGULATOR STR F6656...


