background image

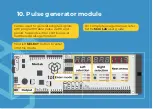
10. Pulse generator module

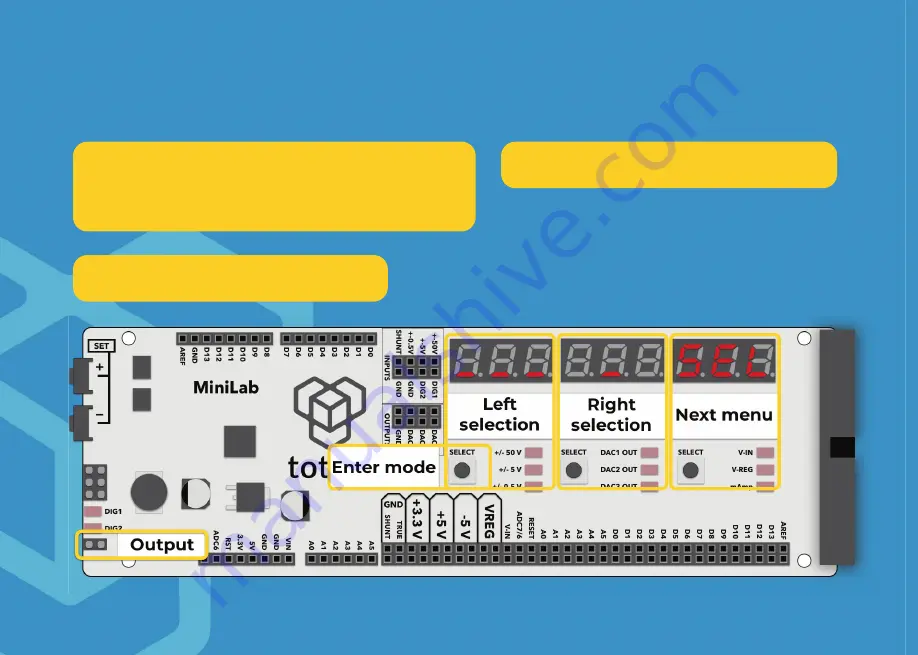
Hold left 

SELECT

 button to enter 

into this mode.

For complete usage manual, refer 
to the 

Mini Lab

 user guide.

Can be used to generate digital signals 
with programmable pulse width and 
period. Supports either continuous or 
numbered pulse generation.

Содержание Mini Lab

Страница 1: ......

Страница 2: ...twisted adjustable mirror bracket x8 Nylon nut M3 x16 Standoff M3 8mm x16 Single side filler x6 2 hole 45 simple bracket x6 Breadboard SYB 120 x2 LabBoard TotemDuino board Flat cable 30cm Power adapter Beams 40mm x2 70mm x2 140mm x2 160mm x2 180mm x5 200mm x3 Mechanics Electronics USB cable Breadboard cable kit x2 Totem Screwdriver ...

Страница 3: ...tep contains a list of parts needed it helps if you prepare them beforehand Zoomed in view gives a detailed peek into more difficult pieces Start by putting nuts in their correct positions Back of the Totem screwdriver helps to push nuts into their place Please carefully read all instruction manual prior using the product Keep this instruction for future reference they contain important informatio...

Страница 4: ...1 Beams 2 x 14cm 3 x 18cm 5 18cm 18cm 1 4 c m 14 cm 18cm 4x 2 hole simple bracket 16x Bolt M3 6mm 16x Nut M3 6x10 A 6x C bracket 5 Nut Nut Nut beam slot number ...

Страница 5: ...10 3 3 4x Bolt M3 6mm 4x Nut M3 6x10 A 2x L twisted adjustable bracket 2x L twisted adjustable mirror bracket 10 Do not tighten the bolts too much since you might need to adjust position in the next step ...

Страница 6: ...3 A 4x Bolt M3 6mm 4x Nylon Nut M3 4x Standoff M3 8mm Use these 4 holes You may need to adjust brackets positions to fit all 4 holes in the TotemDuino TotemDuino board ...

Страница 7: ...4 Beams 2 x 4cm 2 x 7cm 2 x 16cm 4cm 7cm 16cm 16cm 4cm 14x Bolt M3 6mm 14x Nut M3 6x10 A 6x 2 hole 45 simple bracket 2x 2 hole simple bracket 6x Single side filler 6 6 Hook and snap ...

Страница 8: ...5 Beams 3 x 20cm 2 x 18cm 14 14 12x Bolt M3 6mm 12x Nut M3 6x10 B 6x C bracket 18cm 18cm 20cm 20cm 20cm ...

Страница 9: ...lt M3 6mm 4x Nut M3 6x10 4x Nylon Nut M3 4x Standoff M3 8mm Do not tighten the bolts too much since you might need to adjust position in the next step 2x L twisted adjustable bracket 2x L twisted adjustable mirror bracket ...

Страница 10: ...7 B 4x Bolt M3 6mm You may need to adjust brackets positions to fit 4 holes in the LabBoard LabBoard ...

Страница 11: ... tighten the bolts too much since you might need to adjust position in the next step 8x Bolt M3 6mm 8x Nut M3 6x10 8x Nylon Nut M3 8x Standoff M3 8mm 4x L twisted adjustable bracket 4x L twisted adjustable mirror bracket ...

Страница 12: ...9 B 8x Bolt M3 12mm Adjust bracket position to fit the holes on the breadboards Breadboard SYB 120 2x ...

Страница 13: ...10 Sub assemblies A and B 10 A B 10 6x Bolt M3 6mm 6x Nut M3 6x10 ...

Страница 14: ...11 Attach the flat cable to the TotemDuino like this Loosen the bolts on the LabBoard for better cable reach FINAL STEP Attaching the flat cable Flat cable 30cm ...

Страница 15: ...d parameter TotemDuino ports compatible with Arduino shields and headers Output power connectors TotemDuino ports in a breadboard friendly arrangement Input and Output connectors Display with mode select buttons LED indicates currently measured value TotemDuino connection ...

Страница 16: ...patible with Arduino shields and headers Mini USB connector for sketch uploading into TotemDuino Power input accepts any voltage between 9V to 20V At least 1A power supply is recommended Voltage selector switches between 3 3V or 5V TotemDuino is based upon Arduino Uno platform keeping compatibility with existing IDE s and expansions while offering following advantages ...

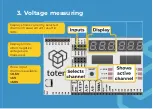
Страница 17: ...3 Voltage measuring Display shows currently selected channel measurement result in Volts Display blinks when negative voltages are measured Three input channels available 0 5V 5V 50V ...

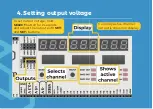
Страница 18: ...4 Setting output voltage To set output voltage hold SELECT button for 2 seconds and adjust the output with SET and SET buttons Currently active channel output is shown on display ...

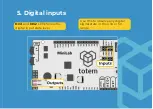
Страница 19: ...5 Digital inputs DIG1 and DIG2 LEDs follow the digital input state level Use this to observe any digital signal state in the 3 3V or 5V range ...

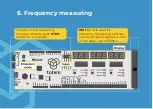
Страница 20: ... Frequency measuring To enter or exit frequency measure module push STEP button for 2 seconds DIG1 input is used for frequency measuring and can work with digital signals in 3 3V or 5V range up to 750kHz ...

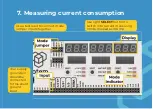
Страница 21: ...ent consumption Use a test lead to connect mode jumper inputs together Use right SELECT button to switch into current measuring mode marked as mAmp Your supply ground pin should be connected to this shunt ground input ...

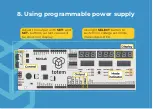
Страница 22: ...8 Using programmable power supply Use right SELECT button to switch into voltage set mode marked as V REG Adjust the output with SET and SET buttons current value will be shown on display ...

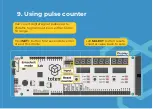
Страница 23: ...pulse counter Hold SET button for 2 seconds to enter or exit this mode Can count digital signal pulses up to 750kHz Signal must be in either 3 3V or 5V range Left SELECT button resets counter value back to zero ...

Страница 24: ...t SELECT button to enter into this mode For complete usage manual refer to the Mini Lab user guide Can be used to generate digital signals with programmable pulse width and period Supports either continuous or numbered pulse generation ...

Страница 25: ...11 Power scheme Mini Lab is designed to be powered from the included 12V 1A power adapter but a USB connection can be used for a reduced functionality mode ...

Страница 26: ...nual with usage examples code samples and example sketches Mini Lab can be expanded with a number of easily mountable add ons Side Panels giving you access to a variety of ready to use electronic modules Sensor Side Panel Audio Side Panel Input Output Side Panel ...

Страница 27: ...ere are some tips to prevent damage to the electronics Keep the electronics inside the ESD bag right until you are asked to install them Always touch the sides of the board while manipulating with it Avoid touching the chips capacitors and other parts of the electronics Before you touch the electronics use any conductive steel structure nearby to discharge yourself Be extra cautious in the rooms w...

Страница 28: ......
Отзывы: