background image

INSTALLATION

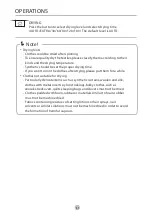
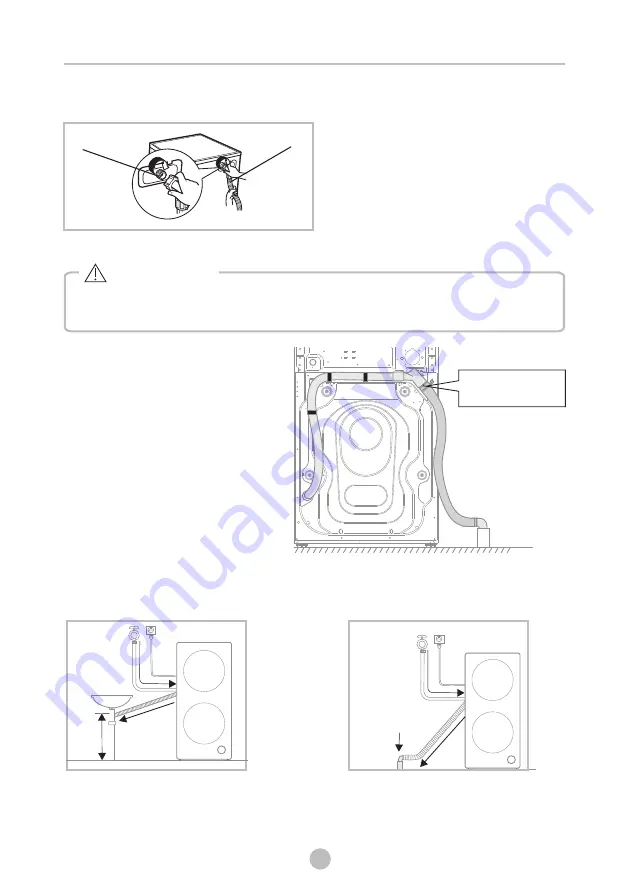
Drain Hose

There are two ways to place the end of drain hose:
1.Put it into the drain port.

2.Connect it to the branch drain pipe of 
   the trough.

 •  
 •  Position drain hose properly ,otherwise damage might result of water leakage.

Do not


kink or protract the drain hose.

Warning!

water supply hose

water Inlet valve

Connect the other end of inlet pipe to the inlet valve at the backside of product 
and fasten the pipe tightly clockwise.

50

0m

m

M

A

X

15

Installthe drain hose 
with the clamp tightly.

Firstly install the drain hose to the 
back side of machine.
Then hold the drain hose with the 
clamp.

Содержание TWD-BL160D4 Series

Страница 1: ... before use Follow the Instructions carefully Keep the operation Instructions handy for later use If the Application is sold or passed on then ensure That the new owner always receives those Operation instructions CAUTION HOT SURFACE CAUTION RISK OF FIRE CAUTION READ THE INSTRUCTIONS MODEL TWD BL160D4 Series ...

Страница 2: ...TIONS Quick Start Before Each Washing Detergent Dispenser Control Panel Option Programmes Washing Programmes Table MAINTENANCES Cleaning And Care Trouble Shooting Technical Specifications Safety Instructions Setting guide 2 10 12 16 17 18 19 20 23 26 28 31 34 35 CONTENTS 1 ...

Страница 3: ...er to avoid a hazard The new hose sets supplied with the appliance are to be used and that old hose sets should not be reused The openings must not be obstructed by a carpet This appliance is intended to be used in household and similar applications such as staff kitchen areas in shops offices and other working environments farm houses by clients in hotels motels and other residential type environ...

Страница 4: ...y cord is damaged it must be replaced by the The electric shock a potentially dangerous situation which may result in death or serious injuries unless it s avoided This combination of symbol and signal word indicates Warning This combination of symbol and signal word indicates a potentially dangerous situation which may result in slight or minor injuries Note This combination of symbol and signal ...

Страница 5: ...d into an appropriate outlet that is properly installed and grounded in accordance with all local codes and ordinances SAFETY INSTRUCTIONS Improper connection for the appliance when using not grounded outlet or when GND terminal of outlet is not suitable with GND terminal of power plug can result in risk of electric shock Check with a qualified electrician or service person if you are in doubt as ...

Страница 6: ... the machine Check the machine before every operation Children should be supervised that they do not play with the appliance The appliance can be used by children aged from 8 years Risk to children maintenance Do not use any socket with rated current less than that of appliance Never pull out power plug with wet hand Please remember to disconnect water and power supply immediately after the clothe...

Страница 7: ...encleanedin washed The appliance is for indoor use only It isn t intended to be built in using The openings must not be obstructed by a carpet The appliance shall not be installed in bath room or very wet rooms as well as in the rooms with explosive or explosive and corrosive gases The appliance with single inlet valve only can be connected to the cold water supply Plug must be accessible after in...

Страница 8: ...r can not be used as the handle during the conveyance 4 This appliance is heavy Transport with care 5 That the hands shall not be inserted into running water extracting tub Please do not close the door with excessive forces If it is found difficult to close the door please check if the clothes are put in or distributed well It is forbidden to wash carpets Operating the appliance Before washing the...

Страница 9: ...hair care products it be placed in a tumble dryer they should first be washed in hot water with extra detergent this will reduce but not eliminate the hazard Adequate ventilation has to be provided to avoid the back flow of gases into the room from appliances burning other fuels including open fires Do not dry unwashed items in the appliance Items that have been soiled with substances such as cook...

Страница 10: ... fabric softener instructions The final part of a washer dryer cycle occurs without heat cool down cycle to ensure that the items are left at a temperature that ensures that the items will not be damaged Remove all objects from pockets such as lighters and matches before use the appliance Lint must not to be allowed to accumulate around the tumble dryer WARNING Never stop a washer dryer before the...

Страница 11: ... Note INSTALLATION Transport hole plug 9 plugs Supply hose cold water Drain hose connect Owner s manual Screw optional Rat resistance panel optional Spanner assembly optional Power supply cord Upper drum Detergent dispenser Under drum Drain pump filter Under door Upper door 10 Container Extended drain hose Drain hose ...

Страница 12: ...Bolt 6 Transport Bolt 7 Transport Bolt 2 Transport Bolt 4 Transport Bolt 5 Transport Bolt 8 Transport Bolt 9 Adjustable Legs Power supply cord Drain Hose Inlet valve The product line chart is for reference only please refer to real product as standard Note 11 ...

Страница 13: ... with transport hole plugs 3 Keep the transport bolts properly for future use Installthe rat resistance panel Remove transport bolts Stability is important to prevent the product from wandering Make sure that the product should not stand on the power cord Warning You must removethetransportboltsfromthebackside before using the product You ll need the transport bolts again if you move the product s...

Страница 14: ...stick and tie a rope at the end of it Bind a heavy object at the end of the rope Hang the rope from the top cover of the machine Adjust the legs till the difference between a and b is less than 1cm 2 it s balanced from front to back Whether Put the stick at the middle of the Front cover and hang the rope in front of the machine Keep 13cm away from the rope end to the Front cover edge c Adjust the ...

Страница 15: ...pe as indicated There are two ways to connect the inlet pipe 1 Connection between ordinary tap and inlet hose To prevent leakage or water damage follow the instructions in this chapter Do not kink crush modify or sever water inlet hose 2 3 4 1 Raise Lower Lock nut foot Warning Warning Loosen clamp nut and four bolts Press the tap end tightly to the rubber ring inside the clamp and then tighten the...

Страница 16: ...damage might result of water leakage Do not kink or protract the drain hose Warning water supply hose water Inlet valve Connect the other end of inlet pipe to the inlet valve at the backside of product and fasten the pipe tightly clockwise 500mm MAX 15 Installthe drain hose with the clamp tightly Firstly install the drain hose to the back side of machine Then hold the drain hose with the clamp ...

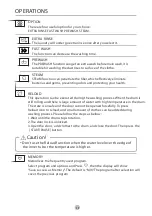
Страница 17: ...p Load Close door Plug in Add detergent Quick Start 3 After Washing 1 2 3 4 2 Washing Power On Select Drum Start up 1 2 3 4 Caution OPERATIONS Select Program and function or default 5 Add detergent or softener when the display shows note like this Detergent and Softener have run out please add Note When the machine is working you can touch the display to lighten the display screen and drum lamp Yo...

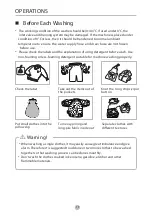
Страница 18: ... valve and draining system may be damaged If the machine is placed under condition of 0 Cor less then it should be transferred to normal ambient temperature to ensure the water supply hose and drain hose are not frozen before use Please check the labels and the explanation of using detergent before wash Use non foaming or less foaming detergent suitable for machine washing properly Take out the it...

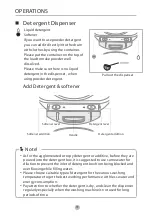
Страница 19: ...shing performance with less water and energy consumption Pay attention to whether the detergent is dry and clean the dispenser regularly especially when the washing machine is not used for long periods of time Note OPERATIONS If you want to use powder detergent you can add it directly into the drum with clothes by using the container Please put the container on the top of the load to make powder w...

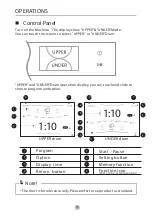
Страница 20: ... UPPER and UNDER Drum operation display you can touch and slide to 1 2 3 4 5 7 6 8 8 7 6 4 5 1 2 3 1 2 3 4 5 6 7 8 Program Option Display time Return button Start Pause Setting button Memory function Function icon Wi Fi time remote control The chart is for reference only Please refer to real product as standard Note UPPER drum 19 UNDER drum MIX 1 10 MIX 1 10 ...

Страница 21: ... programme and when the power is restarted the machine will run the previous program automatically While DELAY is set If there is any break in the power supply the machine can t start up operation automatically You should set it again Cancel the Delay function Touch the off to cancel delay function Option SPIN Press the button to change the spin speed TEMP Press the button to regulate the temperat...

Страница 22: ...ron the clothes after drying please put them for a while Clothes not suitable for drying Particularly delicate items such as synthetic curtains woolen and silk clothes with metal inserts nylon stockings bulky clothes such as anoraks bedcovers quilts sleeping bags and duvets must not be dried Clothes padded with foam rubber or materials similar to foam rubber must not be machine dried Fabrics conta...

Страница 23: ...drum The state is unsafe and the door cannot be opened forcefully To press Reload icon to reload and small amount of clothes can be added during washing process Please follow the steps as bellow 1 Wait until the drum stops rotation 2 The door lock is unlocked 3 Open the door add clothes to the drum and close the door Then press the START PAUSE button Don t use the Reload function when the water le...

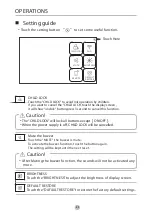
Страница 24: ...ute the buzzer Touch the MUTE the buzzer is mute To activate the buzzer function touch the button again The setting will be kept until the next reset After Muting the buzzer function the sounds will not be activated any more Caution BRIGHTNESS Touch the BRIGHTNESS to adjust the brightness of display screen DEFAULT RESTORE Touch the DAFAULT RESTORE to restore the factory default settings Setting gu...

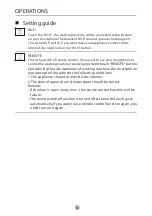
Страница 25: ...use your smartphone to control the washing machine remotely you need touch REMOTE button Considering the safe operation of washing machine the smartphone remote control shoud meet the following conditions 1 The appliance should connect to the internet 2 The door of upper drum under drum should be closed Remark If the door is open in any time the remote control function will be failure The remote c...

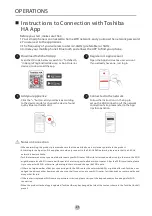
Страница 26: ... Notes on Connection When networking the product please make sure that the mobile phone is as close as possible to the product According to the App tips if the appliance could only connect to the 2 4GHz WiFi network please note that the 2 4GHz network is now available Toshiba recommends that you would better name your WiFi router SSID with letters and numbers only otherwise the SSID might become i...

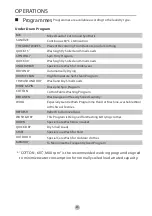
Страница 27: ...Special Care Wash for Underwear Automatically Drying High Temprature Self Clean Program Wash and Dry Small Loads Rinse and Spin Program Cotton Fabric Washing Program Wash Large and Heavily Soiled Laundry Especially Gentle Wash Programme Hand or Machine washable Wool or Richwool Textiles Refresh to Remove Odor This Program is Designed for Washing Drying clothes Special Care Wash Down Jacket Dry Sma...

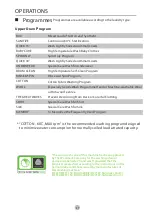
Страница 28: ...sh Lightly Soiled and Small Loads High Temperature Wash Baby Clothes Spin Only Program Wash Lightly Soiled and Small Loads Special Care Wash for Underwear High Temprature Self Clean Program Rinse and Spin Program Cotton Fabric Washing Program Especially Gentle Wash Programme Hand or Machine washable Wool or Richwool Textiles Prevent Decoloring From Dark or Colorful Clothing Special Care Wash for S...

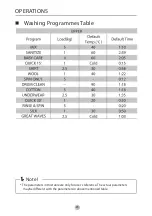
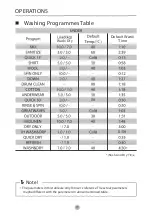
Страница 29: ...Washing Programmes Table OPERATIONS maybe different with the parameters in above mentioned table The parameters in this table are only for user s reference The actual parameters Note 28 ...

Страница 30: ... Table OPERATIONS maybe different with the parameters in above mentioned table The parameters in this table are only for user s reference The actual parameters Note 29 20 0 59 Wash Dry Default Wash Time Wash and Dry Time ...

Страница 31: ...me can be different from actual time Because actual time will be adjusted automatically by load or texture Drying time for reference The parameters in this table are only for user s reference The actual parameters maybe different with the parameters in above mentioned table In the program DRY ONLY you can touch button to change drying min min min DRY ONLY Note Cotton fabric kg Estimated time min 3...

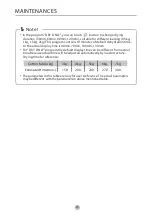
Страница 32: ...e during the drum cleaning Warning Note Note Cleaning And Care The rusts left inside the drum by the metal articles shall be removed immediately with chlorine free detergents Never use steel wool Proper maintenance on the washing machine can extend its working life The surface can be cleaned with diluted non abrasive neutral detergents when necessary If there is any water overflow use the dry clot...

Страница 33: ...ispenser Pull out the dispenser drawer with press the A Clean the dispenser drawer under water Clean inside the recess with an old toothbrush Insert the dispenser drawer 1 2 3 4 Note MAINTENANCES Step 1 2 Step 3 4 Step 1 2 Step 3 4 1 Pull out the dispenser drawer with press A as indicated in Figure1 2 Take out of detergent softener cover and wash with water 3 Clean inside the recess with a suitabl...

Страница 34: ...it for the water to cool down Unplug the machine to avoid electrical shock before maintenance Drain pump filter can filter the lints and small foreign matters from the washing Clean the filter periodically to ensure the normal operation of washing machine Be careful of the hot water Open the lower cover cap Pull out the emergency drain hose and take off the hose cap Open the upper or under filter ...

Страница 35: ...does not light Electrical power cord may not be plugged in or connection may be loose Make sure plug fits tightly in wall outlet Check the power plug is connected correct Washing machine cannot start up MAINTENANCES or the display shows other alarm codes After the check turn off and trun on the machine If the problem occurs again contact the service Note Description Reason Solution Check if the wa...

Страница 36: ...Supply 10A 0 05MPa 1MPa 220V 240V 50Hz MAINTENANCES Model Upper Drum Washing Capacity Dimension W D H mm Net Weight Rated Power 5 0kg 600 630 1350 116kg Under Drum Dry Capacity 7 0kg Dry Power 2000W 1300W w H D 10 0kg Under Drum Washing Capacity 35 TWD BL160D4 Series ...

Отзывы: