Toshiba TLP-X150 Скачать руководство пользователя страница 5

8

9

Bef

ore Using

IMPORTANT SAFETY INSTRUCTIONS (Continued)

19.  If glass components, 

including lens and lamp, 
should break, contact your 
dealer for repair service.

This product incorporates glass 
components, including a lens and 
a lamp.  
If these should break, please 
handle with care to avoid injury 
and contact your dealer for repair 
service. Avoid any broken pieces of 
glass since they may cause injury. 
In the unlikely event that the lamp 
ruptures, thoroughly clean the area 
around the projector and discard 
any edible items placed in that area 
since they may be contaminated.

20.  Servicing

Do not attempt to service this 
product yourself as opening or 
removing covers may expose you 
to dangerous voltage or other 
hazards.  Refer all servicing to 
qualified service personnel.

21.  Replacement Parts

When replacement parts are 
required, be sure the service 
technician has used replacement 
parts specified by the manufacturer 
or have the same characteristics 
as the original part.
Unauthorized substitutions may 
result in fire, electric shock, or 
other hazards.
(Only the replacement of the lamp 
should be made by users.)

22.  Safety Check

Upon completion of any service 
or repairs to this product, ask 
the service technician to perform 
safety checks to verify that the 
product is in proper operating 
condition.

23.  Do not leave thermal-

paper documents or easily 
deformed items on top 
of the unit or near the air 
exhaust for long periods of 
time.

The heat from the unit could erase 
the information on the thermal 
paper, or cause deformation or 
warping.

24.  Do not use the product 

in a closed installation 
location.

Do not place the product in a box 
or in any other closed installation 
location. Otherwise it may 
overheat, which could result in a 
risk of fire.

25.  Do not look into the laser 

light source of the remote 
control or direct the laser 
pointer toward a person or 
a mirror.

The laser beam may cause 
damage to the eyesight.

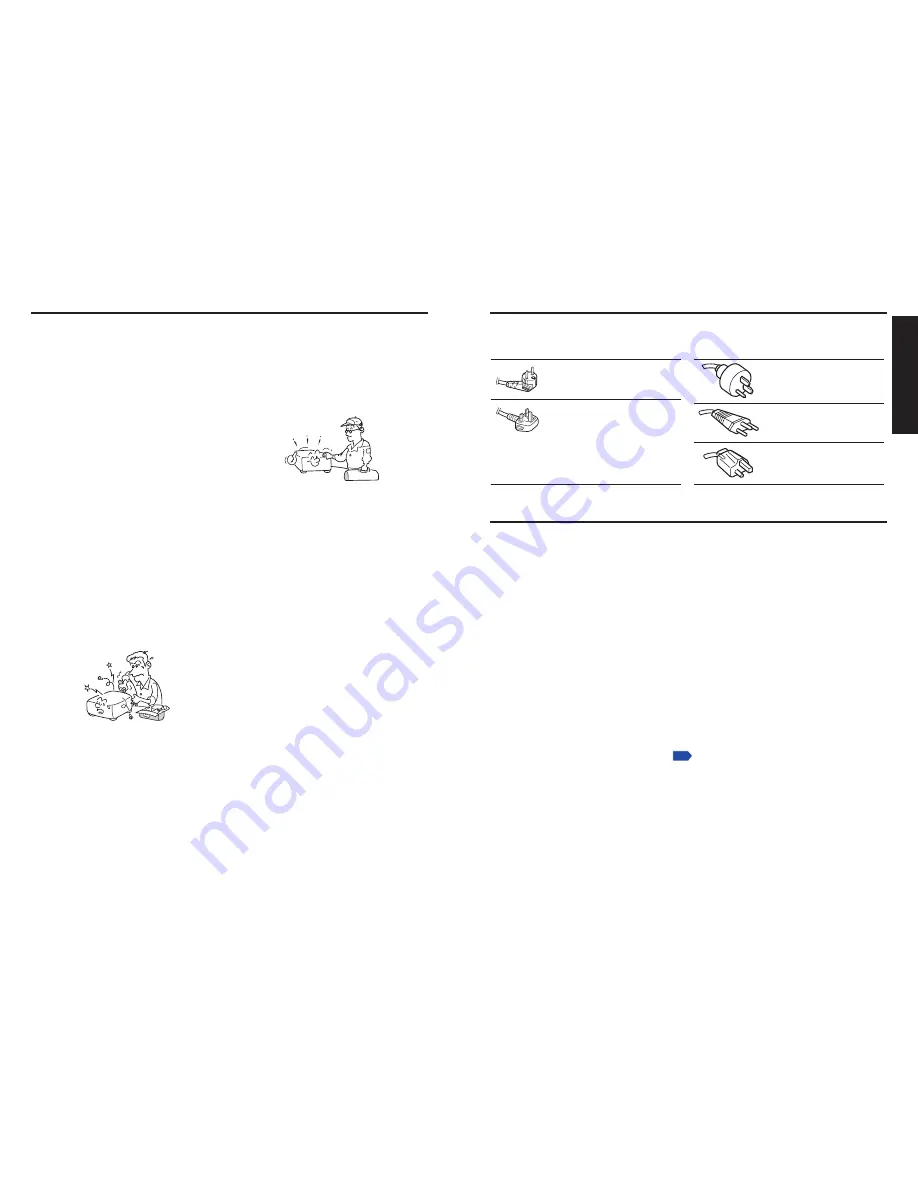
POWER SUPPLY INFORMATION

If your line voltage is 0 to 40 V, use one of the following types of cable/plug.

Plug
configuration Plug type

Australian
40 V
10 A

North American
40 V
15 A

Switzerland
40 V
6 A

Line voltage

EURO

UK

0 – 40 V

0 – 40 V

00 – 40 V

00 – 40 V

00 – 40 V

Plug
configuration

Plug type

Line voltage

Use a 5 A fuse which is approved by 
ASTA or BSI to BSI6.
Always replace the fuse cover after 
changing the fuse.

IMPORTANT PRECAUTIONS

Moisture Condensation

Never operate this unit immediately after moving it from a cold location to a warm location. 
When the unit is exposed to such a change in temperature, moisture may condense on the 
lens and the crucial internal parts. Do not use the unit for at least  hours when there is an 
extreme or sudden change in temperature to prevent the unit from possible damage.

Place and Manner of Installation

Do not place in hot locations, such as near heating equipment. Doing so could cause a 
malfunction, and shorten the life of the projector.
Avoid locations with oil or cigarette smoke. These environments will dirty the optical parts, 
shortening their lives, and darkening the screen.
Do not use this product in the upright position or tilt it up or down by more than 0° from 
level. Doing so may cause a failure or shorten the life of the product.
Using this instrument near a TV or radio may cause interference to the images or audio 
sound. If this happens, move it away from the TV or radio.
Moving the projector from a low-temperature room to a high-temperature room may cause 
condensation on the lens or internal parts. If you continue to use it in that situation, it may 
malfunction. Wait until the condensation naturally disappears.
In a high altitude location where air is thin, cooling efficiency is reduced so use the 
projector with [Fan mode] set to [High]. 

p.41

Only plug the power cord into outlets rated for use within the power cord’s specified voltage 
range. Do not overload extension cords or power strips as this can result in fire or electric shock.
Route the power cable or the connecting cable away from where people could trip over it. 
The projector may fall, which could result in serious injury and/or damage to the product.
Be sure the power cord is easily reached for unplugging in case of emergency. Do not 
place any obstacles near a wall outlet in which the cord is plugged.

Avoid Volatile Liquid

Do not use volatile liquids, such as an insect spray, near the unit.  Do not leave rubber or 
plastic products touching the unit for a long time as they will leave marks on the finish.
Do not use a chemically saturated cloth on the unit.

Содержание TLP-X150

Страница 1: ...erations Maintenance Others TLP X150 DATA PROJECTOR OWNER S MANUAL In the spaces provided below record the Model and Serial No located at the bottom of your projector Model No Serial No Retain this information for future reference ...

Страница 2: ...s device may not cause harmful interference and 2 this device must accept any interference received including interference that may cause undesired operation This equipment has been tested and found to comply with the limits for a Class B digital device pursuant to part 15 of the FCC Rules These limits are designed to provide reasonable protection against harmful interference in a residential inst...

Страница 3: ... the product on a bed sofa rug or other similar surface Do not place it in a built in installation such as a bookcase or rack unless proper ventilation is provided 5 Heat The product should be situated away from heat sources such as radiators heat registers stoves or other products including amplifiers that produce heat 6 Water and Moisture Do not use this product near water for example near a bat...

Страница 4: ... this product increase in temperature during normal use and may damage the other unit 16 Attachments Do not use attachments not recommended by the product manufacturer Use of an incompatible attachments could cause hazards or damage to the product 17 Accessories Do not place this product on an unstable cart stand tripod bracket or table The product may fall causing serious injury to a child or adu...

Страница 5: ... 40 V 00 40 V 00 40 V Plug configuration Plug type Line voltage Use a 5 A fuse which is approved by ASTA or BSI to BSI 6 Always replace the fuse cover after changing the fuse IMPORTANT PRECAUTIONS Moisture Condensation Never operate this unit immediately after moving it from a cold location to a warm location When the unit is exposed to such a change in temperature moisture may condense on the len...

Страница 6: ...ocal city office your household waste disposal service or the shop where you purchased the product OTHER INFORMATION Continued Trademarks VGA SVGA XGA SXGA and UXGA are trademarks or registered trademarks of International Business Machines Corporation Macintosh is a registered trademark of Apple Computer Inc Windows is a registered trademark of Microsoft Corporation in the U S and other countries ...

Страница 7: ...f the picture and sound temporarily Mute 31 Changing picture mode 31 Changing screen size 31 Freezing the image Freeze 32 Setting the password 32 Using the menus 34 Setup using the Setting display 34 The image adjustment menu 35 The display setting menu 37 The Default setting menu 40 Setting slideshow options 43 Displaying Information Status display 45 How to use the USB terminal 46 Projecting ima...

Страница 8: ...our computer by downloading it from the Adobe Systems website Viewing the manual Run the CD ROM and double click on Start pdf Acrobat Reader launches then select Owner s manual on the screen and click on the desired language The Owner s Manual cover and list of bookmarks appear Click on a bookmark title to view that section of the manual Click on p to view a reference page with related information...

Страница 9: ...LASER button Shows a laser pointer 9 Laser indicator Lights when laser is on 10 Mouse control button Controls a mouse pointer p 20 11 PAGE button Proceeds PowerPoint slides p 20 12 MUTE button Cuts off the picture and sound temporarily p 31 13 FREEZE button Pauses image p 32 14 Ten Key button Use when entering password Remote control button Input items Remote control button Input items 1 1 7 7 2 2...

Страница 10: ... used 3 Replace the battery cover Operating the remote control Point toward the projector s infrared remote sensor and press any button on the remote control Operating the projector from the front Approx 15 Approx 5m Note When operating the remote control from behind the projector the infrared signal is reflected on the projecting surface The operating range therefore may decrease depending on the...

Страница 11: ...SB port The remote control may fail to operate if the mouse remote control receiver is exposed to bright sunlight or fluorescent lighting In such a case change position or direction of the mouse remote control receiver and retry 2 Operating a computer Operate remote control s buttons towards the mouse remote control receiver Moving the mouse pointer Press the mouse control button in the direction ...

Страница 12: ... not supplied Monitor cable Mini D sub 15P BNC not supplied To audio output White L Red R To RGB output Computer for control To S video output To audio intput White L Red R Audio amplifier etc It is necessary to switch to MONITOR OUT by the switch p 18 S video cable not supplied Control cable not supplied The connection for COMPUTER 1 IN terminal described here is also applicable for COMPUTER 2 IN...

Страница 13: ... is displayed after the Password entry screen disappears p 33 Do not touch the lens directly with your hand If fingerprints or stains are left on the projection lens surface they may interfere with the projector s ability to project images on the screen Power cord connector Supplied Control panel Remote control Turn the power off 1 Press the ON STANDBY button When the beep sound setting is On the ...

Страница 14: ... 1 menu p 40 This owner s manual assumes that English has been selected 3 Activate the connected device Turn on and start the connected device such as a computer 4 Press the INPUT button An image of the connected equipment is projected Each time you press the INPUT button it switches to the input of the connected equipment that is outputting video signals Notes When Auto input search is set to Off...

Страница 15: ...ged the projector s internal temperature will rise shortening the lifetime of the LCD panel and causing malfunctions Clean the air filter from time to time p 60 and replace it periodically Contact the store where you purchased your projector or your local Service Station for air filter replacement Using handy features Using auto setting For computer input only This function automatically sets up t...

Страница 16: ...e mute button Press the remote control s MUTE button The picture and sound are cut off The Mute function is released by pressing the MUTE button again Notes The icon will appear while mute is in effect Operating any other function will also cancel the muting Changing picture mode The projected image mode can be selected using the NCE button Press the remote control s NCE button and select with but...

Страница 17: ...er Remote control How to set password from Off to On 1 Select Password in the Default setting 2 menu and press the or button 2 Select Password setting and press the or button 3 Select On 4 Select OK and press the button The password entry screen is displayed 5 Enter the password using the numeric keys of the remote control 6 The password setting will be set as On How to operate when password is On...

Страница 18: ...menu p 37 Display setting menu Default setting 1 menu p 40 Default setting 2 menu p 41 Slideshow setup menu p 43 Status display menu p 45 The image adjustment menu Use this menu to set or adjust image related items Items that can be set or adjusted are marked Yes and those that cannot are marked No When an item is masked it indicates that you cannot select it using the current input Item Descripti...

Страница 19: ...t Allows the projected images to shift vertically when the screen size setting is Wide display within the range of 1024 768 Lower the image Raise the image Blackboard mode When projecting on a non screen surface select a color in accordance with the projecting surface Press and switch with and Off Green Black Brown Blue Beige Language Select one of the languages below to use for displaying the men...

Страница 20: ... is On the logo is displayed at start up User logo Part of the image that is input from a computer is registered as a stationary picture and is displayed as a logo at start up and when no signal is input Logo registration How to register user logo 1 Project a picture to register 2 Select User logo in the Display setting menu and press the or button 3 Select Logo registration from the displayed men...

Страница 21: ...B memory Input select shows whether signal is input or not Input select menu Default setting 2 menu Item Description Projection mode Sets projection mode in accordance with Placement Style p 21 Standard Rear Ceiling Rear ceiling Fan mode Sets the cooling fan speed Standard High Remote control When 2 projectors are used and controlled by the remote control respectively this menu sets the code for t...

Страница 22: ...winding or fast forwarding those operations in the connected device may cause the Caption or Text to remain on the screen for a while Closed Caption is available for Video and S Video input images Setting slideshow options Slideshow is the function to display the JPEG image files stored in a USB memory one after another at fixed time intervals When switching from one image to the next Slideshow ca...

Страница 23: ... the folder is not displayed Off Displays an icon without displaying thumbnail preview Unplug device Run when unplugging a USB memory a USB memory card reader writer or a digital camera and the like Displaying Information Status display This displays information about the input signal lamp use time etc Yes displayed No not displayed Item Description Computer Y PB PR Video S video USB memory Input ...

Страница 24: ...n or data corruption USB memories This projector can read JPEG files stored in a USB memory and display them on the screen This allows you to give presentations without a computer create an advertising screen board using the slideshow function and more The projector cannot reproduce animation effects such as those produced by Microsoft PowerPoint The USB terminal The USB terminal of the projector ...

Страница 25: ... projector starts loading data from the USB memory device and displays a thumbnail list on the screen 2 Searching for a target file Use the buttons to move the orange frame over the desired file or folder If there are multiple pages of thumbnails click the button on the bottom row to go to the next page and the button on the top row to go to the previous page To open a folder move the orange frame...

Страница 26: ... the slideshow operation guide When you operate the projector using the USB memory card reader writer up to 4 media types are supported Installing the JPEG Conversion Tool To convert JPEG and other files into a format that can be displayed as a slide show using a USB memory device first install the JPEG Conversion Tool onto your computer The JPEG Conversion Tool can be found on the CD ROM that shi...

Страница 27: ... selection dialog box appears Select a desired resolution and click the OK button c A confirmation dialog box opens Click Yes The computer converts the file When it finishes a message appears informing you that a JPEG file has been created 1 5 7 a 1 5 7 a b b a 4 6 b 6 c 6 a 7 c 7 c 7 b 7 b Converting files created with Microsoft PowerPoint This process provides presentations without using a compu...

Страница 28: ...revious slide click the button 9 c 9 c 9 b 9 b Creating a screen capture and converting it into a JPEG file This function saves the current computer screen as a JPEG file 1 In the Conversion Method field select Creating screen capture 2 In the File settings field click the Browse button for File name after conversion The Save As dialog box appears 3 In the Save As dialog box a Specify the location...

Страница 29: ...nt of lamp burst unplug the product from the wall outlet leave and completely ventilate the room Then thoroughly clean the area around the projector and discard any edible items placed in that area as they may be contaminated If the lamp bursts consult a doctor if glass dust or mercury gas gets into your eyes or is inhaled A lamp is a consumable item If used for extended periods images will appear...

Страница 30: ...lamp use Use it as a rough estimate or guide for lamp life p 45 Please replace the lamp after 2000 hours of use if Lamp power in the Default setting 1 menu is set to Standard or after 3000 hours of use if Lamp power in the Default setting 1 menu is set to Low p 40 There may be cases where the lamp stops working before the above mentioned period expires or before the replacement message is displaye...

Страница 31: ...culation inside the projector is affected and the internal temperature will rise causing the projector to stop working or malfunction Be sure the air filter is inserted all the way into the slot Leaving gaps will allow dust and dirt to get inside the projector again If you wash the air filer with water make sure you dry it thoroughly before replacing it If the air filter is torn consult with your ...

Страница 32: ... Red lit Red lit Red lit Orange flashing Orange lit or Orange flashing If you think something is wrong check the followings before contacting customer service Please see Trouble indications p 62 as well If This Happens Check No power Is the power cord plugged in Is it connected to the projector Is the outer lamp cover attached properly p 58 Power goes out during use Is the ambient temperature high...

Страница 33: ...cluding MG alloy Conditions for usage environment Temp 5 C to 35 C relative humidity 30 to 70 LCD Panel Display method 3 panel transmission Panel size 0 63 type Drive system TFT active matrix Picture elements 786 432 pixels 1024 H 768 V Lens F 1 7 1 87 f 19 2 23 00 mm Lamp High pressure mercury lamp 180 W Projection screen size 30 300 inches Projection distance 0 89 m 10 93 m Speaker 1 W Mono Conn...

Страница 34: ... whose resolution exceeds the native resolution 1024 768 dots will be compressed For this reason some information may be lost and or image quality may be affected List of supported signals Component signals Signal format fh kHz fv Hz 480i 525i 60Hz 15 73 59 94 480p 525p 60Hz 31 47 59 94 576i 625i 50Hz 15 63 50 00 576p 625p 50Hz 31 25 50 00 720p 750p 60Hz 45 00 60 00 720p 750p 50Hz 37 50 50 00 1080...

Страница 35: ... 3 Byte ETX 03 h Only 1 command valid per communication 3 Data format For input commands only ASCII compliant all uppercase alphanumeric characters supported 4 Replies Acknowledge ACK 06 h CR 0 Dh Data Normally ended ACK 06 h ESC 1 Bh Aborted No acknowledge NAK 15 h If commands are to be sent consecutively wait for the response from the projector before sending the next command Main Commands Item ...

Отзывы: