15
Preparations
14
(1)
(6)
(2)
(3)
(4)
(5)
COMPUTER
( Y/PB/PR )
S-VIDEO
VIDEO
VIDEO
AUDIO
MONITOR
CONTROL
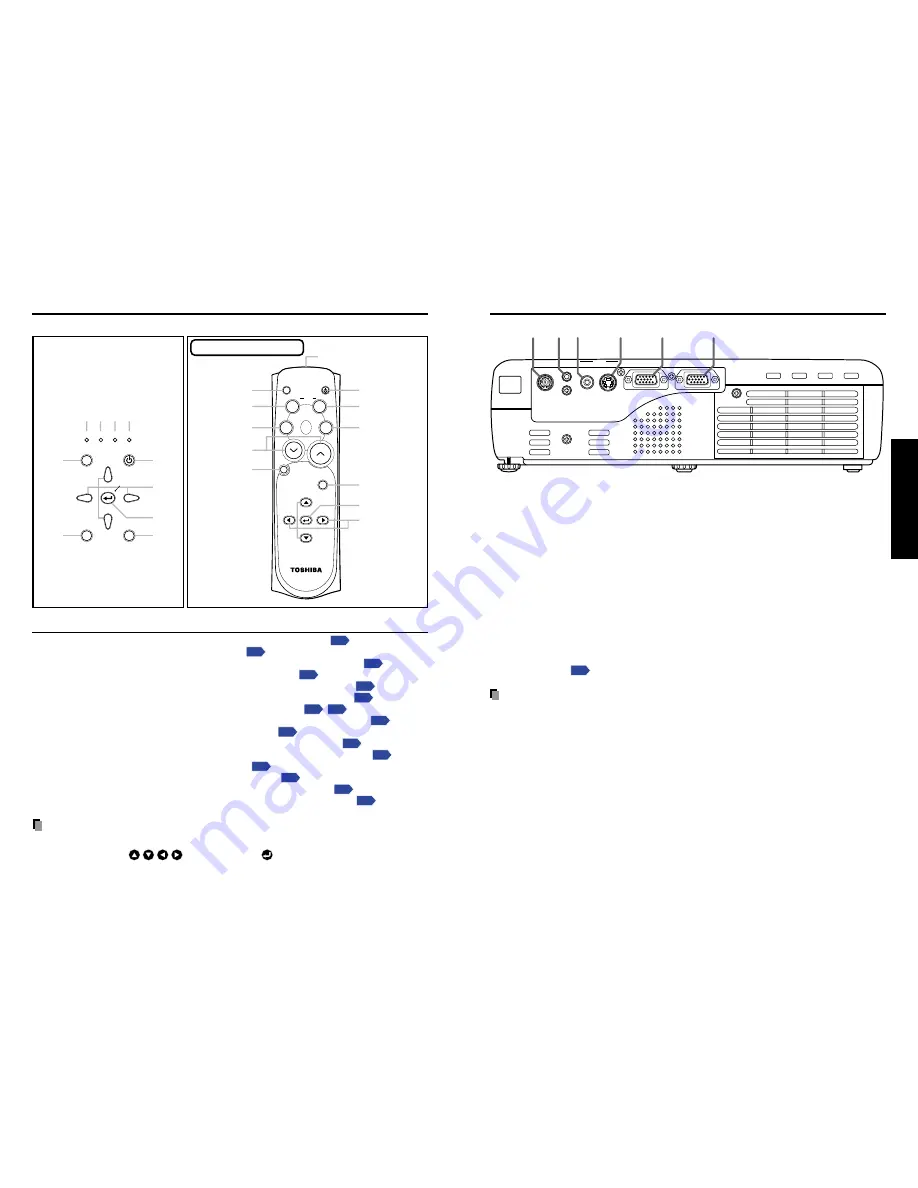
(1) COMPUTER terminal
Input RGB signal from a computer or other source, or a component video signal (Y/P
B
/
P
R
) from video equipment.
(2) MONITOR terminal
Connect to a computer display, etc.
(3) S-VIDEO terminal
Input S video signals from video equipment.
(4) VIDEO terminal
Input video signals from video equipment.
(5) AUDIO terminal
Input audio signals from a computer or video equipment.
(6) CONTROL terminal
When operating the projector via a computer, connect this to the controlling computer’s
RS-232C port.
p.38
Note
• Although this owner’s manual abbreviates component video signals as Y/P
B
/P
R
, the
product also supports signals from video equipment marked “Y/C
B
/C
R
.”
Names of the connection terminals
Names of each part on the control panel and remote control
Name
: Main Function
(1) ON/STANDBY button
: Turns the power on/off (standby)
p.19
(2) INPUT button
: Selects input
p.21
(3) AUTO KEYSTONE button
: Adjusts keystone (trapezoidal distortion)
p.24
(4) AUTO SET button
: Sets up image and mode
p.23
(5) MENU button
: Displays menus and makes selections
p.27
(6) Selection button
: Menu selections and adjustments, etc.
p.27
(7) FAN indicator
: Displays cooling fan mode
p.20
p.33
(8) TEMP indicator
: Lights when internal temperature too high
p.33
(9) LAMP indicator
: Displays lamp mode
p.20
(10) ON indicator
: Displays whether power is on or off
p.19
(11) MUTE button
: Cuts off the picture and sound temporarily
p.24
(12) FREEZE button
: Pauses image
p.25
(13) RESIZE button
: Enlarges picture size
p.25
(14) OFF button
: Turns off enlarged picture display
p.25
(15) CALL button
: Displays the information on the screen
p.26
Control panel
FAN TEMP LAMP
ON
VOL.
+
VOL.
-
(1)
(2)
(3)
(4)
(5)
(6)
(7) (8) (9) (10)
ON / STANDBY
INPUT
MENU
AUTO SET
AUTO
KEYSTONE
INPUT
ON/
STANDBY
RESIZE
OFF
CALL
AUTO
MUTE
RESIZE
FREEZE
SET
KEYSTONE
MENU
CT-90140
VOL.
+
VOL.
-
(1)
(2)
(3)
(4)
(5)
(6)
(12)
(13)
(14)
(11)
(15)
Remote control transmitter
Remote Control
Notes
• For the remainder of this manual, buttons are referred to as follows:
Selection button
⇒
; MENU button
⇒
• For further information of the mouse remote control supplied with the TLP-T50M, see the
Owner’s Manual of the Mouse Remote Control.
CLASS 1 LED PRODUCT


