


34
HM117 (E/F) Web 213:276
Chapter 5: Setting up your TV
3
Press
BbC
c
to highlight
No Label
and press
T
.
4
Repeat steps 2 and 3 for other channels.
5
To save your settings, highlight
Done
and press
T
.
If the desired channel label is not available from the list of
presets, you can create a custom label.
To create and assign a custom label:
1
Open the
Channel Labeling
window.
2
Press
<
or
,
to select a channel you want to label.
3
Press
Bb c
to highlight
Custom
and press
T
.
The software keyboard will appear.
4
Repeatedly press the corresponding key on the remote
control to highlight the desired character on the on-screen
software keyboard.
5
The highlighted character is entered after you either press
a different key, press
c
key, or after a two-second pause.
6
Repeat steps 4 and 5 until you have entered all desired
text.
7
When finished, press
T
.
8
(New labels will be added to the list in alphabetical order
and marked with an icon to indicate that they are
custom.) Highlight the new custom label and press
T
to
assign. Assigned channel labels will be displayed in the
banner,
Channel Add/Delete
window, and
Channels
Block
window.
To delete the custom label:
1
Open the
Channel Labeling
window.
2
Highlight the label to be deleted and press
=
.
3
Highlight
Yes
from the deletion confirmation window
and press
T
.
4
Highlight
Done
and press
T
to save changes, and go
back to the
Channel Labeling
window.
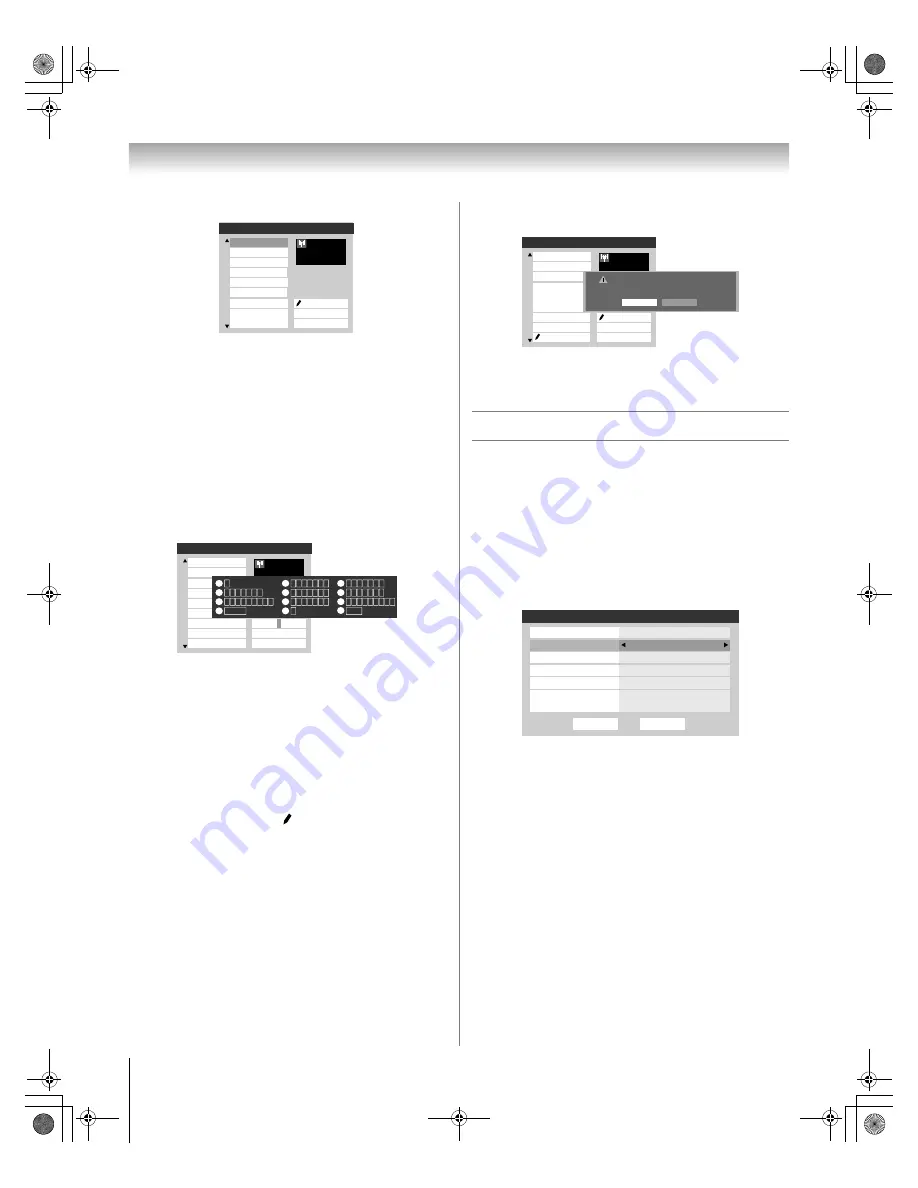
Setting the HDMI
™
audio mode
To set the HDMI audio mode:
1
Press
Y
and open the
Audio
menu.
2
Highlight
Audio Setup
and press
T
.
3
Press
B
or
b
to select
HDMI 1 Audio
and then press
C
or
c
to select the HDMI 1 audio mode (
Auto
,
Digital
,
or
Analog
). (
Auto
is the recommended mode.) See
“Connecting an HDMI or DVI device to the HDMI input”
(
-
page 19).
Note:
Because the PC and HDMI-1 inputs share the same set
of analog audio inputs, the
PC Audio
menu setting influences
the
HDMI 1 Audio
menu setting. If
PC Audio
is set to “
No
,” the
HDMI 1 Audio
setting changes to “
Auto
.” If
PC Audio
is set to
“
Yes
,” the
HDMI 1 Audio
setting is set to “
Digital
” and is
grayed out in the menu. (Also see item 3 on page 12 and
“Setting the PC Audio” on page 54.)
AMAXW
AMC
ANIMAL
Custom
Clear All
Done
AMAX
ABCHD
ABCFAM
ABC
{No Label}
24
Press CH UP/DOWN to
change channels.
Channel Labeling
A&E
ANT
AMAXW
AMC
ANIMAL
Clear All
Done
AMAX
ABCHD
ABCFAM
ABC
{No Label}
24
Press CH UP/DOWN to
change channels.
Channel Labeling
A&E
A&E
ANT
CH RTN
Edit
Cancel
Send
EXIT
Exit
1
4
7
100
Backspace
1
A B C a b c 2
J K L j k l 5
T U V t u v 8
P Q R S p q r s 7
0
G H I g h i 4
Space
W X Y Z w x y z 9
M N O m n o 6
_
2
5
8
3
6
9
INPUT
D E F d e f 3
0
TNT
TNTHD
TOCDEFG
Custom
Clear All
Done
TMCw
TMCXw
TMCX
TMC
TIMES
24
Press CH UP/DOWN to
change channels.
Channel Labeling
TLC
ANT
Delete the selected custom label?
Yes
No
Done
Audio Setup
Language
Reset
MTS
Stereo
English
Dolby Digital
Optical Output Format
HDMI 1 Audio
PC Audio
No
Auto
Dynamic Range Control
Compressed
Dolby Digital
57HM117_EN.book Page 34 Friday, March 23, 2007 9:48 AM


