background image

Installation

12

Installation

GB

TOSHIBA TF 471

2 x

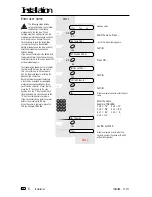
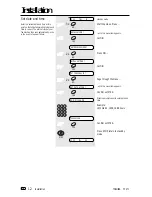
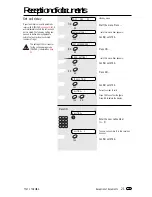
Set date and time

Enter the current date and time at this
point so that all details relating to date and
time is correct. The internal clock of your
fax machine then runs automatically - even
in the event of a power failure.

15.03       TEL       00

standby  mode

Start the menu. Press ...

...until this menu item appears.

Confirm.

Press NO ...

Confirm.

Page through the menu ...

...until this menu item appears.

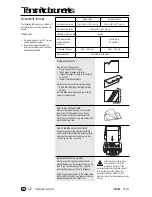
Confirm with YES.

Machine prompts user to enter date and
time

Example:
15th March, 1998, 19:56 hours

Confirm with YES.

Press STOP, return to standby
mode

3 x

INSTALLATION ? 

INITIAL SETTING ? 

SET TERMINAL ID ? 

2 x

SET DATE & TIME ? 

DD-MM-YY HH:MM 

1503981956

15.03       TEL       00

NO

NO

NO

STOP

YES

YES

YES

YES

SET RECEIVE MODE ?

Содержание TF 471

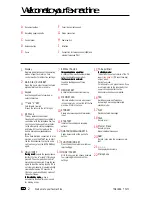
Страница 1: ...1 A B C F E D H I J G 20 19 18 1 2 15 3 7 5 6 14 13 9 8 21 22 11 17 10 16 1 4 7 5 8 0 6 9 2 3 MEMORY 4 12 ...

Страница 2: ... speakerphone operation For speakerphone operation For speakerphone operation Activates the previous number dialled under speakerphone operation If a fax number is entered If a fax number is entered If a fax number is entered If a fax number is entered If a fax number is entered Inserts a dialling pause of three seconds MEMORYKEY Activates transmission from memory MEMORY LED Indicate whether there...

Страница 3: ...ed transmission 34 Switch off error correction 35 Adjust basic contrast 36 Stop transmission 36 Store Numbers Alphabet dial memory 37 One touch dial keys 39 Telephony without a Telephone The speakerphone facility 41 Muting 41 Telephone Answering Device TAD Overview 42 Recording Playing and Deleting The Out Going Message 43 Activate deactivate the Telephone Answering Device 44 Record played back cl...

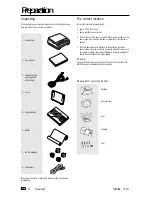
Страница 4: ...t with high power consumption such as a photocopier or equipment which generates electrical noise such as a radio computer radio transmitting and receiving equipment should be connected to this mains supply AC power You will find the mains connection on the back of the machine The ON OFF switch is situated above the mains jack Please protect your machine from vibration direct sunlight dust humidit...

Страница 5: ...n the right Connection of a telephone Liability in case of wrong connection by the user is excluded In the UK connection of an external telephone or cordless telephone should be made at the socket on the break in adaptor The break in adaptor is the small white box found at the end of the telephone cable supplied with the TF471 in the UK ...

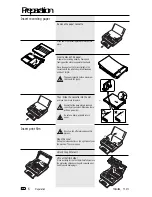
Страница 6: ...ssette holds a maximum 160 sheets 80 g qm Then Slide the cassette into the slot until you hear it lock into place Ensure that the base plate is pressed correctly into possition Otherwise there will be a paper jam Do not use damp wrinkeld or torn paper Insert print film Do not switch off machine during this process Open the cover Pull up the release button on the right side of your fax machine The ...

Страница 7: ...rive hubs with gear teeth must be located on this side The full roll must be located to the rear See the marking mm on the holder The empty roll must be located at the front Replace the film holder in the fax machine Ensure that the marking mm on the holder is pointing to the rear see diagram Close the printer unit Close the cover 15 03 TEL 00 YES INK FILM CHANGED Confirm with YES The ink film cou...

Страница 8: ...your time therefore to read the information concerning the name identification dialling procedure and line type and only start the procedure when you have finished reading If you have not entered all the data within the permitted time the details will not be completely stored In this case repeat the entire procedure again The transmission header not only contains the terminal ID but also the user ...

Страница 9: ...your fax machine can be reached The number should be entered in the international format Example 44 1931 12345678 Fax number Space to improve legibilitly Area code without initial 0 Country code here Germany Plus symbol for the international form Character Key to be pressed Key Hyphen REDIAL PAUSE key Enter the actual figures via the dial keypad as usual Setting dialling method There are two diall...

Страница 10: ...he connection circuit is interrupted briefly When the method of obtaining a public line has been entered you must always press the key before the actual number when you dial your fax partner This is also applicable for saving the fax numbers see page 38 EXCHANGE PSTN Current line type is displayed Press NO until the desired menu item appears Confirm with YES Next menu item is displayed Press STOP ...

Страница 11: ...L 00 SET DATE TIME SET DATE TIME SET DATE TIME YES YES YES YES STOP STOP STOP Confirm with YES Machine prompts user to enter the code Enter the digit s for obtaining public line max 3 digits Confirm with YES Next menu item is displayed Press STOP return to standby mode Confirm with YES Next menu item is displayed Press STOP return to standby mode Confirm with YES Next menu item is displayed Press ...

Страница 12: ...er failure 15 03 TEL 00 standby mode Start the menu Press until this menu item appears Confirm Press NO Confirm Page through the menu until this menu item appears Confirm with YES Machine prompts user to enter date and time Example 15th March 1998 19 56 hours Confirm with YES Press STOP return to standby mode 3 x INSTALLATION INITIAL SETTING SET TERMINAL ID 2 x SET DATE TIME DD MM YY HH MM 1503981...

Страница 13: ...uncement text in the TEL FAX setting Confirm with YES first available language is displayed Press NO ENGLISH ITALIANO DEUTSCH until the desired menu item appears Confirm with YES standby mode 7 x LANGUAGE SELECT LANGUAGE Set language Your fax machine is set to English Please carry out the following menu steps if you wish to use another language for the menu and the list prints ENGLISH 15 03 TEL 00...

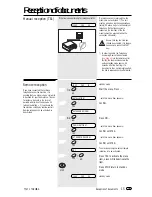
Страница 14: ...ore the preset receiving mode If the line is reserved exclusively for fax operation The fax machine switches over to reception as soon as the line rings see page 21 The fax machine is always activated even if the call is initiated by a voice partner Automatic reception FAX INSTALLATION 3 x 15 03 TEL 00 RECEIVE MODE TEL RECEIVE MODE FAX 15 03 FAX 00 standby mode Start the menu Press until this menu...

Страница 15: ...cument is then not remotely polled the line is released shortly afterwards Manual reception TEL INSTALLATION 4 x 3 x ON SET REMOTE RECEIVE standby mode Start the menu Press until this menu item appears Confirm Press NO until this menu item appears Confirm with YES until this menu item appears Confirm with YES The machine prompts whether remote reception is to be activated Press YES to activate the...

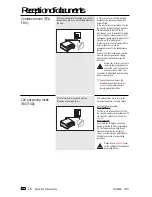
Страница 16: ... soon as the announcement is made the connection is established and the calling party incurs charges During the announcement the Telephone Answering Device see page 42 can be activated via a remote polling transmitter If the line is defined for telephone as well as for fax operation and if you are primarily situated in the room This mode enables you to receive fax documents and also to handle call...

Страница 17: ...of your fax machine The transmitted code of the transmitter is compared against the contents of your speed dialling memory If no number is stored every transmission is rejected Only the final five digits are compared standby mode Start the menu Press until this menu item appears Confirm Press NO until this menu item appears Confirm with YES Press NO until this menu item appears Confirm with YES Th...

Страница 18: ...m with YES Press NO Confirm with YES Confirm with YES Entry field for polling time Enter the time Example 4 25 Confirm with YES Activate TOSHIBA password Press NO Entry field for fax number Enter the fax number of the other station Press START key Delayed polling job is stored 15 03 FAX 00 5 x POLLING POLLING RESERVE POLLING RECEIVE DELAYED POLL HH MM _ HH MM 04 25 SECURITY CODE TEL _ 123456789 15...

Страница 19: ... 3 x 15 03 FAX 00 15 03 FAX 00 ON NO YES NO YES YES YES YES YES YES 3 x NO NO NO NO NO COMM SETTING COMM SETTING Reception reduction Your fax machine uses A4 paper For technical reasons aspects mean that the entire length of this page cannot be used For this reason the fax machine reduces the length of the incoming document This means that the received image may be slightly compressed In general t...

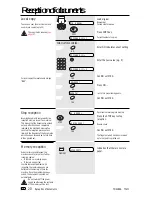
Страница 20: ...rinted out Stop reception Incoming documents are received via a reception memory in your fax machine This means that the document is printed out only after it has been completely received in the machine s memory You can stop the reception process at any time and the fragment of the documents which has been received up to that time is then printed out Memory reception Under certain circumstances th...

Страница 21: ...cable before the fax machine is activated number of rings The setting of the call counter for the call answering mode FAX TAD is detailed on page 53 standby mode Start the menu Press until this menu item appears Confirm with YES Press NO until this menu item appears Confirm with YES Press NO Confirm with YES Current number of calls Press YES to confirm the figure Press NO to delete the display Ent...

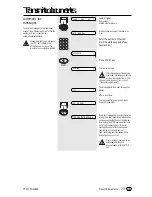
Страница 22: ...fed at one time How to load documents correctly Remove any paper clips staples and similar objects before transmitting the document Now place your documents on the document tray up to 20 at one time as shown Automatic document feeder Most important Only the document sheets placed facedown on the document tray can be read If you can still read your text you ll be sending empty pages or the back of ...

Страница 23: ...f your fax machine Press START key The line is checked If this message continues to be displayed this indicates that the access line is defective or that the line type is incorrect see page 65 Transmission problems The dialling digits then pass through the display after a brief time Your document is now scanned line by line and transmitted If this text is displayed in conjunction with a long tone ...

Страница 24: ...art alphabet dialling Enter the alphabet dialling number of your partner Press the START key The name which is stored under the alphabet dialling number is briefly displayed or the stored fax number is displayed The line is checked If this message continues to be displayed this indicates that the access line is defective or that the line type is incorrect see page 65 Transmission problems The dial...

Страница 25: ...nt is pulled in by 2 cm Press the one touch dialling key The name which is stored under the one touch dialling key is briefly displayed or the stored fax number is displayed The line is checked If this message continues to be displayed this indicates that the access line is defective or that the line type is incorrect see page 65 Transmission problems The dialling digits then run through the displ...

Страница 26: ...mpatible with the listening in function see page 41 In this way you can listen to any messages etc between the numbers 15 03 FAX 00 STD NORMAL TOSHIBA 123 Load original Remember Printed side face down Wait until the document is pulled in by 2 cm Press the one touch dialling key The name which is stored under the one touch dialling key is briefly displayed or the stored fax number is displayed The ...

Страница 27: ...th telephone If you have agreed the transmission with your fax partner or if you hear the fax tone at the other end Press START key Transmission commences You can replace the handset as the fax machine has now assumed control If this message is displayed in conjunction with a long tone the transmission procedure has not been successful Delete the display by pressing the STOP key and attempt to sen...

Страница 28: ...corresponding letter here A is displayed followed by the alphabet dialling memory position where it is stored Press the key 2 to display the next letter here B which is stored under this key Use the keys and to select the desired fax partner with identical starting letters Press the START key The line is checked If this message continues to be displayed this indicates that the access line is defec...

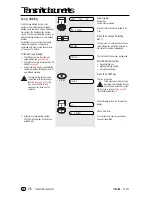
Страница 29: ...ssion time and also higher costs as all lines are scanned Last number redial There may be various reasons why your fax document cannot be transmitted please refer to pages 64 et seq A possible reason is that the fax machine at the other end is busy In this case it is advisable to call the other fax party again at a later date The dialling procedure is automatically repeated every three minutes for...

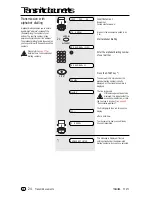
Страница 30: ...es you to overcome the problems involved with different time zones or will enable you to transmit documents at off peak rates When you have set the time delayed transmission is applicable for the next message which you enter In this way you cannot only send delayed fax messages you can also send delayed broadcast messages or use the delayed polling facility You can choose between two versions of d...

Страница 31: ...see pages 24 25 Example Dial using keypad Enter number Press START key The document is read into the memory In the display you can see the percentage utilisation of memory The memory lamp indicates that the memory is now full It cannot be used for any other purpose If the capacity of the memory is not sufficient you should reduce the number of pages which belong to the transmission In this case br...

Страница 32: ...Enter number Confirm with YES Enter further numbers or Press START key The document is read into the memory In the display you can see the percentage utilisation of memory If the capacity of the memory is not sufficient you should reduce the number of pages which belong to the transmission In this case break down the transmission into several parts The choice of resolution see page 29 also has an ...

Страница 33: ... code as polling protection A document is only polled if this code is identical in both fax machines Reservation via document tray Load original Remember Printed side face down Wait until the document is pulled in by 2 cm Start the menu Press until this menu item appears Confirm with YES Confirm with YES Aktivate TOSHIBA security code TOSHIBA password activated Confirm with YES Entry field for fou...

Страница 34: ... the fax machine prompts whether the operator wishes to change to the other status Confirm with YES The following can only be sent to a fax partner whose code is identical to the dialled fax number Protected transmission The transmission of documents is restricted Documents can only be faxed to fax machines whose code is identical to the dialled fax number This means that you can fax your document...

Страница 35: ...igh costs with oversees calls For this reason the error correction facility can be temporarily disabled Load original Remember Printed side face down Wait until document is pulled in by 2 cm Start the menu Press until this menu item appears Confirm with YES Press NO until this menu item appears Confirm with YES Depending on the setting the fax machine prompts whether the operator wishes to change ...

Страница 36: ...ny time by pressing the STOP key The receiver then receives that fragment of your document which had been sent up to the point of interruption Adjust basic contrast Some characters cannot be transmitted where the printing on documents is weak or where colour character sets are used For this case you should set contrast to DARKER On the other hand there are documents which contain characters in col...

Страница 37: ...5 03 FAX 00 STOP YES YES YES YES NO NO Alphabet dial memory The alphabet dial facility enables you to enter a two digit address instead of the frequently long fax number of your partner The real fax number is stored under this address With frequently used fax numbers the alphabet dial facility enables you to save time 50 alphabet dial memories are available and the name as well as the number of yo...

Страница 38: ...leted you can enter a new entry Press Y Y Y Y Yes es es es es to confirm new entry The current name is displayed Press YES key to skip The displayed entry is not changed the next entry is displayed Press NO key to delete The current entry is deleted you can enter a new entry Press Y Y Y Y Yes es es es es to confirm new entry Facility for entering further alphabet dialling numbers or Press STOP ret...

Страница 39: ...rm with YES Entry field for the name If you do not wish to enter a name press YES to skip this point Confirm with YES Enter the name Example TOSHIBA 1 X 8 T 3 X 4 I 3 X 6 O 2 X 2 B 4 X 7 S 1 X 2 A 2 X 4 H Confirm with YES Option of using further one touch dialling keys or Press STOP return to standby mode 15 03 FAX 00 15 03 FAX 00 STOP YES YES YES YES NO One touch dial keys The one touch dialling ...

Страница 40: ... NO key to delete The current entry is deleted you can enter a new entry Press Y Y Y Y Yes es es es es to confirm new entry The current name is displayed Press YES key to skip The displayed entry is unchanged the next entry is displayed Press NO key to delete The current entry is deleted you can enter a new entry Press YES YES YES YES YES to confirm new entry Facility for entering further speed di...

Страница 41: ...e speakerphone facility Do not move too far away from the fax machine during a call Avoid background noise traffic noise machine noise music Avoid speaking at the same time as the other party Speakerphone duringtelephony standby mode Press speakerphone key Enter the telephone number Dial Conduct telephone call Terminate telephone call Speakerphone pickuptelephone call standby mode Incoming call Pr...

Страница 42: ...e deactivate telephone answering device Start remote polling Terminate remote polling Operation OGM YES MEMO YES TALK YES PLAY MEMO YES TALK YES OGM YES FF during operation REW during operation STOP 8 x NO ERASE YES during operation MEMO NO YES TALK NO YES OGM NO YES TAD Remote polling 1 0 1 1 3 during operation 2 during operation 4 during operation 6 0 repeat sequence after confirmation tone 6 0 ...

Страница 43: ...eak after the signal tone Where possible avoid background noise when recording the announcement text particularly music as this can result in malfunctioning of the telephone answering device If the error message MESSAGE FULL is displayed when you are recording the announcement text there is not enough memory available In this case clear the message memory see page 44 The telephone answering device...

Страница 44: ...lume can be adjusted via keys Press TAD key again confirm key is no longer lit Telephone answering device is deactivated Preset receive mode is displayed Record played back clear messages Recording the messages When the signal is generated the caller is able to record a message within a period of 30 seconds A total recording capacity of 15 minutes is available or 30 different messages can be store...

Страница 45: ...n received Press PLAY key The first message MSG 01 is played back Use the keys to regulate the playback volume In the absence of further input the next message is played back etc Use the STOP key to stop standby mode Repeat skip fast forward rewind message You can repeat the message you have just played back as often as you wish In addition use rewind to play back any message again It is also poss...

Страница 46: ...wering device the current message counter is set to 0 Telephone answering device on display current messages Press TAD key The LED goes out Number of current messages 3 is added to the existing messages 9 All messages can be played back with the playback key Press the TAD key again The key lights up Telephone answering device on current message counter is set to 0 Clearing individual messages Whil...

Страница 47: ...ave been recorded Press MEMO key Record a memo Confirm with Yes End recording Standby display the memo has been placed at the start of the message memory Play back memo Two options are available 1 The memo is played back when you play back messages see page 45 as it is virtually recorded as the first message All criteria which are applicable for messages playback and delete are also available when...

Страница 48: ...nutes 3 minutes 3 minutes This function is not fully available depending on the particular version for a specific country Only one call can be recorded at one time Recordcall Off hook Press TALK key Confirm with YES Call is recorded max 3 minutes Press TALK key Recording terminated call has been recorded or Replace handset Recording ended call has been recorded Stoprecording Call is recorded Press...

Страница 49: ...ppears Confirm with YES Prompt for programming the access code Enter the 4 digit number code Example 1234 Confirm with YES Press STOP to return standby mode Carry out remote polling Action Action Action Action Action Call Prepare for remote polling Enter security code Carry out remote polling End remote polling Operator Operator Operator Operator Operator Call the fax machine from any telephone An...

Страница 50: ...essage is limited to 30 seconds You can extend this period to 60 or 120 seconds Please note that if you extend the recording time the number of possible messages may be reduced Changerecordingtime standby mode Start the menu Press until this menu item appears Confirm with YES Press NO until this menu item appears confirm Page through the menu until this menu item appears Confirm with YES Preset re...

Страница 51: ... loudspeaker If you wish to talk to the caller simply lift the handset of the connected telephone The loudspeaker is then automatically de activated only for variant 2 see page 5 The speakerphone facility cannot be activated while the operator is screening a call Screencallduringrecording standby mode Start the menu Press until this menu item appears Confirm with YES Press NO until this menu item ...

Страница 52: ...t the second ring if messages are present On the other hand if there are no messages on the telephone answering device the connection is only established at the fifth ring factory setting This prevents costs from being incurred as a result of unsuccessful polling attempts The function is only effective if the call delay see page 53 has been set to at least 4 times Activate deactivate message displ...

Страница 53: ... the TAD mode it connects to the line after the fifth ring factory setting This delay enables you for instance to collect the call via the external telephone when you are present You can set the call delay to 1 9 rings via the menu Programaccesscode standby mode Start the menu Press until this menu item appears Confirm with YES Press NO until this menu item appears confirm Confirm with YES press N...

Страница 54: ... The multitransmission report After a broadcast transmission group dialling the machine prints out a list of fax partners who have been reached or who have not been reached by group dialling This list is always printed out when group dialling has been completed TRANSMISSION REPORT TIME 02 05 98 15 49 TEL NUMBER 44 1932 158156 NAME TOSHIBA NBR DATE TIME DURATION PGS TO MODE STATUS 005 23 11 13 32 0...

Страница 55: ...tion OK means successful NG stands for communication error MODE Indicates the type of communication HS High Speed Transmission only possible between TOSHIBA machines EC Error correction mode G3 Communication in standard groups operational mode P Documents were sent received by polling M Indicates a memory communication TO or FROM Gives ID or telephone number of the receiver or sender see error cod...

Страница 56: ...he menu Press until this menu item appears Confirm with YES Skip menu item Confirm with YES The report is printed JOURNAL TELEPHONE NBRS LIST TELEPHONE NUMBERS LIST TIME 02 05 98 15 49 TEL NUMBER 44 1932 158150 NAME TOSHIBA ONE TOUCH KEY INFORMATION OT NBR NAME TEL NUMBER 01 ADAM 0158170 02 AGENCY 02114373110 03 SALES 0003345503330 ABBREVIATED TEL NUMBER INFORMATION ABB NBR NAME TEL NUMBER 01 BAFI...

Страница 57: ...page 9 EXCHANGER PSTN defined connection type see page 10 MONITOR LEVEL DIGIT 0 obtaining outside line see page 11 PRINTER SETTINGS RX REDUCTION OFF Reduce page see page 19 DISCARD ON Discard see page 19 COMMUNICATION SETTING REMOTE RX OFF Fax can be activated by 5 see page 15 CALL TIME 5 Number of rings see page 21 PRIVILEGED RX OFF Receiving protection status see page 17 TTI INSIDE Transmission ...

Страница 58: ...ISTS 1 x 3 x PRINTING 15 03 FAX 00 RESERVATION LIST RESERVATION LIST TIME 02 05 98 15 49 TEL NUMBER 44 1932 158156 NAME TOSHIBA TELEFAX 1 DOCUMENT TRANSMISSION OT NUMBER ABB NUMBER TEL NUMBER TIME OF TRANS 2 MEMORY TRANSMISSION OT NUMBER ABB NUMBER TEL NUMBER TIME OF TRANS NUMBER OF PAGES 3 POLLING OT NUMBER ABB NUMBER TEL NUMBER TIME OF TRANS YES YES NO NO standby mode Start the menu Press until ...

Страница 59: ...eader Accordingly the transmission header is first printed before the copy is printed The effect is that the length of the incoming copy is extended by approx 5 mm In Germany the code must be specified standby mode Start the menu Press until this menu item appears Confirm with YES Press NO until this menu item appears Confirm with YES Press NO until this menu item appears Confirm with YES Specify ...

Страница 60: ...form of a selection menu and the relevant job can thus be deleted accordingly standby mode Press Stop first job is displayed Example polling reservation Confirm with YES or skip with NO The selected job is deleted 15 03 FAX 00 DOCUMENT FEEDER Change screening volume Use the key to regulate the playback volume for loudspeaker dialling see page 41 Press the corresponding key several times to change ...

Страница 61: ...rt e g in order to save paper by specifying that it is only printed out if transmission is defective Set group TX report standby mode Start the menu Press until this menu item appears Confirm with YES Press NO until this menu item appears Confirm with YES Skip menu item Confirm with YES Specify the current setting Press NO ALWAUS ON ERROR OFF until the desired menu item appears here Transmission r...

Страница 62: ...cility so that it can only be activated at your request 3 x INSTALLATION 6 x LIST SETTING SET AUTO JOURNAL OFF SET RECEIVE MODE 15 03 FAX 00 NO YES YES YES YES YES NO NO standby mode Start the menu Press until this menu item appears Confirm with YES Press NO until this menu item appears Confirm with YES Confirm with YES Depending on the particular setting the machine now prompts whether to change ...

Страница 63: ... signal If this response does not take place your operator call has been rejected If the operator call is rejected your fax machine returns to the normal standby mode after approx 15 seconds If the operator call signal is generated press the speakerphone key or lift the handset of the external telephone in order to speak with your fax partner Transmission running Press the CALL key press the key a...

Страница 64: ...ing stored are automatically ejected Connection to your partner s fax machine as impossible or the connection was poor The printer system stops When the thermal print head TPH overheats your machine is temporarily switched off The required number was busy during all dialling attempts or the fax partner was not available Your machine reports a power failure The cover is open and solutions Feed in d...

Страница 65: ...ce down on your document feeder Make a copy of your document on your fax machine see page 20 If your copy is also difficult to read clean the document reader Make a copy on your fax machine see page 20 and adjust the settings to your document You can also improve document quality By making the print on the photocopy darker enlarging or reducing see page 29 Then send again Redial You may get a bett...

Страница 66: ...ms Your fax machine reports an operating error or fails to perform the required function Before you make an unnecessary call on your service technician take your time and see if you can help yourself This checklist will help you recognise and eliminate errors possible causes Your have an error displayed The fax machine is not correctly connected The display is blank There is still a document in th...

Страница 67: ...py and transmitt this instead Close the control panel Take care that the cover locks firmly into place Now by pressing STOP delete the error message Pull out the paper tray Remove any paper in the tray How to clear a recording paper jam After opening Keep the power ON Unlock the printer unit Lift out the film holder Remove any jammed paper Do not damage the print head Replace the film holder and c...

Страница 68: ...ndby mode Start the menu Press Confirm with YES Press No Confirm with YES Reject Confirm with YES REMOTE REMOTE 15 03 FAX 00 OPE PANEL TEST 15 03 FAX 00 6 x TEST OPE PANEL TEST 2 x NO NO NO NO NO YES YES YES YES YES YES Remote maintenance COMLINE Your fax machine permits remote diagnosis This means that the internal settings can be read and changed via a telephone line In order to ensure that data...

Страница 69: ...hen reset to their factory settings The stored numbers are not not not not not deleted 15 03 FAX 00 Connection to PABXs You should consider the following points if your fax machine is connected to a PABX Is the extension authorised to dial an outside line Does the extension have DDI authorisation Has the facility for obtaining an outside line been correctly programmed code earth flash Is an outsid...

Страница 70: ...eing present Any other usage will invalidate the approval of the apparatus if as a result it then ceases to conform to the standards against which approval was granted EPA ENERGY STAR Addendum to the TF471 Operator s Manual The United States Environmental Protection Agency EPA has introduced a voluntary program the ENERGY STAR Program to encourage the widespread and voluntary use of energy efficie...

Страница 71: ...e 10 Memo 47 Memory reception 20 Memory 20 31 33 Message display 52 Messages 44 Mute 41 Name 8 Number list 56 Number of calls 21 Obtaining a public line 10 Operator call 63 PABX 10 69 Paper jam 67 Paper size 22 Password 33 PC connection 63 Play back messages 45 Polling protection 33 Polling 18 Pulse dialling 9 Receive protection 17 Receiving mode 14 Receiving problems 66 Reception reduction 19 Rec...

Отзывы: