


Chapter 4
4-11
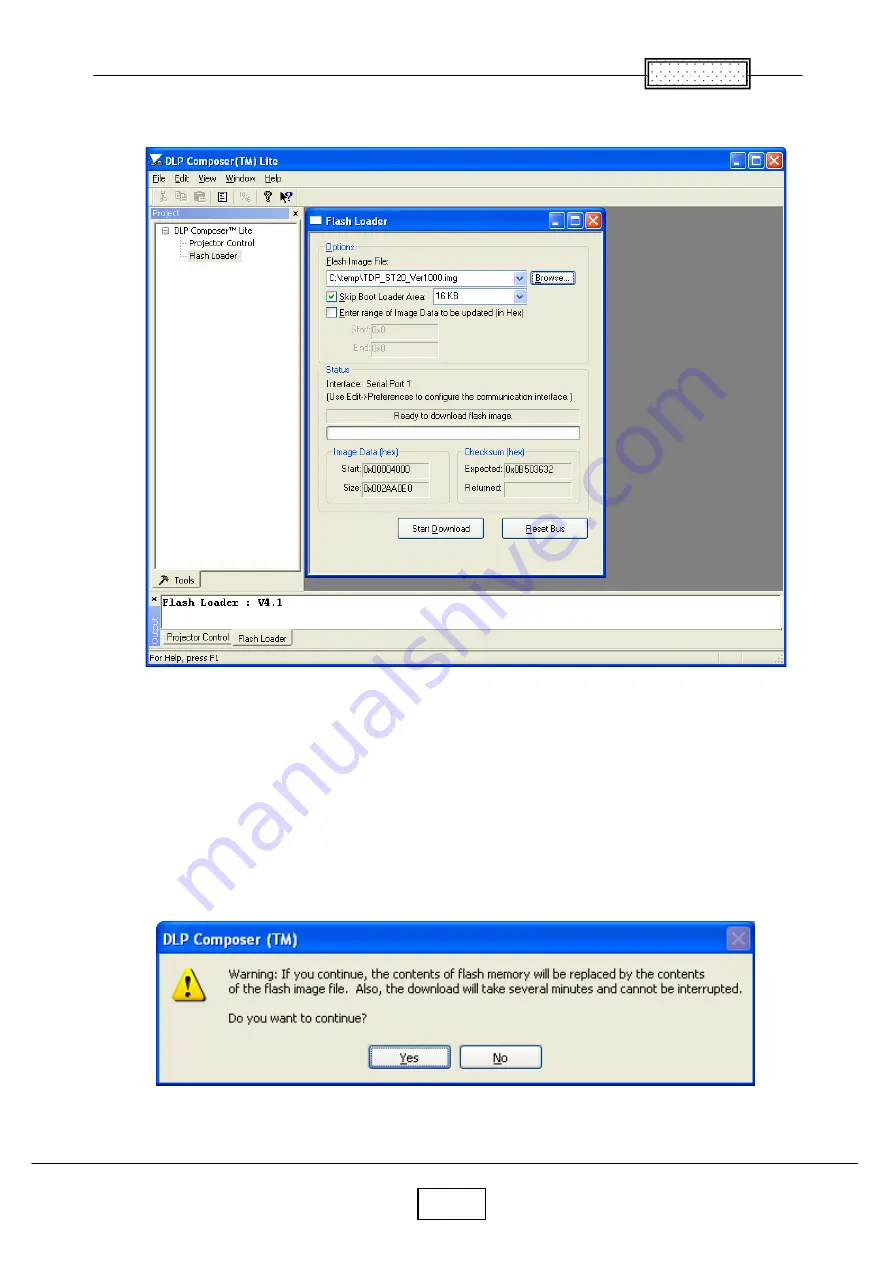
Click Browse button to select the firmware (*. img file)
Press and hold the projector’s
[Service] two
keys. (TDP-ST20)
Press and hold the projector’s
[Keystone]
and
[Auto set]
keys. (TDP-EX20/EW25)
Then plug in the power cord and turn on power switch.
When the projector enters the firmware upgrade mode,
[LAMP]
,
[ON/Standby]
and
[TEMP]
LED blinks RED in order.
Click Start Download button.
Click Yes button.
Содержание TDP-ST20B
Страница 4: ...1 1 Chapter 1 Specifications Chapter 1 ...
Страница 5: ...1 2 Specifications Continued Chapter 1 ...
Страница 6: ...Chapter 1 1 3 Using the Menus ...
Страница 7: ...Chapter 1 1 4 Names of the Terminals on the Rear Panel ...
Страница 8: ...Chapter 1 1 5 Names of each part on the main unit ...
Страница 9: ...1 6 Chapter 1 Names of each part on the control panel and remote control ...
Страница 10: ...1 7 Chapter 1 List of Supported Signals ...
Страница 11: ...Chapter 1 1 8 ...
Страница 29: ...Chapter 4 4 3 Click the next button Click the next button ...
Страница 30: ...Chapter 4 4 4 Click the finish button Click the Yes button to reboot ...
Страница 41: ...5 1 Chapter 5 Wiring Diagram Chapter 5 ...
Страница 42: ...Chapter 5 5 2 BLOCK DIAGRAM 1 2 Block Diagram ...
Страница 43: ...5 3 Chapter 5 Block Diagram 2 2 ...
Страница 55: ...Chapter 6 6 12 ...
Страница 56: ...Chapter 6 6 13 ...
Страница 69: ...9 1 Chapter 9 Spare Parts List Exploded View Chapter 9 ...
Страница 70: ...9 2 Chapter㧥 Exploded View E500 Optical Block ...
Страница 74: ...TOSHIBA CORPORATION 1 1 SHIBAURA 1 CHOME MINATO KU TOKYO 105 8001 JAPAN ...


